
If you've been playing around with Node-RED, you've probably noticed there's a lot of nodes in that palette. And if you're anything like me when I started, you felt pretty overwhelmed the moment you got dropped onto that scary blank canvas.
So I made a three-part series breaking down every single core Node-RED node: what it does, when you'd use it, and for the trickier ones, exactly how they work. This is the companion article.
The two are meant to go together rather than replace each other. The videos teach you everything you actually need — watch those and you'll be fine. This covers the same ground in writing so you can skim it, search it and copy the bits you need, and it goes a bit deeper where a paragraph does a better job than a piece to camera: the exact shape of a message, the mistakes that are easy to make, and the importable JSON for every demo.
Every demo in here is a real flow that ran on a real Node-RED instance, every screenshot is that flow actually running, and every block of JSON is the actual export. Every export is valid and importable. Most are self-contained; the network and storage ones clearly identify any broker, proxy, port, path or external service they depend on.
What "core node" means here
Node-RED 5 registers 50 built-in node types, but they aren't all the same kind of thing, so let's be precise about what this article covers:
- Palette nodes — the ones you drag onto the canvas. All 42 of them are covered below. That's the bulk of the article.
- Configuration nodes — they don't sit on the canvas or handle messages; they hold settings that other nodes share, and they live in the config sidebar. That's the MQTT broker, TLS, HTTP Proxy, the two WebSocket configs, and Global Config. All covered, but flagged as config nodes so you're not left hunting for them in the palette.
- Registered but not in the palette — Junction and
unknown. Junction gets a section anyway because you'll want it.unknownis an internal placeholder Node-RED substitutes when a flow references a node type you haven't installed; there's nothing to teach about it, so that's the one type deliberately out of scope.
Tested with
| Node-RED | 5.0.4 |
| Node.js | 24.18.1 |
| Install | Clean nodered/node-red:5.0.4 container, no extra palette nodes |
| Checked | 8 August 2026 |
Every JSON export below was imported and deployed on that clean install, and every self-contained flow was actually run. Node-RED is pretty stable about this stuff, but that's a snapshot of one version rather than a promise about every future release. If you're on something much older or newer and a node looks different, check the built-in help in the editor sidebar — it ships with your install, so it matches the version you're actually running.
The MQTT and proxy examples need external services, so those were exercised against throwaway local containers, never anything real.
How to use the flow exports
Each demo comes with a JSON export. To use one:
- Copy the JSON.
- In Node-RED, open the hamburger menu (top right) → Import.
- Paste it in and hit Import.
- Hit Deploy.
Every export includes its own tab, so it lands in a new flow tab rather than dumping nodes on top of whatever you're working on.
Assume an export is self-contained unless it says otherwise. Most of them are: import, deploy, hit the inject, done. Where one needs something I can't ship you inside a JSON file, there's a callout directly above it naming the specific thing — a broker, a proxy, an external service, a free port, or a path worth checking — so you're never left wondering why nothing happened.
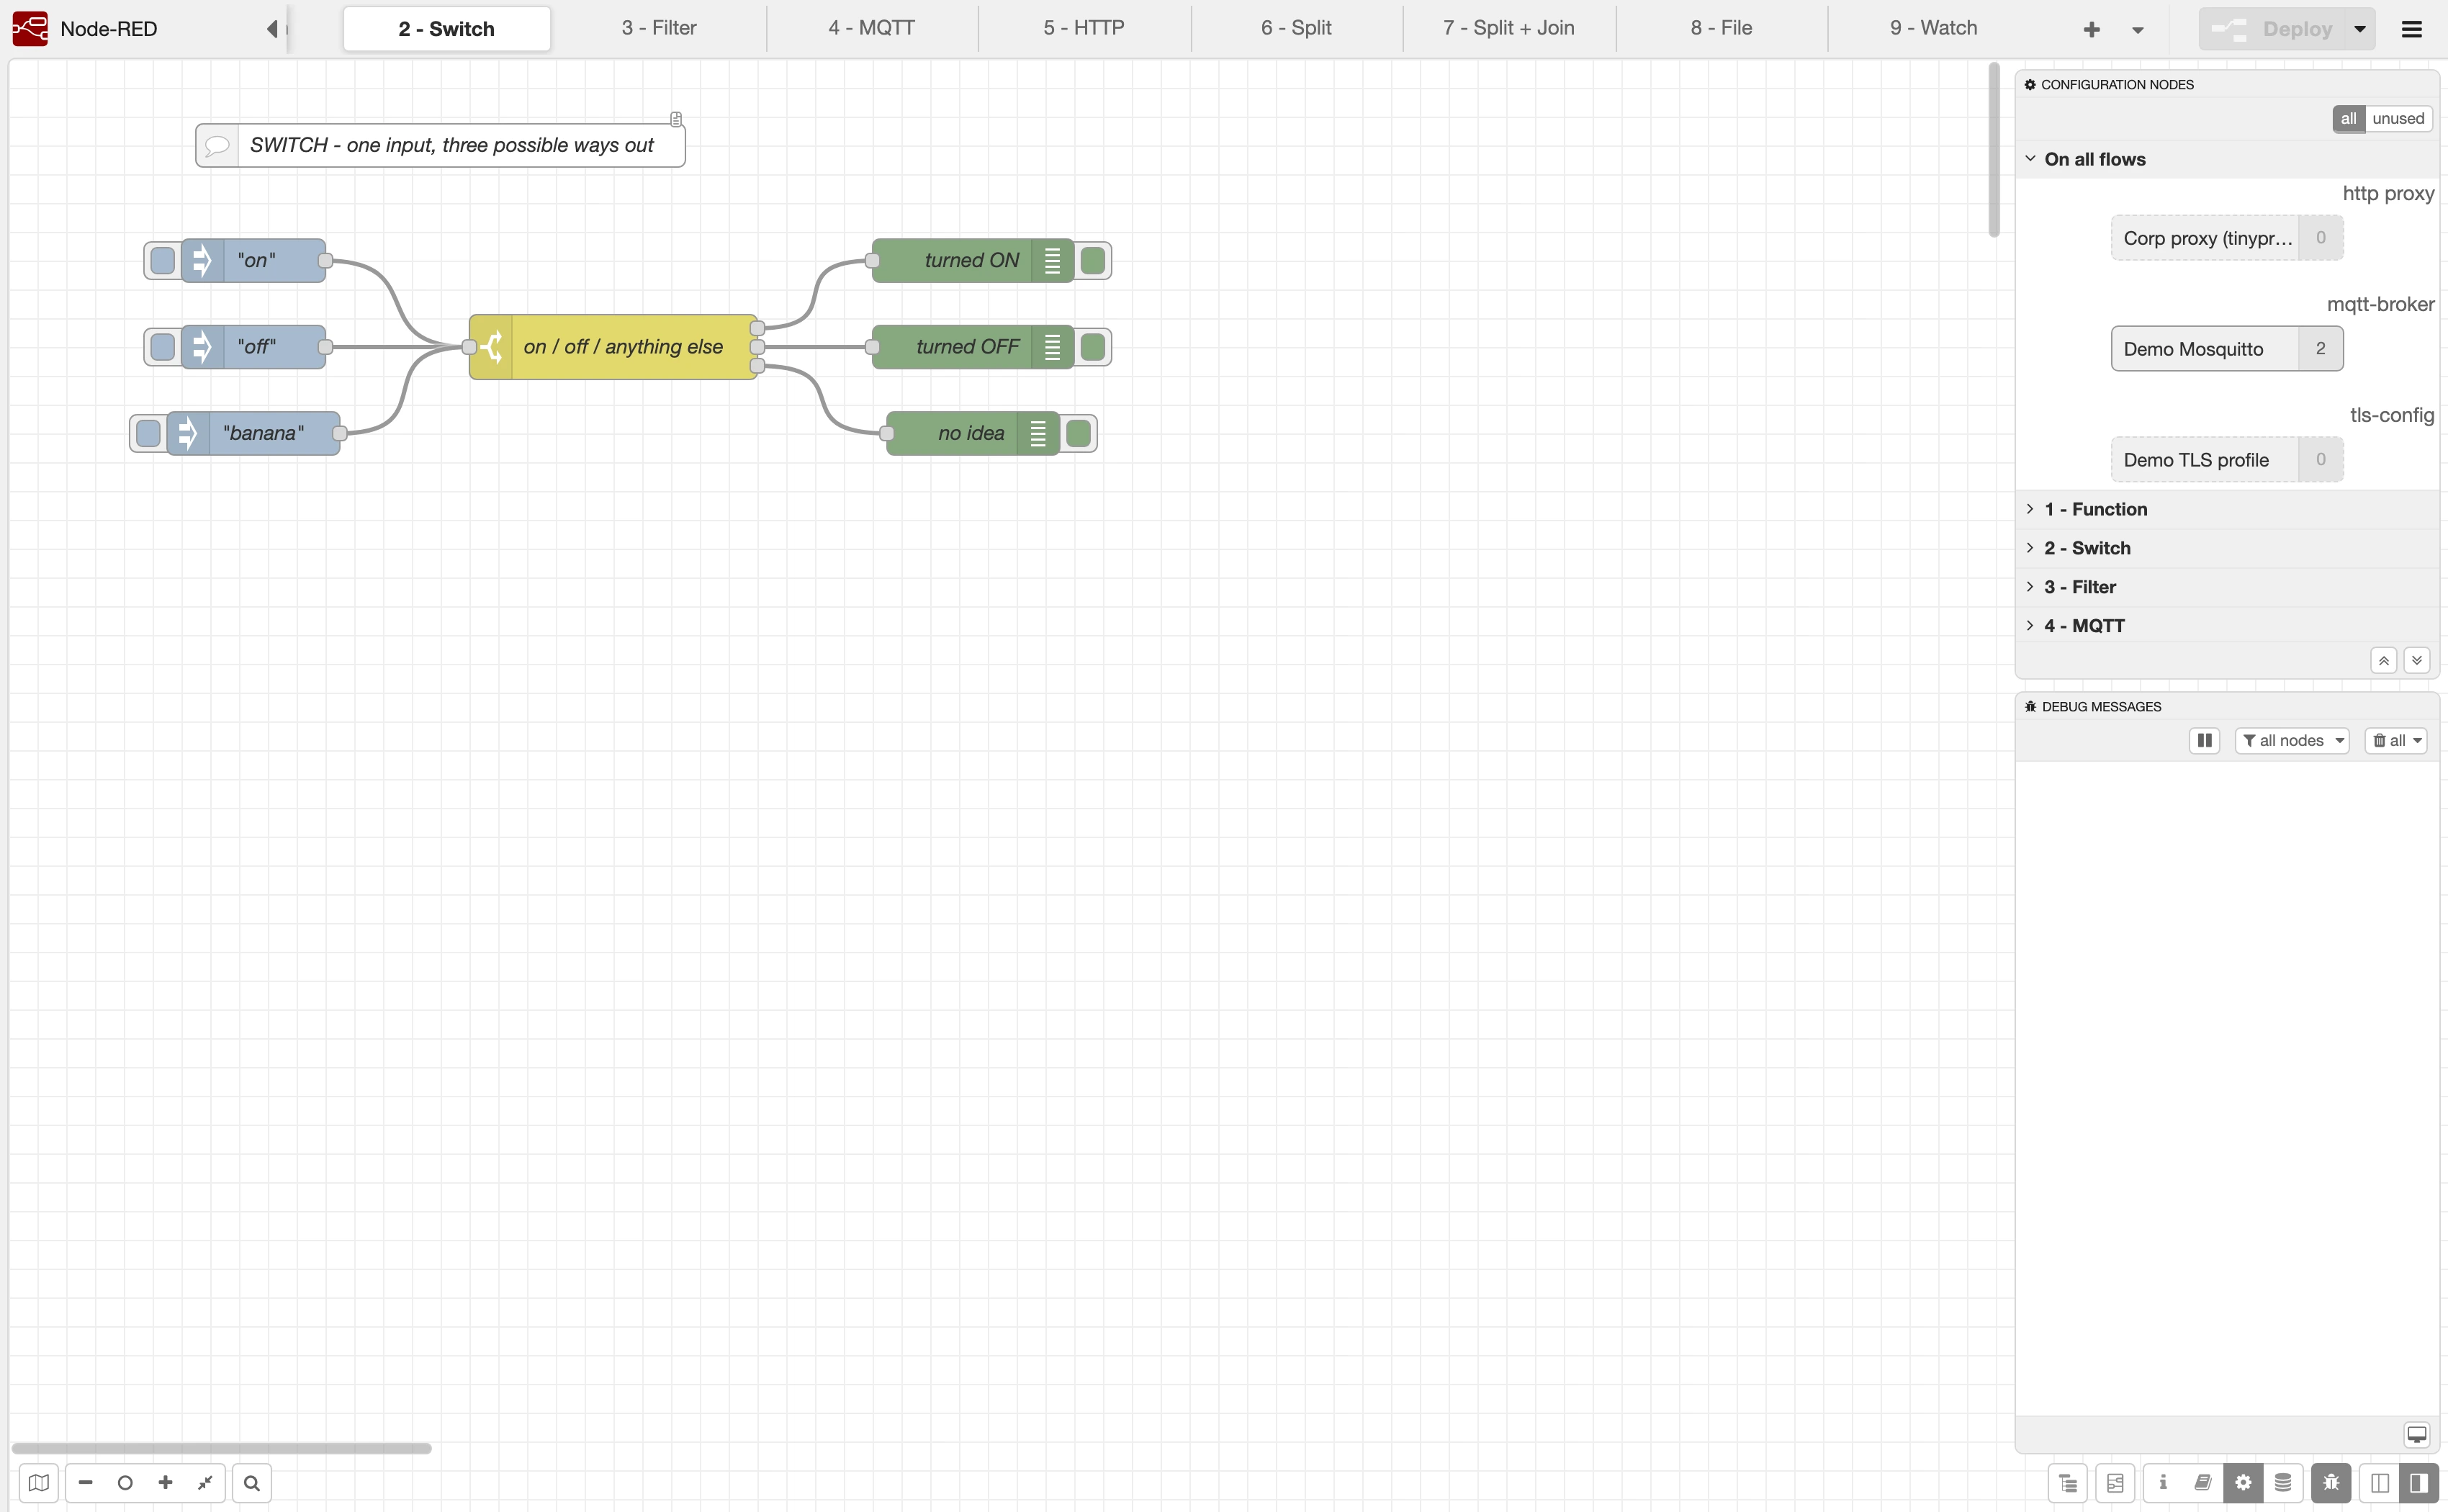
Notice the Configuration nodes panel on the right of that screenshot, listing the HTTP proxy, MQTT broker and TLS profile. That's where the config nodes live — not on the canvas. Worth knowing now, because it's the first place people get lost.
Import every flow export in this article and you'll end up with 38 tabs: the nine numbered showcase flows, 1 - Function through 9 - Watch, plus 29 smaller single-node examples. Most nodes below have their own little export, so you can grab just the one you care about instead of importing the lot.
Part 1: Common and Function nodes
These are the everyday essentials, the nodes you'll use in basically every flow you ever build.
Common nodes
Further reading: Handling errors in the Node-RED docs, which goes deeper on the Catch and Status nodes than I do here.
Inject
Your start button. The Inject node fires a flow either when you click its button manually, or (and a lot of people don't realise it can do this) on a schedule. Every second, every 20 minutes, only on a Tuesday at 8am, whatever you need.
You also choose what it sends: a timestamp, a string, a number, a JSON object. I use these constantly for testing, but they're equally good for real scheduled work like "every morning at 8am, check the weather and notify me".
Import this flow to get both kinds of trigger: a button you click, and one set to fire at 8am every day.
Self-contained. Note the second inject is on a schedule: leave it deployed and it'll fire at 8am every day. Disable or delete it if you don't want that.
JSON (84 lines)
[
  {
    "id": "n_inject",
    "type": "tab",
    "label": "Inject",
    "disabled": false,
    "info": "Manual button and a schedule."
  },
  {
    "id": "i_c",
    "type": "comment",
    "z": "n_inject",
    "name": "INJECT - fire by hand, or on a schedule",
    "x": 280,
    "y": 60,
    "wires": []
  },
  {
    "id": "i_manual",
    "type": "inject",
    "z": "n_inject",
    "name": "click me",
    "props": [
      {
        "p": "payload"
      },
      {
        "p": "topic",
        "vt": "str"
      }
    ],
    "repeat": "",
    "crontab": "",
    "once": false,
    "onceDelay": 0.1,
    "topic": "",
    "payload": "",
    "payloadType": "date",
    "x": 190,
    "y": 140,
    "wires": [["i_dbg"]]
  },
  {
    "id": "i_cron",
    "type": "inject",
    "z": "n_inject",
    "name": "every day at 8am",
    "props": [
      {
        "p": "payload"
      },
      {
        "p": "topic",
        "vt": "str"
      }
    ],
    "repeat": "",
    "crontab": "00 08 * * *",
    "once": false,
    "onceDelay": 0.1,
    "topic": "",
    "payload": "time to check the weather",
    "payloadType": "str",
    "x": 190,
    "y": 210,
    "wires": [["i_dbg"]]
  },
  {
    "id": "i_dbg",
    "type": "debug",
    "z": "n_inject",
    "name": "fired",
    "active": true,
    "tosidebar": true,
    "console": false,
    "tostatus": false,
    "complete": "payload",
    "targetType": "msg",
    "statusType": "auto",
    "x": 470,
    "y": 175,
    "wires": []
  }
]
Debug
Your best mate when a flow isn't behaving. If you come from a programming background, it's console.log.
By default it shows msg.payload in the debug sidebar, but that's only the default, not the limit. A Debug node can send its output to three different places, and you pick them in its config:
- The debug sidebar, which is the one you'll use.
- The runtime log, the same log Node-RED prints to its console or journal. Handy when you want a record that survives you closing the browser tab.
- The node's own status, a short line of text under the node on the canvas. It's truncated to about 32 characters, so it's for an at-a-glance "last value was 21", not for real inspection.
Two more things worth knowing:
- You can toggle Debug nodes on and off with the button on their right-hand side. Leave one wired into a flow you occasionally need to troubleshoot and just switch it on when you need it.
- Point it at the full message rather than just the payload. That's often the difference between five minutes and an hour of head-scratching, because the interesting thing is frequently in
msg.topic,msg.partsormsg.errorrather than the payload.
Common mistake: wondering why nothing appears in the sidebar when the node is set to log to the runtime instead. If a Debug node looks dead, open it and check where its output is actually going.
Import this flow to see the same message hitting two debug nodes, one showing only msg.payload and one showing the whole thing.
JSON (75 lines)
[
  {
    "id": "n_debug",
    "type": "tab",
    "label": "Debug",
    "disabled": false,
    "info": "Payload only vs the whole message."
  },
  {
    "id": "d_c",
    "type": "comment",
    "z": "n_debug",
    "name": "DEBUG - payload only, or the entire msg object",
    "x": 280,
    "y": 60,
    "wires": []
  },
  {
    "id": "d_in",
    "type": "inject",
    "z": "n_debug",
    "name": "a small object",
    "props": [
      {
        "p": "payload"
      },
      {
        "p": "topic",
        "vt": "str"
      }
    ],
    "repeat": "",
    "crontab": "",
    "once": false,
    "onceDelay": 0.1,
    "topic": "",
    "payload": "{\"room\":\"kitchen\",\"temp\":21.5}",
    "payloadType": "json",
    "x": 190,
    "y": 175,
    "wires": [["d_pay", "d_full"]]
  },
  {
    "id": "d_pay",
    "type": "debug",
    "z": "n_debug",
    "name": "just msg.payload",
    "active": true,
    "tosidebar": true,
    "console": false,
    "tostatus": false,
    "complete": "payload",
    "targetType": "msg",
    "statusType": "auto",
    "x": 470,
    "y": 140,
    "wires": []
  },
  {
    "id": "d_full",
    "type": "debug",
    "z": "n_debug",
    "name": "the whole message",
    "active": true,
    "tosidebar": true,
    "console": false,
    "tostatus": false,
    "complete": "true",
    "targetType": "full",
    "statusType": "auto",
    "x": 470,
    "y": 210,
    "wires": []
  }
]
Complete
A bit niche, but genuinely useful. It fires when another node finishes its work. Not every node supports it, but for the ones that do, like Function nodes and HTTP Request nodes, you get a signal that they're done. It's a callback, basically.
Handy when you've got a long-running process with no direct output and you want to do something once it wraps up.
Import this flow to get a Function node that returns nothing, and a Complete node that still fires once it has finished.
JSON (86 lines)
[
  {
    "id": "n_complete",
    "type": "tab",
    "label": "Complete",
    "disabled": false,
    "info": "Run something after a node finishes."
  },
  {
    "id": "c_c",
    "type": "comment",
    "z": "n_complete",
    "name": "COMPLETE - fires when the target node has finished",
    "x": 280,
    "y": 60,
    "wires": []
  },
  {
    "id": "c_in",
    "type": "inject",
    "z": "n_complete",
    "name": "start the work",
    "props": [
      {
        "p": "payload"
      },
      {
        "p": "topic",
        "vt": "str"
      }
    ],
    "repeat": "",
    "crontab": "",
    "once": false,
    "onceDelay": 0.1,
    "topic": "",
    "payload": "",
    "payloadType": "date",
    "x": 180,
    "y": 150,
    "wires": [["c_work"]]
  },
  {
    "id": "c_work",
    "type": "function",
    "z": "n_complete",
    "name": "do some work",
    "func": "node.warn(\"working...\");\n// no output wired, the Complete node picks it up\nreturn null;",
    "outputs": 1,
    "timeout": 0,
    "noerr": 0,
    "initialize": "",
    "finalize": "",
    "libs": [],
    "x": 390,
    "y": 150,
    "wires": [[]]
  },
  {
    "id": "c_done",
    "type": "complete",
    "z": "n_complete",
    "name": "after 'do some work'",
    "scope": ["c_work"],
    "uncaught": false,
    "x": 390,
    "y": 240,
    "wires": [["c_dbg"]]
  },
  {
    "id": "c_dbg",
    "type": "debug",
    "z": "n_complete",
    "name": "it finished",
    "active": true,
    "tosidebar": true,
    "console": false,
    "tostatus": false,
    "complete": "payload",
    "targetType": "msg",
    "statusType": "auto",
    "x": 640,
    "y": 240,
    "wires": []
  }
]
Catch
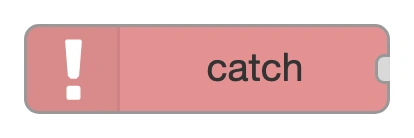
Error handling for your flows. When a node throws, the Catch node intercepts it and gives you a message with all the error details, so you can log it, alert yourself, or trigger a recovery.
It's a try/catch block. You can scope it to specific nodes or let it catch everything on the tab. I'd genuinely recommend having at least one Catch node in any flow you actually depend on. It turns silent failures into something you can see.
Import this flow to get a Function node that deliberately throws, and a Catch node that picks the error up instead of letting it vanish.
JSON (86 lines)
[
  {
    "id": "n_catch",
    "type": "tab",
    "label": "Catch",
    "disabled": false,
    "info": "Handle an error instead of failing silently."
  },
  {
    "id": "k_c",
    "type": "comment",
    "z": "n_catch",
    "name": "CATCH - intercepts errors thrown anywhere on this tab",
    "x": 280,
    "y": 60,
    "wires": []
  },
  {
    "id": "k_in",
    "type": "inject",
    "z": "n_catch",
    "name": "cause a problem",
    "props": [
      {
        "p": "payload"
      },
      {
        "p": "topic",
        "vt": "str"
      }
    ],
    "repeat": "",
    "crontab": "",
    "once": false,
    "onceDelay": 0.1,
    "topic": "",
    "payload": "",
    "payloadType": "date",
    "x": 180,
    "y": 150,
    "wires": [["k_boom"]]
  },
  {
    "id": "k_boom",
    "type": "function",
    "z": "n_catch",
    "name": "throw an error",
    "func": "node.error(\"The thing went wrong\", msg);\nreturn null;",
    "outputs": 1,
    "timeout": 0,
    "noerr": 0,
    "initialize": "",
    "finalize": "",
    "libs": [],
    "x": 390,
    "y": 150,
    "wires": [[]]
  },
  {
    "id": "k_catch",
    "type": "catch",
    "z": "n_catch",
    "name": "catch everything here",
    "scope": null,
    "uncaught": false,
    "x": 390,
    "y": 240,
    "wires": [["k_dbg"]]
  },
  {
    "id": "k_dbg",
    "type": "debug",
    "z": "n_catch",
    "name": "error details",
    "active": true,
    "tosidebar": true,
    "console": false,
    "tostatus": false,
    "complete": "true",
    "targetType": "full",
    "statusType": "auto",
    "x": 650,
    "y": 240,
    "wires": []
  }
]
Status
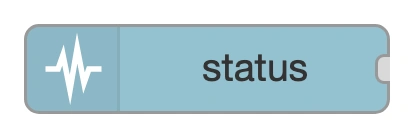
Monitors node status changes. Lots of nodes show a little status message underneath them: "connected", "reconnecting", that sort of thing. The Status node emits a message whenever that text changes.
So if your MQTT connection drops, a Status node can catch that and let your flow react. The status details come through on the message rather than in the payload: text, colour, shape, the lot.
Import this flow to get a node that sets its own status, and a Status node reporting every time it changes.
JSON (85 lines)
[
  {
    "id": "n_status",
    "type": "tab",
    "label": "Status",
    "disabled": false,
    "info": "React to a node changing its status."
  },
  {
    "id": "st_c",
    "type": "comment",
    "z": "n_status",
    "name": "STATUS - reports when the watched node changes status",
    "x": 280,
    "y": 60,
    "wires": []
  },
  {
    "id": "st_in",
    "type": "inject",
    "z": "n_status",
    "name": "set a status",
    "props": [
      {
        "p": "payload"
      },
      {
        "p": "topic",
        "vt": "str"
      }
    ],
    "repeat": "",
    "crontab": "",
    "once": false,
    "onceDelay": 0.1,
    "topic": "",
    "payload": "",
    "payloadType": "date",
    "x": 180,
    "y": 150,
    "wires": [["st_fn"]]
  },
  {
    "id": "st_fn",
    "type": "function",
    "z": "n_status",
    "name": "sets its own status",
    "func": "node.status({ fill: \"green\", shape: \"dot\", text: \"just ran\" });\nreturn null;",
    "outputs": 1,
    "timeout": 0,
    "noerr": 0,
    "initialize": "",
    "finalize": "",
    "libs": [],
    "x": 400,
    "y": 150,
    "wires": [[]]
  },
  {
    "id": "st_status",
    "type": "status",
    "z": "n_status",
    "name": "watching that node",
    "scope": ["st_fn"],
    "x": 400,
    "y": 240,
    "wires": [["st_dbg"]]
  },
  {
    "id": "st_dbg",
    "type": "debug",
    "z": "n_status",
    "name": "status changed",
    "active": true,
    "tosidebar": true,
    "console": false,
    "tostatus": false,
    "complete": "true",
    "targetType": "full",
    "statusType": "auto",
    "x": 650,
    "y": 240,
    "wires": []
  }
]
Link In / Link Out / Link Call
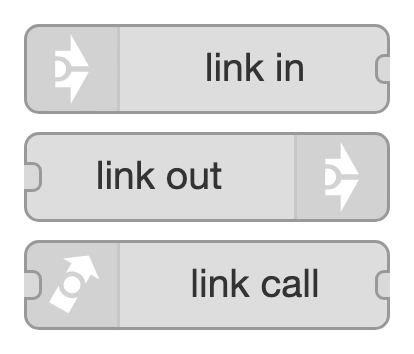
Brilliant for keeping your canvas readable. Link nodes connect different parts of a flow, or different tabs entirely, without wires sprawling everywhere.
Link Out sends, Link In receives. They're invisible jumpers. Select one and you'll see where it connects; the rest of the time it just keeps things tidy.
Link Call is the fancy one: it calls a flow like a subroutine and gets a result back. Which means you can build a bit of reusable logic once and call it from anywhere.
Import this flow to get a working Link Call. Send it 21, and the linked flow doubles it and hands 42 back.
JSON (108 lines)
[
  {
    "id": "n_link",
    "type": "tab",
    "label": "Link",
    "disabled": false,
    "info": "Jumps between flows, and a callable subroutine."
  },
  {
    "id": "l_c",
    "type": "comment",
    "z": "n_link",
    "name": "LINK CALL - call a bit of flow like a function and get a result back",
    "x": 280,
    "y": 60,
    "wires": []
  },
  {
    "id": "l_in",
    "type": "inject",
    "z": "n_link",
    "name": "21",
    "props": [
      {
        "p": "payload"
      },
      {
        "p": "topic",
        "vt": "str"
      }
    ],
    "repeat": "",
    "crontab": "",
    "once": false,
    "onceDelay": 0.1,
    "topic": "",
    "payload": "21",
    "payloadType": "num",
    "x": 170,
    "y": 150,
    "wires": [["l_call"]]
  },
  {
    "id": "l_call",
    "type": "link call",
    "z": "n_link",
    "name": "call 'double it'",
    "links": ["l_linkin"],
    "linkType": "static",
    "timeout": "30",
    "x": 370,
    "y": 150,
    "wires": [["l_dbg"]]
  },
  {
    "id": "l_dbg",
    "type": "debug",
    "z": "n_link",
    "name": "result comes back",
    "active": true,
    "tosidebar": true,
    "console": false,
    "tostatus": false,
    "complete": "payload",
    "targetType": "msg",
    "statusType": "auto",
    "x": 600,
    "y": 150,
    "wires": []
  },
  {
    "id": "l_linkin",
    "type": "link in",
    "z": "n_link",
    "name": "double it",
    "links": [],
    "x": 195,
    "y": 260,
    "wires": [["l_fn"]]
  },
  {
    "id": "l_fn",
    "type": "function",
    "z": "n_link",
    "name": "x2",
    "func": "msg.payload = msg.payload * 2;\nreturn msg;",
    "outputs": 1,
    "timeout": 0,
    "noerr": 0,
    "initialize": "",
    "finalize": "",
    "libs": [],
    "x": 390,
    "y": 260,
    "wires": [["l_out"]]
  },
  {
    "id": "l_out",
    "type": "link out",
    "z": "n_link",
    "name": "return",
    "mode": "return",
    "links": [],
    "x": 575,
    "y": 260,
    "wires": []
  }
]
Comment
Dead simple: it's a label. No effect on the flow at all, purely documentation. It supports Markdown, so you can make it readable.
Every demo flow in this article has one, and there's a reason for that. Good comments are the difference between understanding a flow instantly and reverse-engineering your own work six months later.
Import this flow to get a perfectly ordinary two-node flow where the comment nodes do all the explaining.
JSON (68 lines)
[
  {
    "id": "n_comment",
    "type": "tab",
    "label": "Comment",
    "disabled": false,
    "info": "Documentation that does nothing at runtime."
  },
  {
    "id": "cm_c",
    "type": "comment",
    "z": "n_comment",
    "name": "COMMENT - labels for humans, ignored by the runtime",
    "x": 280,
    "y": 60,
    "wires": []
  },
  {
    "id": "cm_in",
    "type": "inject",
    "z": "n_comment",
    "name": "a very ordinary flow",
    "props": [
      {
        "p": "payload"
      },
      {
        "p": "topic",
        "vt": "str"
      }
    ],
    "repeat": "",
    "crontab": "",
    "once": false,
    "onceDelay": 0.1,
    "topic": "",
    "payload": "hello",
    "payloadType": "str",
    "x": 190,
    "y": 160,
    "wires": [["cm_dbg"]]
  },
  {
    "id": "cm_dbg",
    "type": "debug",
    "z": "n_comment",
    "name": "output",
    "active": true,
    "tosidebar": true,
    "console": false,
    "tostatus": false,
    "complete": "payload",
    "targetType": "msg",
    "statusType": "auto",
    "x": 450,
    "y": 160,
    "wires": []
  },
  {
    "id": "cm_note",
    "type": "comment",
    "z": "n_comment",
    "name": "^ the comment nodes are the only documentation here",
    "x": 320,
    "y": 230,
    "wires": []
  }
]
Junction
The one you won't find in the palette. Junction is a proper core node, registered like all the others, but its editor file is deliberately empty so it doesn't clutter the palette. You add one by double-clicking a blank bit of canvas and picking Junction, or by right-clicking a wire and choosing "split with junction".
It does nothing to your messages at all. It's a corner pin: a point wires can route through so they bend neatly instead of cutting diagonally across your flow, and a place to fan one output out to several destinations from a single tidy anchor.
Purely cosmetic, and worth ten minutes of your life on any flow you'll have to look at again. If you've ever had six wires crossing in the middle of a tab, this is the fix.
Import this flow to get two inputs routed through one junction into a single debug node.
JSON (85 lines)
[
  {
    "id": "n_junction",
    "type": "tab",
    "label": "Junction",
    "disabled": false,
    "info": "A routing pin for tidy wires."
  },
  {
    "id": "jn_c",
    "type": "comment",
    "z": "n_junction",
    "name": "JUNCTION - tidies wiring, changes nothing about the message",
    "info": "Junction is not in the palette. To add one yourself, double-click empty canvas and choose Junction, or right-click a wire and pick 'split with junction'.\n\nBoth inject nodes route through the single junction into one debug node. Remove it and you would need two wires crossing the canvas instead.",
    "x": 300,
    "y": 60,
    "wires": []
  },
  {
    "id": "jn_a",
    "type": "inject",
    "z": "n_junction",
    "name": "first input",
    "props": [
      {
        "p": "payload"
      }
    ],
    "repeat": "",
    "crontab": "",
    "once": false,
    "onceDelay": 0.1,
    "topic": "",
    "payload": "from the first inject",
    "payloadType": "str",
    "x": 190,
    "y": 150,
    "wires": [["jn_j"]]
  },
  {
    "id": "jn_b",
    "type": "inject",
    "z": "n_junction",
    "name": "second input",
    "props": [
      {
        "p": "payload"
      }
    ],
    "repeat": "",
    "crontab": "",
    "once": false,
    "onceDelay": 0.1,
    "topic": "",
    "payload": "from the second inject",
    "payloadType": "str",
    "x": 190,
    "y": 230,
    "wires": [["jn_j"]]
  },
  {
    "id": "jn_j",
    "type": "junction",
    "z": "n_junction",
    "x": 400,
    "y": 190,
    "wires": [["jn_dbg"]]
  },
  {
    "id": "jn_dbg",
    "type": "debug",
    "z": "n_junction",
    "name": "both arrive here",
    "active": true,
    "tosidebar": true,
    "console": false,
    "tostatus": false,
    "complete": "payload",
    "targetType": "msg",
    "statusType": "auto",
    "x": 590,
    "y": 190,
    "wires": []
  }
]
Global Config
The last of the Common nodes, and another configuration node rather than something you place on the canvas. You'll never drag this one in: Node-RED creates and manages it for you.
It's the thing behind Global Environment Variables in the editor's settings. Variables you define there are readable from anywhere in your flows — env.get("MY_SETTING") inside a Function node, or the env type in a Change node, a file path, an MQTT topic, and so on.
It's the right place for anything you'd otherwise paste into fifteen different nodes: a base URL, a device ID, a broker address. Change it once and every flow follows.
One important catch, because flow exports get pasted into forum posts constantly. Putting a value in here does not automatically keep it out of your exports. An ordinary variable is stored as part of the flow, so its value travels with the JSON:
{ "name": "PLAIN_SETTING", "value": "https://api.example.com", "type": "str" }What protects a value is choosing the credential type for it. Credential values go into Node-RED's separate, encrypted credential store instead of the flow file, and the export keeps only the name:
{ "name": "MY_API_KEY", "type": "cred" }So use the credential type for anything that's actually a secret — passwords, tokens, API keys — and give any export a quick read before you share it. It takes ten seconds and it's how you avoid posting your API key to a forum.
No demo flow for this one, because there's nothing to wire up. It's under the hamburger menu → Settings → Global Environment Variables.
Function nodes
Further reading: Writing functions in the Node-RED docs.
Function
The big one. Write custom JavaScript and do basically anything: transform the message, run calculations, branch, loop, send to multiple outputs.
Here's the simplest possible version:
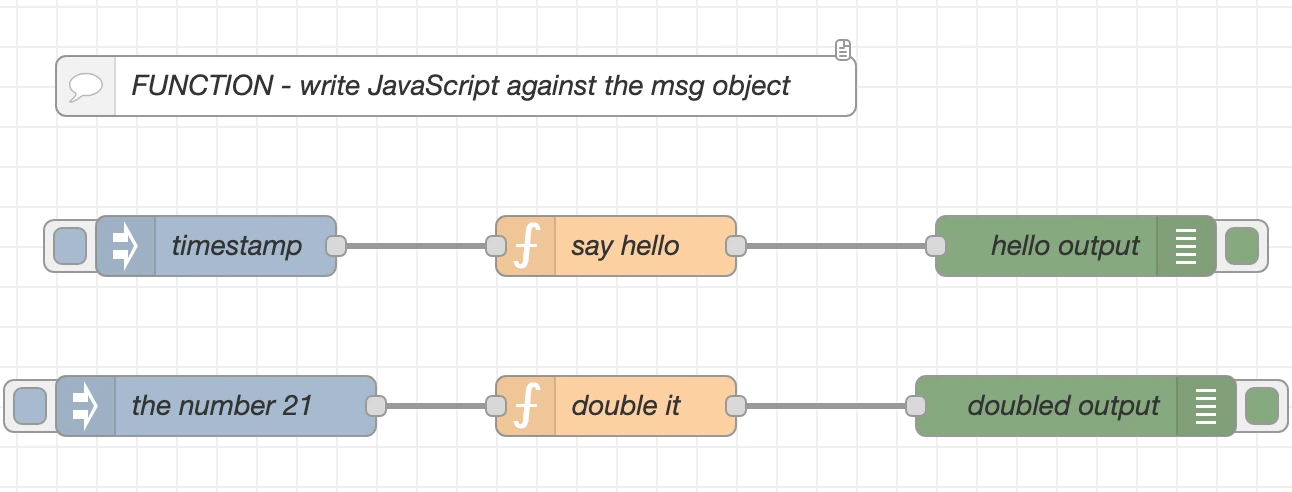
Two flows here. The first one throws away whatever came in and replaces it:
msg.payload = "Hello from the function node!";
return msg;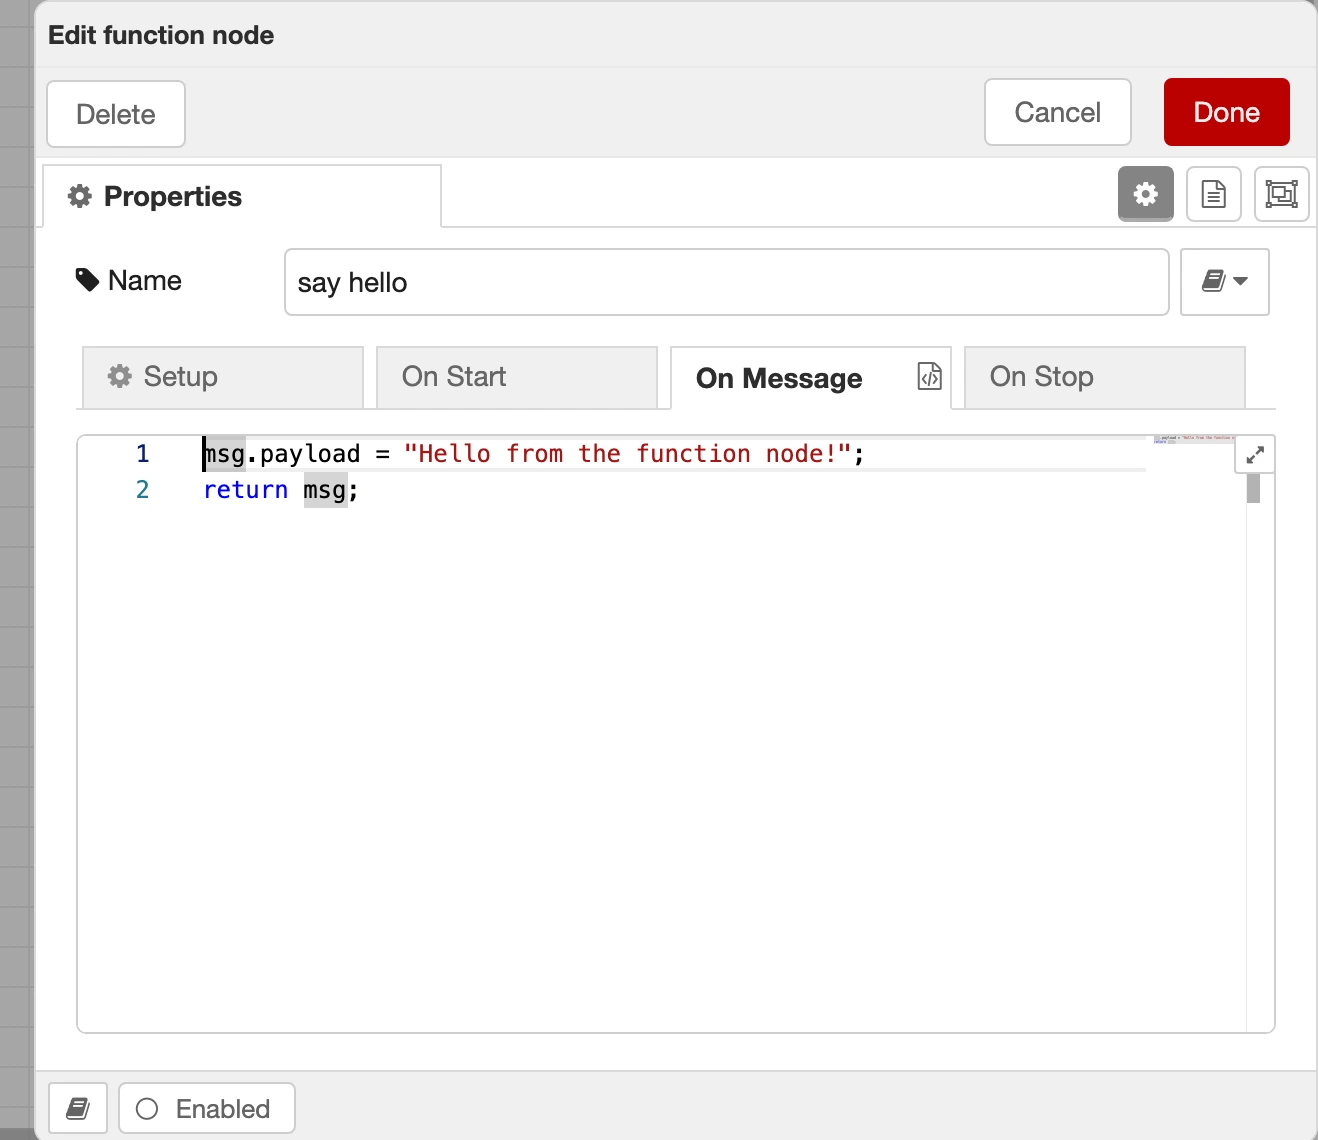
The second one does something with the input instead:
msg.payload = msg.payload * 2;
return msg;
The thing that catches everyone out: if you don't return anything, the message stops dead and nothing downstream fires. That's occasionally what you want, but usually it means you forgot.
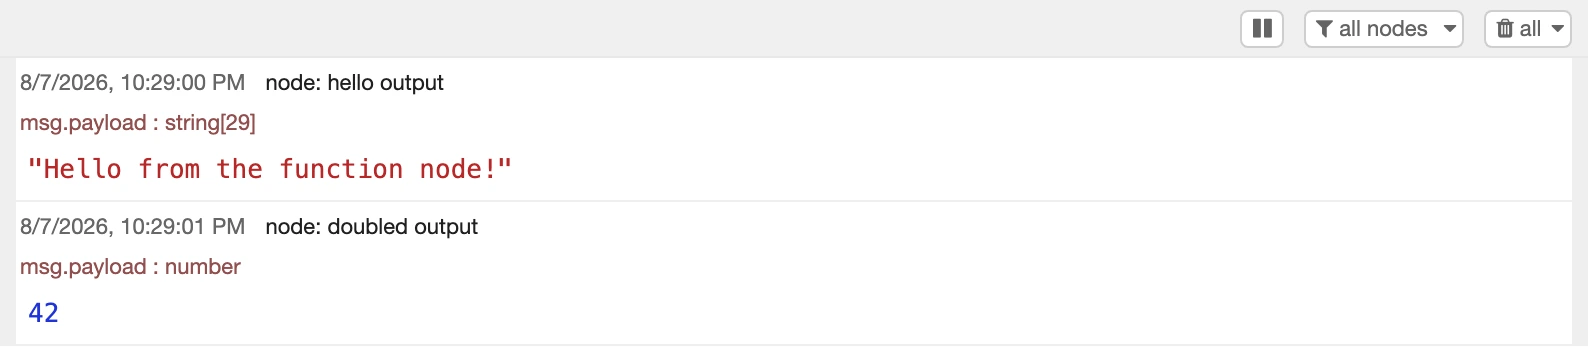
Trigger both and you get exactly what you'd expect: the fixed string, and 21 doubled to 42:
Returning more than one message
return msg; is the ordinary case: one message in, one message out, synchronously. It isn't the only option though, and it's worth knowing the others before you hit the first thing return msg can't do:
return msg;— send one message out of the first output.return null;— send nothing. Deliberately stopping a message here is a normal, useful thing to do.return [msg1, msg2];— one entry per output. Give the node two outputs in its settings and this sendsmsg1out of the first andmsg2out of the second. Usenullin a slot to send nothing out of that one.return [[msg1, msg2, msg3]];— a nested array sends several messages out of a single output, one after another.node.send(msg);— send without returning. This is the one you need for anything asynchronous, because by the time your callback orawaitresolves, the function has already returned.node.done();— tell the runtime this message is finished with. Call it after the lastnode.send()in asynchronous code. It's what makes the Complete node fire and what lets Node-RED track a message properly.
So an asynchronous function looks more like this, with no return of a message at all:
someSlowThing(msg.payload, (result) => {
  msg.payload = result;
  node.send(msg);
  node.done();
});
The full set of rules is in the writing functions guide, which is worth a read once you're past the basics.
Import this flow to get both Function examples: the one that replaces the payload and the one that doubles it, each with its own inject and debug node.
JSON (133 lines)
[
  {
    "id": "p1function",
    "type": "tab",
    "label": "1 - Function",
    "disabled": false,
    "info": "Custom JavaScript on a message."
  },
  {
    "id": "f_c",
    "type": "comment",
    "z": "p1function",
    "name": "FUNCTION - write JavaScript against the msg object",
    "info": "Two examples:\n\n1. Replace the payload with a fixed string.\n2. Take the number coming in and double it.\n\nBoth of these are the simple synchronous case, so they end with 'return msg'. Return nothing (or null) and the message stops here - nothing downstream fires. For anything asynchronous, use node.send(msg) and then node.done() instead of returning.",
    "x": 300,
    "y": 60,
    "wires": []
  },
  {
    "id": "f_in1",
    "type": "inject",
    "z": "p1function",
    "name": "timestamp",
    "props": [
      {
        "p": "payload"
      },
      {
        "p": "topic",
        "vt": "str"
      }
    ],
    "repeat": "",
    "crontab": "",
    "once": false,
    "onceDelay": 0.1,
    "topic": "",
    "payload": "",
    "payloadType": "date",
    "x": 180,
    "y": 140,
    "wires": [["f_fn1"]]
  },
  {
    "id": "f_fn1",
    "type": "function",
    "z": "p1function",
    "name": "say hello",
    "func": "msg.payload = \"Hello from the function node!\";\nreturn msg;",
    "outputs": 1,
    "timeout": 0,
    "noerr": 0,
    "initialize": "",
    "finalize": "",
    "libs": [],
    "x": 380,
    "y": 140,
    "wires": [["f_dbg1"]]
  },
  {
    "id": "f_dbg1",
    "type": "debug",
    "z": "p1function",
    "name": "hello output",
    "active": true,
    "tosidebar": true,
    "console": false,
    "tostatus": false,
    "complete": "payload",
    "targetType": "msg",
    "statusType": "auto",
    "x": 610,
    "y": 140,
    "wires": []
  },
  {
    "id": "f_in2",
    "type": "inject",
    "z": "p1function",
    "name": "the number 21",
    "props": [
      {
        "p": "payload"
      },
      {
        "p": "topic",
        "vt": "str"
      }
    ],
    "repeat": "",
    "crontab": "",
    "once": false,
    "onceDelay": 0.1,
    "topic": "",
    "payload": "21",
    "payloadType": "num",
    "x": 180,
    "y": 220,
    "wires": [["f_fn2"]]
  },
  {
    "id": "f_fn2",
    "type": "function",
    "z": "p1function",
    "name": "double it",
    "func": "msg.payload = msg.payload * 2;\nreturn msg;",
    "outputs": 1,
    "timeout": 0,
    "noerr": 0,
    "initialize": "",
    "finalize": "",
    "libs": [],
    "x": 380,
    "y": 220,
    "wires": [["f_dbg2"]]
  },
  {
    "id": "f_dbg2",
    "type": "debug",
    "z": "p1function",
    "name": "doubled output",
    "active": true,
    "tosidebar": true,
    "console": false,
    "tostatus": false,
    "complete": "payload",
    "targetType": "msg",
    "statusType": "auto",
    "x": 610,
    "y": 220,
    "wires": []
  }
]
A word of warning though: just because the Function node can do anything doesn't mean it should. If a built-in node does the job, use that instead. Function nodes are powerful, but a canvas full of them is a canvas nobody can read at a glance, including you.
Switch
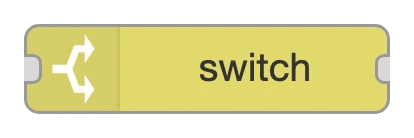
Your decision-maker. It routes messages to different outputs based on rules you define. It's an if/else, or a switch/case.
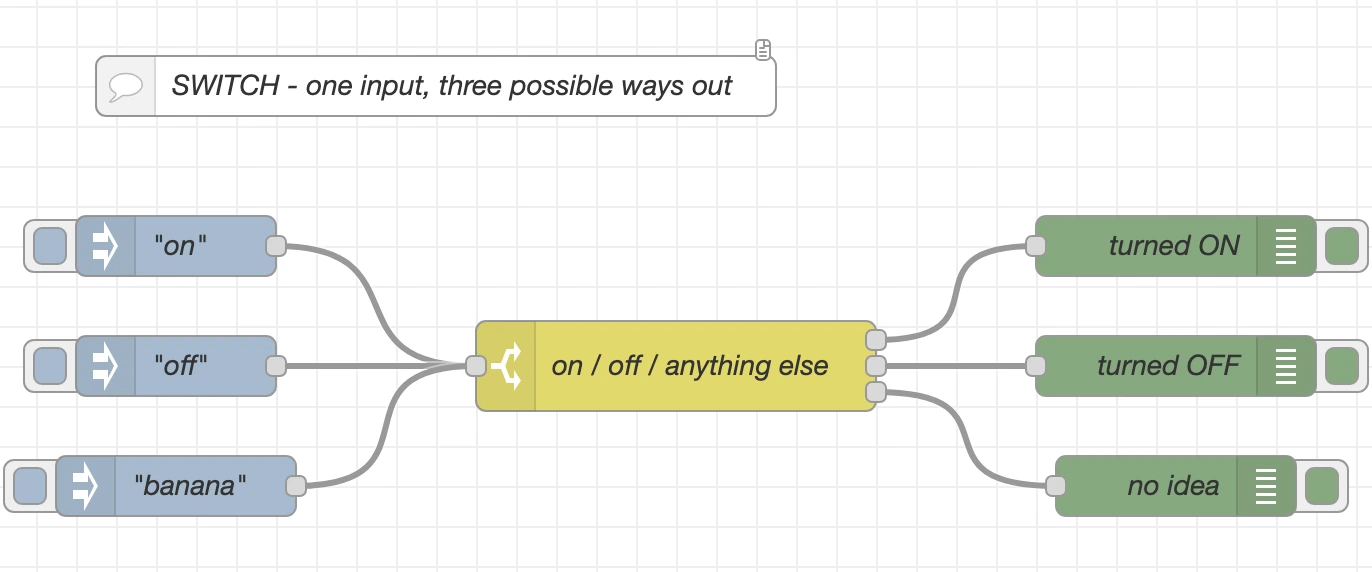
The config is where it all happens. Three rules: == "on" goes out of output 1, == "off" out of output 2, and otherwise catches everything else on output 3.
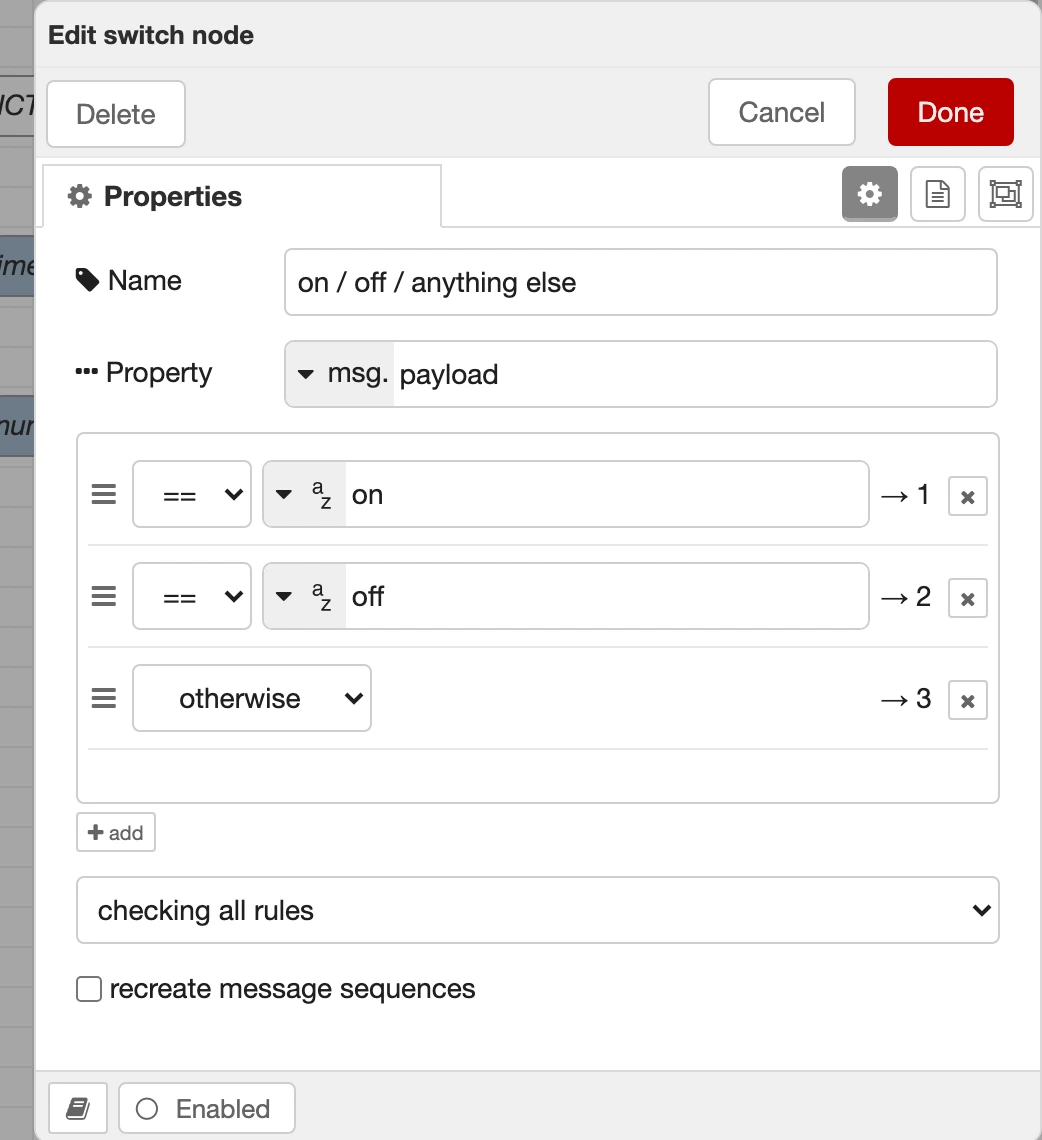
Rules are evaluated top to bottom. Note the checking all rules dropdown at the bottom. Leave it as is and a message can match several rules and go out of several outputs at once. Change it to "stopping after first match" if you want strictly one path.
Fire "on", "off" and "banana" through it and each one lands where it should:
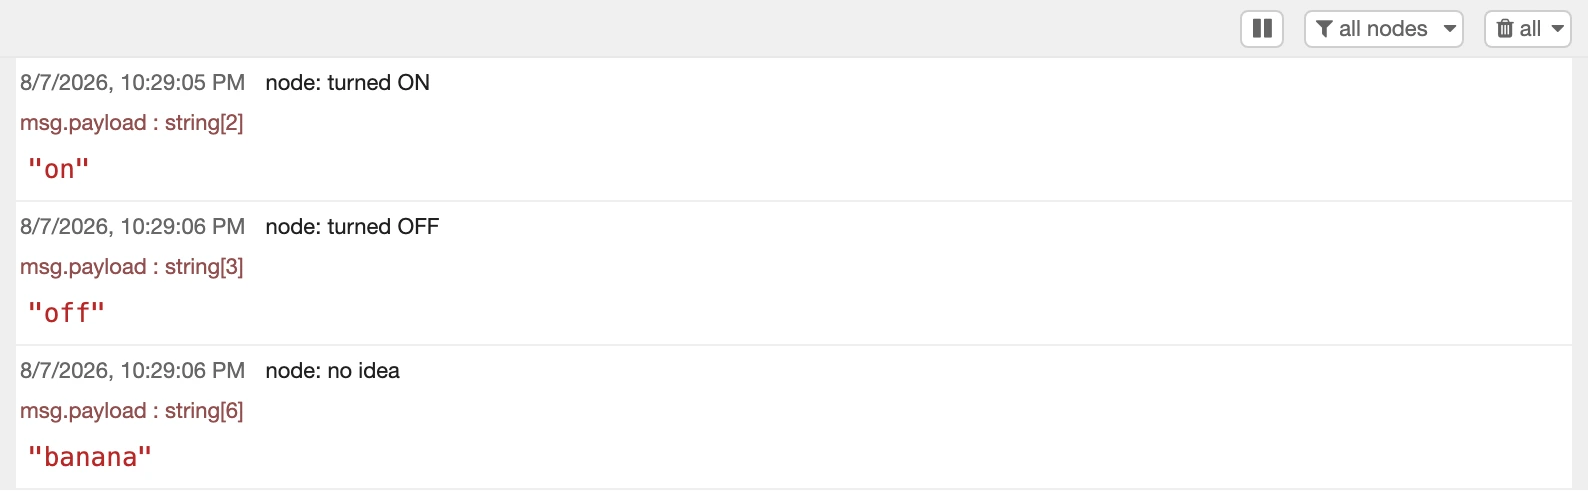
Import this flow to get the three-rule Switch, with inject nodes for on, off and banana and a separate debug node on each output.
JSON (171 lines)
[
  {
    "id": "p1switch",
    "type": "tab",
    "label": "2 - Switch",
    "disabled": false,
    "info": "Route messages down different wires."
  },
  {
    "id": "s_c",
    "type": "comment",
    "z": "p1switch",
    "name": "SWITCH - one input, three possible ways out",
    "info": "Rules are checked top to bottom:\n\n  1. payload == \"on\"   -> output 1\n  2. payload == \"off\"  -> output 2\n  3. otherwise         -> output 3\n\nSend \"on\", \"off\" and \"banana\" and watch which debug node lights up.",
    "x": 300,
    "y": 60,
    "wires": []
  },
  {
    "id": "s_on",
    "type": "inject",
    "z": "p1switch",
    "name": "\"on\"",
    "props": [
      {
        "p": "payload"
      },
      {
        "p": "topic",
        "vt": "str"
      }
    ],
    "repeat": "",
    "crontab": "",
    "once": false,
    "onceDelay": 0.1,
    "topic": "",
    "payload": "on",
    "payloadType": "str",
    "x": 170,
    "y": 140,
    "wires": [["s_sw"]]
  },
  {
    "id": "s_off",
    "type": "inject",
    "z": "p1switch",
    "name": "\"off\"",
    "props": [
      {
        "p": "payload"
      },
      {
        "p": "topic",
        "vt": "str"
      }
    ],
    "repeat": "",
    "crontab": "",
    "once": false,
    "onceDelay": 0.1,
    "topic": "",
    "payload": "off",
    "payloadType": "str",
    "x": 170,
    "y": 200,
    "wires": [["s_sw"]]
  },
  {
    "id": "s_other",
    "type": "inject",
    "z": "p1switch",
    "name": "\"banana\"",
    "props": [
      {
        "p": "payload"
      },
      {
        "p": "topic",
        "vt": "str"
      }
    ],
    "repeat": "",
    "crontab": "",
    "once": false,
    "onceDelay": 0.1,
    "topic": "",
    "payload": "banana",
    "payloadType": "str",
    "x": 170,
    "y": 260,
    "wires": [["s_sw"]]
  },
  {
    "id": "s_sw",
    "type": "switch",
    "z": "p1switch",
    "name": "on / off / anything else",
    "property": "payload",
    "propertyType": "msg",
    "rules": [
      {
        "t": "eq",
        "v": "on",
        "vt": "str"
      },
      {
        "t": "eq",
        "v": "off",
        "vt": "str"
      },
      {
        "t": "else"
      }
    ],
    "checkall": "true",
    "repair": false,
    "outputs": 3,
    "x": 420,
    "y": 200,
    "wires": [["s_d1"], ["s_d2"], ["s_d3"]]
  },
  {
    "id": "s_d1",
    "type": "debug",
    "z": "p1switch",
    "name": "turned ON",
    "active": true,
    "tosidebar": true,
    "console": false,
    "tostatus": false,
    "complete": "payload",
    "targetType": "msg",
    "statusType": "auto",
    "x": 670,
    "y": 140,
    "wires": []
  },
  {
    "id": "s_d2",
    "type": "debug",
    "z": "p1switch",
    "name": "turned OFF",
    "active": true,
    "tosidebar": true,
    "console": false,
    "tostatus": false,
    "complete": "payload",
    "targetType": "msg",
    "statusType": "auto",
    "x": 670,
    "y": 200,
    "wires": []
  },
  {
    "id": "s_d3",
    "type": "debug",
    "z": "p1switch",
    "name": "no idea",
    "active": true,
    "tosidebar": true,
    "console": false,
    "tostatus": false,
    "complete": "payload",
    "targetType": "msg",
    "statusType": "auto",
    "x": 670,
    "y": 260,
    "wires": []
  }
]
Change
For simple transformations without writing code. Set, change, move, rename or delete message properties through a UI. Set a topic, find-and-replace some text, rename a property, delete something. No JavaScript required.
You can chain several operations in one Change node and they run in order. Any straightforward message modification should be a Change node rather than a Function node: it's faster, and anyone reading your flow can see what it does without opening it.
Import this flow to get all three rule types in one node: set a topic, replace a value, and delete a property.
JSON (95 lines)
[
  {
    "id": "n_change",
    "type": "tab",
    "label": "Change",
    "disabled": false,
    "info": "Reshape a message without code."
  },
  {
    "id": "ch_c",
    "type": "comment",
    "z": "n_change",
    "name": "CHANGE - set, replace and delete, all in one node",
    "x": 280,
    "y": 60,
    "wires": []
  },
  {
    "id": "ch_in",
    "type": "inject",
    "z": "n_change",
    "name": "an object",
    "props": [
      {
        "p": "payload"
      },
      {
        "p": "topic",
        "vt": "str"
      }
    ],
    "repeat": "",
    "crontab": "",
    "once": false,
    "onceDelay": 0.1,
    "topic": "",
    "payload": "{\"name\":\"kitchen sensor\",\"status\":\"offline\",\"junk\":\"remove me\"}",
    "payloadType": "json",
    "x": 190,
    "y": 160,
    "wires": [["ch_set"]]
  },
  {
    "id": "ch_set",
    "type": "change",
    "z": "n_change",
    "name": "three rules in order",
    "rules": [
      {
        "t": "set",
        "p": "topic",
        "pt": "msg",
        "to": "devices/kitchen",
        "tot": "str"
      },
      {
        "t": "change",
        "p": "payload.status",
        "pt": "msg",
        "from": "offline",
        "fromt": "str",
        "to": "online",
        "tot": "str"
      },
      {
        "t": "delete",
        "p": "payload.junk",
        "pt": "msg"
      }
    ],
    "action": "",
    "property": "",
    "to": "",
    "reg": false,
    "x": 450,
    "y": 160,
    "wires": [["ch_dbg"]]
  },
  {
    "id": "ch_dbg",
    "type": "debug",
    "z": "n_change",
    "name": "reshaped",
    "active": true,
    "tosidebar": true,
    "console": false,
    "tostatus": false,
    "complete": "true",
    "targetType": "full",
    "statusType": "auto",
    "x": 700,
    "y": 160,
    "wires": []
  }
]
Range
Scales numbers from one range to another. Sensor giving you 0 to 1023 but you want 0 to 100? Range does the maths. Specify input range, output range, done. It can also clamp and round.
It's map() if you've done any Arduino work.
Import this flow to get a 0 to 1023 reading scaled into a percentage. Send it 512 and 50 comes out.
JSON (75 lines)
[
  {
    "id": "n_range",
    "type": "tab",
    "label": "Range",
    "disabled": false,
    "info": "Scale a number into a different range."
  },
  {
    "id": "rg_c",
    "type": "comment",
    "z": "n_range",
    "name": "RANGE - 0-1023 in, 0-100 out",
    "x": 280,
    "y": 60,
    "wires": []
  },
  {
    "id": "rg_in",
    "type": "inject",
    "z": "n_range",
    "name": "512",
    "props": [
      {
        "p": "payload"
      },
      {
        "p": "topic",
        "vt": "str"
      }
    ],
    "repeat": "",
    "crontab": "",
    "once": false,
    "onceDelay": 0.1,
    "topic": "",
    "payload": "512",
    "payloadType": "num",
    "x": 190,
    "y": 160,
    "wires": [["rg_range"]]
  },
  {
    "id": "rg_range",
    "type": "range",
    "z": "n_range",
    "name": "scale to a percentage",
    "minin": "0",
    "maxin": "1023",
    "minout": "0",
    "maxout": "100",
    "action": "scale",
    "round": true,
    "property": "payload",
    "x": 430,
    "y": 160,
    "wires": [["rg_dbg"]]
  },
  {
    "id": "rg_dbg",
    "type": "debug",
    "z": "n_range",
    "name": "as a percentage",
    "active": true,
    "tosidebar": true,
    "console": false,
    "tostatus": false,
    "complete": "payload",
    "targetType": "msg",
    "statusType": "auto",
    "x": 690,
    "y": 160,
    "wires": []
  }
]
Template
Generates text from a template using Mustache syntax. You write something like:
Hello {{payload.name}}, the temperature is {{payload.temp}} degrees....and it fills in the values from the message. Emails, reports, HTML, JSON, whatever text format you need. If you're generating JSON or YAML it can parse the result straight back into an object for you.
Import this flow to get an object turned into a readable sentence with mustache placeholders.
JSON (74 lines)
[
  {
    "id": "n_template",
    "type": "tab",
    "label": "Template",
    "disabled": false,
    "info": "Build text from a template."
  },
  {
    "id": "tp_c",
    "type": "comment",
    "z": "n_template",
    "name": "TEMPLATE - mustache placeholders filled from the message",
    "x": 280,
    "y": 60,
    "wires": []
  },
  {
    "id": "tp_in",
    "type": "inject",
    "z": "n_template",
    "name": "name and temp",
    "props": [
      {
        "p": "payload"
      },
      {
        "p": "topic",
        "vt": "str"
      }
    ],
    "repeat": "",
    "crontab": "",
    "once": false,
    "onceDelay": 0.1,
    "topic": "",
    "payload": "{\"name\":\"kitchen\",\"temp\":21.5}",
    "payloadType": "json",
    "x": 190,
    "y": 160,
    "wires": [["tp_tpl"]]
  },
  {
    "id": "tp_tpl",
    "type": "template",
    "z": "n_template",
    "name": "a sentence",
    "field": "payload",
    "fieldType": "msg",
    "format": "handlebars",
    "syntax": "mustache",
    "template": "The {{payload.name}} is {{payload.temp}} degrees.",
    "output": "str",
    "x": 430,
    "y": 160,
    "wires": [["tp_dbg"]]
  },
  {
    "id": "tp_dbg",
    "type": "debug",
    "z": "n_template",
    "name": "filled in",
    "active": true,
    "tosidebar": true,
    "console": false,
    "tostatus": false,
    "complete": "payload",
    "targetType": "msg",
    "statusType": "auto",
    "x": 670,
    "y": 160,
    "wires": []
  }
]
Delay
Does what it says. Two modes worth knowing:
- Delay mode holds each message for a set time before passing it on.
- Rate limit mode throttles to a maximum rate: "no more than 5 messages a minute".
Rate limit mode is the one that saves you. Calling an API with a rate limit? Stick a Delay node in front of it and stop worrying.
Import this flow to get both modes side by side: one branch holds each message for two seconds, the other throttles to one message every three.
JSON (126 lines)
[
  {
    "id": "n_delay",
    "type": "tab",
    "label": "Delay",
    "disabled": false,
    "info": "Hold a message, or throttle a flood."
  },
  {
    "id": "dl_c",
    "type": "comment",
    "z": "n_delay",
    "name": "DELAY - delay mode on top, rate limit underneath",
    "x": 280,
    "y": 60,
    "wires": []
  },
  {
    "id": "dl_in1",
    "type": "inject",
    "z": "n_delay",
    "name": "hold this 2 seconds",
    "props": [
      {
        "p": "payload"
      },
      {
        "p": "topic",
        "vt": "str"
      }
    ],
    "repeat": "",
    "crontab": "",
    "once": false,
    "onceDelay": 0.1,
    "topic": "",
    "payload": "waited 2 seconds",
    "payloadType": "str",
    "x": 200,
    "y": 140,
    "wires": [["dl_delay"]]
  },
  {
    "id": "dl_delay",
    "type": "delay",
    "z": "n_delay",
    "name": "wait 2s",
    "pauseType": "delay",
    "timeout": "2",
    "timeoutUnits": "seconds",
    "rate": "1",
    "nbRateUnits": "1",
    "rateUnits": "second",
    "randomFirst": "1",
    "randomLast": "5",
    "randomUnits": "seconds",
    "drop": false,
    "allowrate": false,
    "outputs": 1,
    "x": 470,
    "y": 140,
    "wires": [["dl_dbg"]]
  },
  {
    "id": "dl_in2",
    "type": "inject",
    "z": "n_delay",
    "name": "press me repeatedly",
    "props": [
      {
        "p": "payload"
      },
      {
        "p": "topic",
        "vt": "str"
      }
    ],
    "repeat": "",
    "crontab": "",
    "once": false,
    "onceDelay": 0.1,
    "topic": "",
    "payload": "throttled",
    "payloadType": "str",
    "x": 200,
    "y": 220,
    "wires": [["dl_rate"]]
  },
  {
    "id": "dl_rate",
    "type": "delay",
    "z": "n_delay",
    "name": "max 1 every 3s",
    "pauseType": "rate",
    "timeout": "5",
    "timeoutUnits": "seconds",
    "rate": "1",
    "nbRateUnits": "3",
    "rateUnits": "second",
    "randomFirst": "1",
    "randomLast": "5",
    "randomUnits": "seconds",
    "drop": false,
    "allowrate": false,
    "outputs": 1,
    "x": 470,
    "y": 220,
    "wires": [["dl_dbg"]]
  },
  {
    "id": "dl_dbg",
    "type": "debug",
    "z": "n_delay",
    "name": "arrived",
    "active": true,
    "tosidebar": true,
    "console": false,
    "tostatus": false,
    "complete": "payload",
    "targetType": "msg",
    "statusType": "auto",
    "x": 720,
    "y": 180,
    "wires": []
  }
]
Trigger
A versatile timing node. Typically: send one message immediately, wait, then send another. "When input arrives send ON, then 30 seconds later send OFF, unless another input resets the timer."
It can also repeat at intervals until something stops it. Good for turn-on-then-off-again behaviour, and for watchdogs: alert me if no data has arrived in five minutes.
Import this flow to get the classic pattern: ON immediately, then OFF five seconds later.
JSON (80 lines)
[
  {
    "id": "n_trigger",
    "type": "tab",
    "label": "Trigger",
    "disabled": false,
    "info": "Send one thing, then another later."
  },
  {
    "id": "tg_c",
    "type": "comment",
    "z": "n_trigger",
    "name": "TRIGGER - sends ON, then OFF five seconds later",
    "x": 280,
    "y": 60,
    "wires": []
  },
  {
    "id": "tg_in",
    "type": "inject",
    "z": "n_trigger",
    "name": "start",
    "props": [
      {
        "p": "payload"
      },
      {
        "p": "topic",
        "vt": "str"
      }
    ],
    "repeat": "",
    "crontab": "",
    "once": false,
    "onceDelay": 0.1,
    "topic": "",
    "payload": "",
    "payloadType": "date",
    "x": 190,
    "y": 160,
    "wires": [["tg_trig"]]
  },
  {
    "id": "tg_trig",
    "type": "trigger",
    "z": "n_trigger",
    "name": "ON then OFF",
    "op1": "ON",
    "op2": "OFF",
    "op1type": "str",
    "op2type": "str",
    "duration": "5",
    "extend": false,
    "overrideDelay": false,
    "units": "s",
    "reset": "",
    "bytopic": "all",
    "topic": "topic",
    "outputs": 1,
    "x": 420,
    "y": 160,
    "wires": [["tg_dbg"]]
  },
  {
    "id": "tg_dbg",
    "type": "debug",
    "z": "n_trigger",
    "name": "ON now, OFF in 5s",
    "active": true,
    "tosidebar": true,
    "console": false,
    "tostatus": false,
    "complete": "payload",
    "targetType": "msg",
    "statusType": "auto",
    "x": 680,
    "y": 160,
    "wires": []
  }
]
Exec
Runs system commands on the host machine. Call a Python script, run a shell command, execute any CLI program. It has three outputs:
- stdout — whatever the command printed normally.
- stderr — whatever it printed to the error stream.
- Completion info — not a bare number, which is what most people expect.
msg.payloadhere is an object, and for a command that succeeds it looks like this:
{ "code": 0 }If the command fails, that object carries more detail. Running something that exits with status 3 gives you:
{
  "code": 3,
  "message": "Command failed: ...\nto-stderr\n"
}
So read msg.payload.code for the exit status rather than treating the payload itself as a number. Exactly which extra fields turn up depends on how the process exited.
It's Node-RED's gateway to the operating system, and it's genuinely powerful. It's also the node to be most careful with:
-
Make sure Node-RED has permission to run what you're asking. In Docker especially, the container often can't see the tools you assume are there.
-
Commands are platform-specific.
echo,lsandsh -care fine on Linux and macOS; on Windows you're in Command Prompt or PowerShell and the syntax differs. Nothing in Node-RED translates that for you. -
Never let untrusted input reach this node. If a payload can influence what gets run, whoever controls that payload can run commands as the Node-RED user.
Be clear about what the node's options do and don't do here. "Append
msg.payload" is not a safe way to pass input — the payload is concatenated straight onto the end of the command string, exactly as if you'd typed it there yourself. It is not passed as a separate, quoted argument.Spawn mode is not a general safety guarantee either. It splits the command on spaces and quotes before running it, which avoids a shell on Linux and macOS — but the caller still controls the argument list, and on Windows the node runs with
shell: trueand rejoins everything into a single string, putting you right back where you started.So: if the data comes from anywhere you don't control — an HTTP In node, an MQTT topic, a file someone else writes — either keep it out of the command entirely, or validate it against a strict allowlist of known-good values first. "Escaping it" is not a plan.
Import this flow to get a harmless echo wired to all three outputs, so you can see what lands on stdout, stderr and the completion output.
Self-contained, with one caveat: the command is
echo, which works on Linux and macOS. On Windows, swap it for something your shell understands.
JSON (108 lines)
[
  {
    "id": "n_exec",
    "type": "tab",
    "label": "Exec",
    "disabled": false,
    "info": "Run a command on the host."
  },
  {
    "id": "ex_c",
    "type": "comment",
    "z": "n_exec",
    "name": "EXEC - three outputs: stdout, stderr and completion info",
    "info": "Output 3 is not a bare number. Its payload is an object: { code: 0 } on success, with extra detail such as a message field when the command fails. Read msg.payload.code for the exit status.\n\nThe command here is 'echo', which is fine on Linux and macOS. On Windows, change it to something your shell understands.",
    "x": 280,
    "y": 60,
    "wires": []
  },
  {
    "id": "ex_in",
    "type": "inject",
    "z": "n_exec",
    "name": "run it",
    "props": [
      {
        "p": "payload"
      },
      {
        "p": "topic",
        "vt": "str"
      }
    ],
    "repeat": "",
    "crontab": "",
    "once": false,
    "onceDelay": 0.1,
    "topic": "",
    "payload": "",
    "payloadType": "date",
    "x": 180,
    "y": 180,
    "wires": [["ex_exec"]]
  },
  {
    "id": "ex_exec",
    "type": "exec",
    "z": "n_exec",
    "name": "echo something",
    "command": "echo \"hello from the exec node\"",
    "addpay": "",
    "append": "",
    "useSpawn": "false",
    "timer": "",
    "winHide": false,
    "oldrc": false,
    "x": 400,
    "y": 180,
    "wires": [["ex_out"], ["ex_err"], ["ex_rc"]]
  },
  {
    "id": "ex_out",
    "type": "debug",
    "z": "n_exec",
    "name": "stdout",
    "active": true,
    "tosidebar": true,
    "console": false,
    "tostatus": false,
    "complete": "payload",
    "targetType": "msg",
    "statusType": "auto",
    "x": 650,
    "y": 120,
    "wires": []
  },
  {
    "id": "ex_err",
    "type": "debug",
    "z": "n_exec",
    "name": "stderr",
    "active": true,
    "tosidebar": true,
    "console": false,
    "tostatus": false,
    "complete": "payload",
    "targetType": "msg",
    "statusType": "auto",
    "x": 650,
    "y": 180,
    "wires": []
  },
  {
    "id": "ex_rc",
    "type": "debug",
    "z": "n_exec",
    "name": "completion info { code: 0 }",
    "active": true,
    "tosidebar": true,
    "console": false,
    "tostatus": false,
    "complete": "payload",
    "targetType": "msg",
    "statusType": "auto",
    "x": 650,
    "y": 240,
    "wires": []
  }
]
Filter (RBE)
Formerly the RBE node (Report By Exception) for the old-school among us. It filters out values that haven't meaningfully changed.
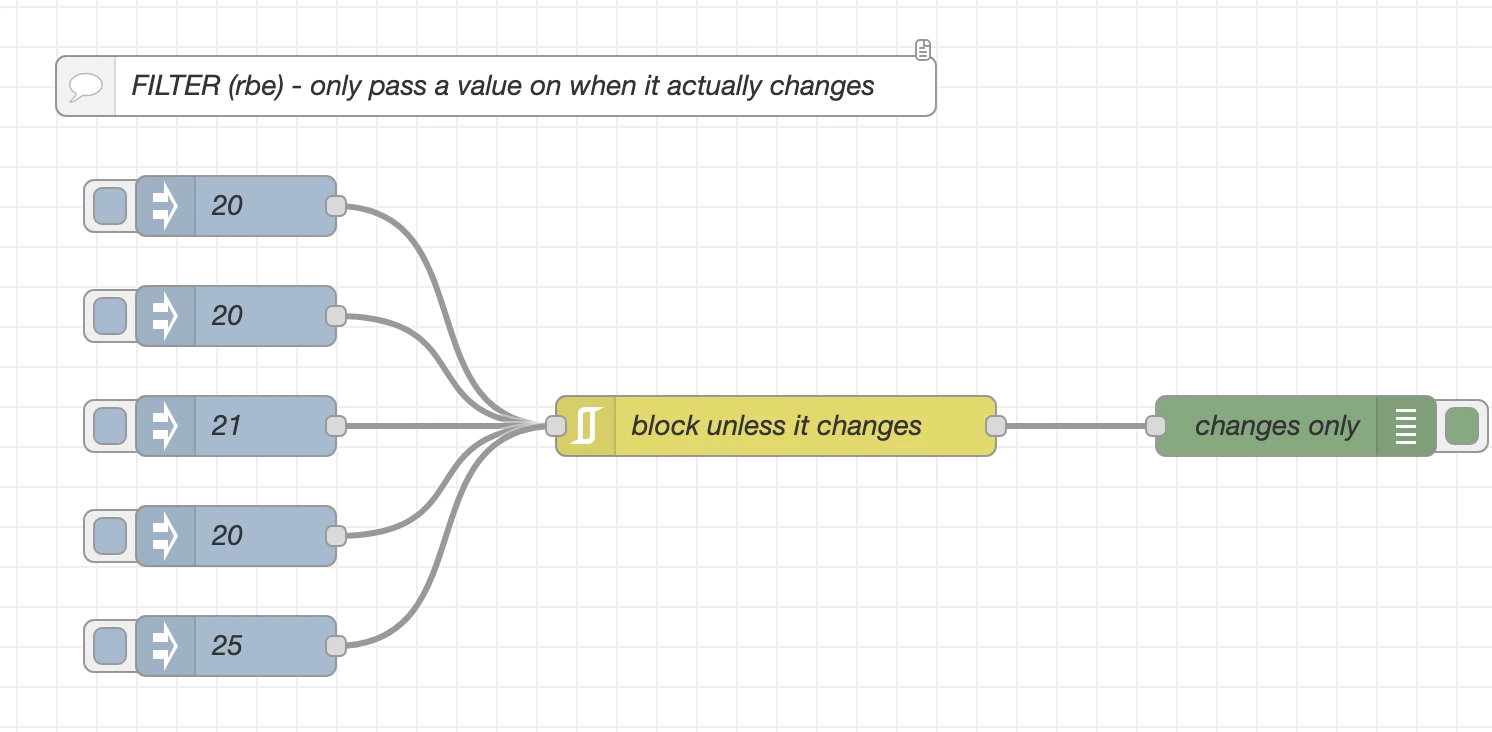
In its basic mode it blocks any message whose payload matches the previous one:
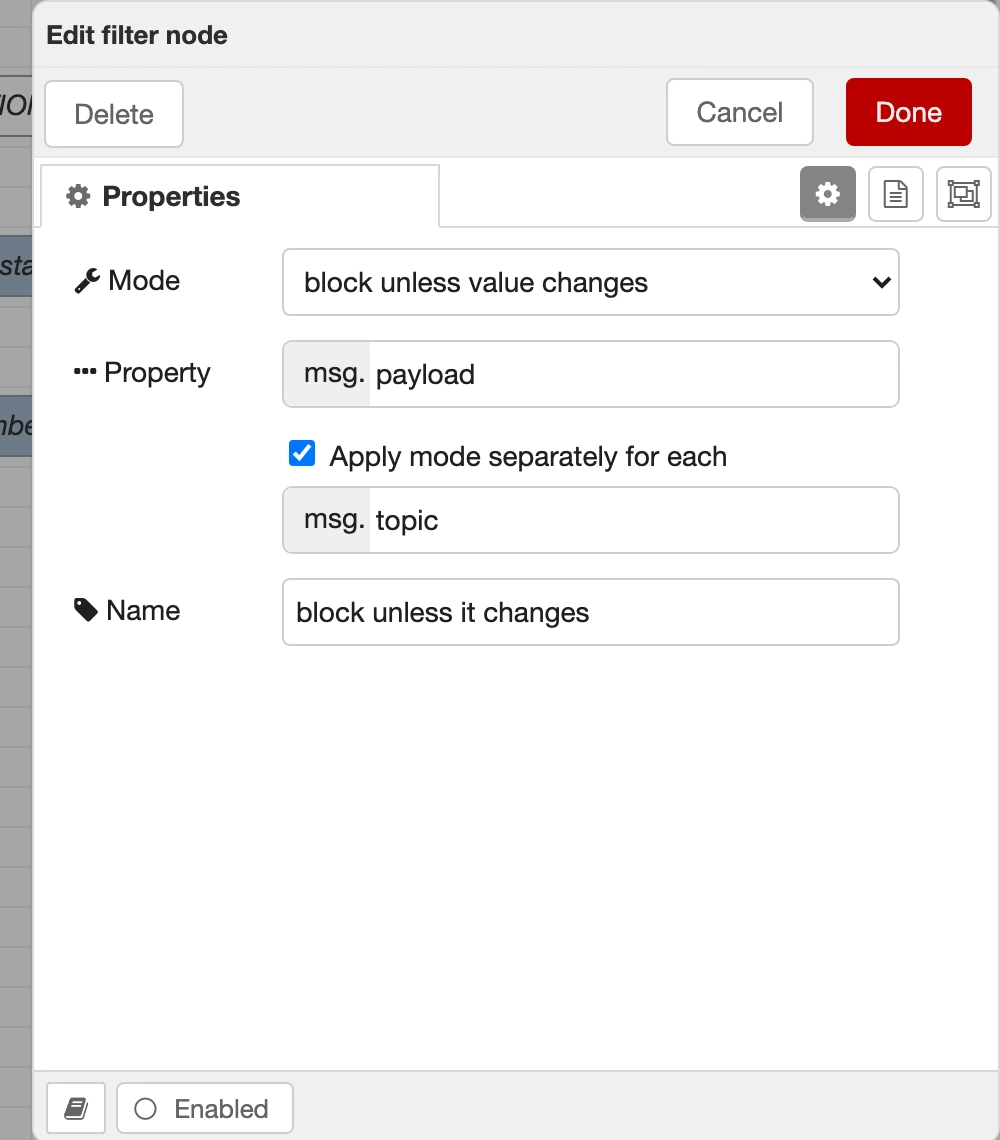
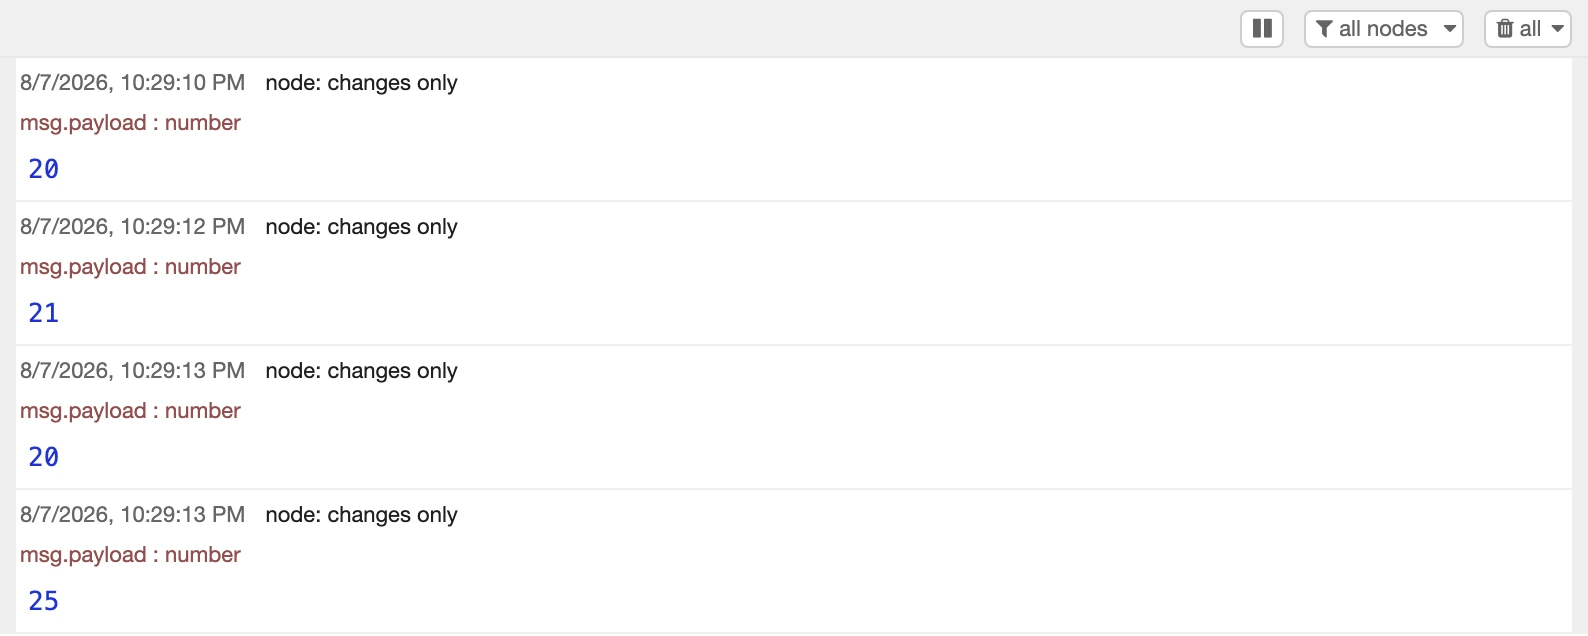
Inject 20, 20, 21, 20, 25 in that order and you get 20, 21, 20, 25 out. The second 20 never makes it through, because it's identical to the one before it. The fourth value is also 20, but it does get through, because the value before it was 21. It's comparing against the last value, not against everything it's ever seen.
You can also set a deadband, which only passes changes bigger than a certain amount. Set that to 2 and the 21 vanishes too, because it's within 2 of the last value that got through. If you've got a temperature sensor twitching by 0.1 degrees all day, this is how you make it shut up.
Import this flow to get the five inject nodes firing 20, 20, 21, 20, 25 into a Filter node, so you can watch the duplicate get dropped.
JSON (176 lines)
[
  {
    "id": "p1filter",
    "type": "tab",
    "label": "3 - Filter",
    "disabled": false,
    "info": "Report by exception - drop the noise."
  },
  {
    "id": "r_c",
    "type": "comment",
    "z": "p1filter",
    "name": "FILTER (rbe) - only pass a value on when it actually changes",
    "info": "Fire these in order: 20, 20, 21, 20, 25.\n\nIn \"block unless value changes\" mode you will only see 20, 21, 20, 25 in the debug panel - the second 20 never makes it through because it is identical to the one before it.\n\nSwap the mode to a deadband of 2 and the 21 disappears too, because it is less than 2 away from the last value that got through.",
    "x": 300,
    "y": 60,
    "wires": []
  },
  {
    "id": "r_in0",
    "type": "inject",
    "z": "p1filter",
    "name": "20",
    "props": [
      {
        "p": "payload"
      },
      {
        "p": "topic",
        "vt": "str"
      }
    ],
    "repeat": "",
    "crontab": "",
    "once": false,
    "onceDelay": 0.1,
    "topic": "",
    "payload": "20",
    "payloadType": "num",
    "x": 170,
    "y": 120,
    "wires": [["r_rbe"]]
  },
  {
    "id": "r_in1",
    "type": "inject",
    "z": "p1filter",
    "name": "20",
    "props": [
      {
        "p": "payload"
      },
      {
        "p": "topic",
        "vt": "str"
      }
    ],
    "repeat": "",
    "crontab": "",
    "once": false,
    "onceDelay": 0.1,
    "topic": "",
    "payload": "20",
    "payloadType": "num",
    "x": 170,
    "y": 175,
    "wires": [["r_rbe"]]
  },
  {
    "id": "r_in2",
    "type": "inject",
    "z": "p1filter",
    "name": "21",
    "props": [
      {
        "p": "payload"
      },
      {
        "p": "topic",
        "vt": "str"
      }
    ],
    "repeat": "",
    "crontab": "",
    "once": false,
    "onceDelay": 0.1,
    "topic": "",
    "payload": "21",
    "payloadType": "num",
    "x": 170,
    "y": 230,
    "wires": [["r_rbe"]]
  },
  {
    "id": "r_in3",
    "type": "inject",
    "z": "p1filter",
    "name": "20",
    "props": [
      {
        "p": "payload"
      },
      {
        "p": "topic",
        "vt": "str"
      }
    ],
    "repeat": "",
    "crontab": "",
    "once": false,
    "onceDelay": 0.1,
    "topic": "",
    "payload": "20",
    "payloadType": "num",
    "x": 170,
    "y": 285,
    "wires": [["r_rbe"]]
  },
  {
    "id": "r_in4",
    "type": "inject",
    "z": "p1filter",
    "name": "25",
    "props": [
      {
        "p": "payload"
      },
      {
        "p": "topic",
        "vt": "str"
      }
    ],
    "repeat": "",
    "crontab": "",
    "once": false,
    "onceDelay": 0.1,
    "topic": "",
    "payload": "25",
    "payloadType": "num",
    "x": 170,
    "y": 340,
    "wires": [["r_rbe"]]
  },
  {
    "id": "r_rbe",
    "type": "rbe",
    "z": "p1filter",
    "name": "block unless it changes",
    "func": "rbe",
    "gap": "",
    "start": "",
    "inout": "out",
    "septopics": true,
    "property": "payload",
    "topi": "topic",
    "x": 440,
    "y": 230,
    "wires": [["r_dbg"]]
  },
  {
    "id": "r_dbg",
    "type": "debug",
    "z": "p1filter",
    "name": "changes only",
    "active": true,
    "tosidebar": true,
    "console": false,
    "tostatus": false,
    "complete": "payload",
    "targetType": "msg",
    "statusType": "auto",
    "x": 700,
    "y": 230,
    "wires": []
  }
]
Part 2: Network nodes
This is the communication layer: the nodes that let Node-RED talk to the outside world. Which, let's be honest, is basically everything you'll ever want it to do.
Further reading: Securing Node-RED in the Node-RED docs — worth a look before you expose an HTTP In endpoint to anything.
TLS configuration
Not a node you drag onto the canvas. It's a configuration node: it holds settings that other nodes share, and it lives in the config sidebar rather than on the canvas.
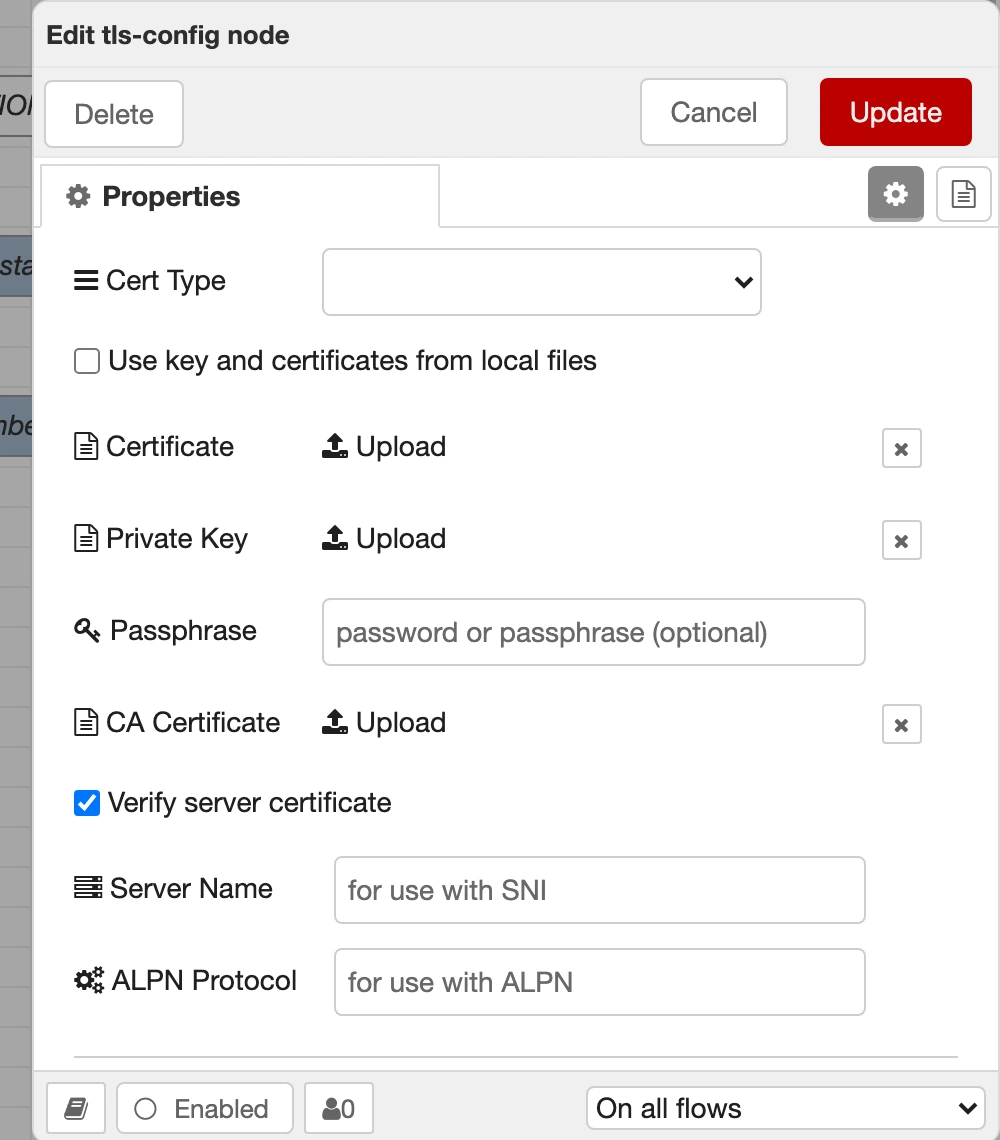
The common misconception is that this is only for client certificates. It isn't. A TLS config controls how a connection is secured in several ways:
- Which certificate authorities to trust. Supply your own CA certificate and you can talk to a broker or API using a private or self-signed certificate that the runtime wouldn't otherwise accept.
- Whether to verify the server's certificate at all. There's a checkbox to turn verification off. It's there for lab work with self-signed certs, and turning it off means you're no longer protected against an impersonated server, so don't leave it off in anything that matters.
- Client certificates, for mutual TLS, where the server wants to authenticate you as well.
- The server name (SNI) sent during the handshake, for when you're connecting by IP but the certificate is issued for a hostname.
- Protocol and connection options, such as which TLS versions are acceptable.
Set one up, then any node that supports secure connections (MQTT over MQTTS, HTTP Request over HTTPS, WebSockets over WSS, TCP with TLS) can select it from a dropdown. Once, reused everywhere.
When you don't need it: ordinary public HTTPS. If you're calling https://api.example.com and it has a normal certificate from a normal certificate authority, Node-RED validates it against the runtime's default trust store and you don't have to configure anything. Reach for a TLS config when the default trust store isn't enough, or when the other end needs something from you.
Import this flow to see where a TLS profile actually attaches. The config node travels with the export.
Calls an external test service (
postman-echo.com) over HTTPS, so it needs outbound internet access. Note that this particular request would work perfectly well without the TLS config attached, because postman-echo has an ordinary public certificate. The config is wired up so you can see where it attaches and how a node references it.
JSON (84 lines)
[
  {
    "id": "n_tls",
    "type": "tab",
    "label": "TLS config",
    "disabled": false,
    "info": "Where a TLS profile gets attached."
  },
  {
    "id": "cfg_tls",
    "type": "tls-config",
    "name": "Demo TLS profile",
    "cert": "",
    "key": "",
    "ca": "",
    "verifyservercert": true
  },
  {
    "id": "tl_c",
    "type": "comment",
    "z": "n_tls",
    "name": "TLS CONFIG - attached to the HTTP Request node below",
    "x": 280,
    "y": 60,
    "wires": []
  },
  {
    "id": "tl_in",
    "type": "inject",
    "z": "n_tls",
    "name": "call over https",
    "props": [
      {
        "p": "payload"
      },
      {
        "p": "topic",
        "vt": "str"
      }
    ],
    "repeat": "",
    "crontab": "",
    "once": false,
    "onceDelay": 0.1,
    "topic": "",
    "payload": "",
    "payloadType": "date",
    "x": 190,
    "y": 160,
    "wires": [["tl_req"]]
  },
  {
    "id": "tl_req",
    "type": "http request",
    "z": "n_tls",
    "name": "GET over TLS",
    "method": "GET",
    "ret": "obj",
    "paytoqs": "ignore",
    "url": "https://postman-echo.com/get?via=tls",
    "tls": "cfg_tls",
    "proxy": "",
    "headers": [],
    "x": 430,
    "y": 160,
    "wires": [["tl_dbg"]]
  },
  {
    "id": "tl_dbg",
    "type": "debug",
    "z": "n_tls",
    "name": "response",
    "active": true,
    "tosidebar": true,
    "console": false,
    "tostatus": false,
    "complete": "payload",
    "targetType": "msg",
    "statusType": "auto",
    "x": 680,
    "y": 160,
    "wires": []
  }
]
HTTP Proxy configuration
Same deal: another configuration node, not something you drag onto the canvas. If your Node-RED needs to route outbound web requests through a proxy, which is common on corporate networks, you set it up once here and HTTP Request nodes point at it.
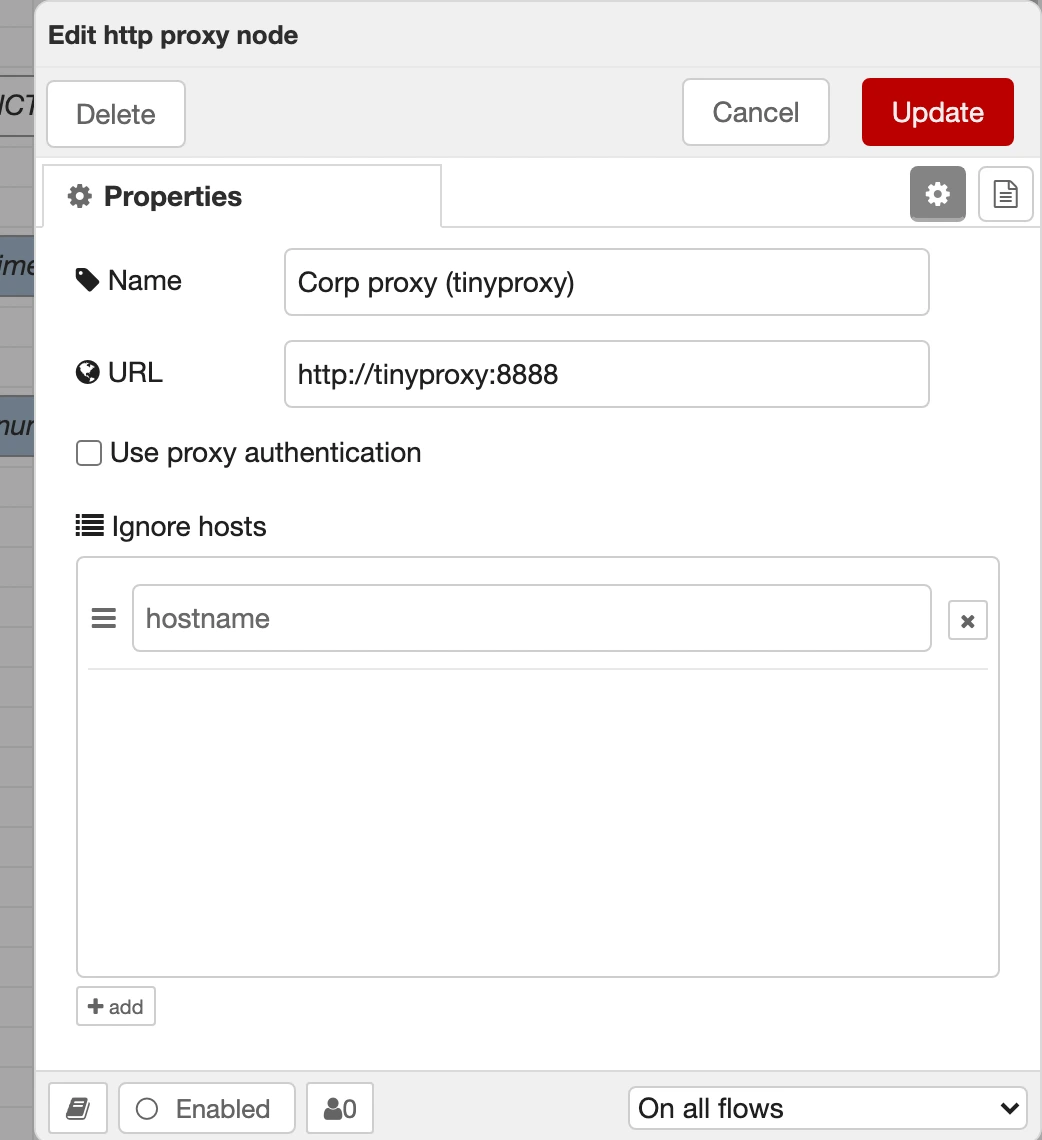
You give it the proxy address and port, optional credentials, and a list of hosts that should bypass it. Most home users will never touch this. Behind an enterprise firewall, nothing outbound works without it.
Import this flow to see a request routed through a proxy config.
Needs an HTTP proxy. The export points at
http://tinyproxy:8888, which is a container on my machine and will mean nothing on yours. Open the proxy config and put in a proxy you actually have, or this one will simply fail to connect.
JSON (81 lines)
[
  {
    "id": "n_proxy",
    "type": "tab",
    "label": "HTTP proxy config",
    "disabled": false,
    "info": "Routing a request through a proxy."
  },
  {
    "id": "cfg_proxy",
    "type": "http proxy",
    "name": "Corp proxy (tinyproxy)",
    "url": "http://tinyproxy:8888"
  },
  {
    "id": "px_c",
    "type": "comment",
    "z": "n_proxy",
    "name": "HTTP PROXY CONFIG - the request below goes via the proxy",
    "x": 280,
    "y": 60,
    "wires": []
  },
  {
    "id": "px_in",
    "type": "inject",
    "z": "n_proxy",
    "name": "call via proxy",
    "props": [
      {
        "p": "payload"
      },
      {
        "p": "topic",
        "vt": "str"
      }
    ],
    "repeat": "",
    "crontab": "",
    "once": false,
    "onceDelay": 0.1,
    "topic": "",
    "payload": "",
    "payloadType": "date",
    "x": 190,
    "y": 160,
    "wires": [["px_req"]]
  },
  {
    "id": "px_req",
    "type": "http request",
    "z": "n_proxy",
    "name": "GET through the proxy",
    "method": "GET",
    "ret": "obj",
    "paytoqs": "ignore",
    "url": "http://postman-echo.com/get?via=proxy",
    "tls": "",
    "proxy": "cfg_proxy",
    "headers": [],
    "x": 450,
    "y": 160,
    "wires": [["px_dbg"]]
  },
  {
    "id": "px_dbg",
    "type": "debug",
    "z": "n_proxy",
    "name": "response",
    "active": true,
    "tosidebar": true,
    "console": false,
    "tostatus": false,
    "complete": "payload",
    "targetType": "msg",
    "statusType": "auto",
    "x": 700,
    "y": 160,
    "wires": []
  }
]
MQTT In and MQTT Out
Now we're at the good stuff. MQTT is a lightweight publish/subscribe protocol and it's everywhere in IoT and smart homes.
MQTT In subscribes to a topic (or a wildcard) and emits a Node-RED message every time something is published there. MQTT Out does the reverse: whatever payload reaches it gets published to a topic.
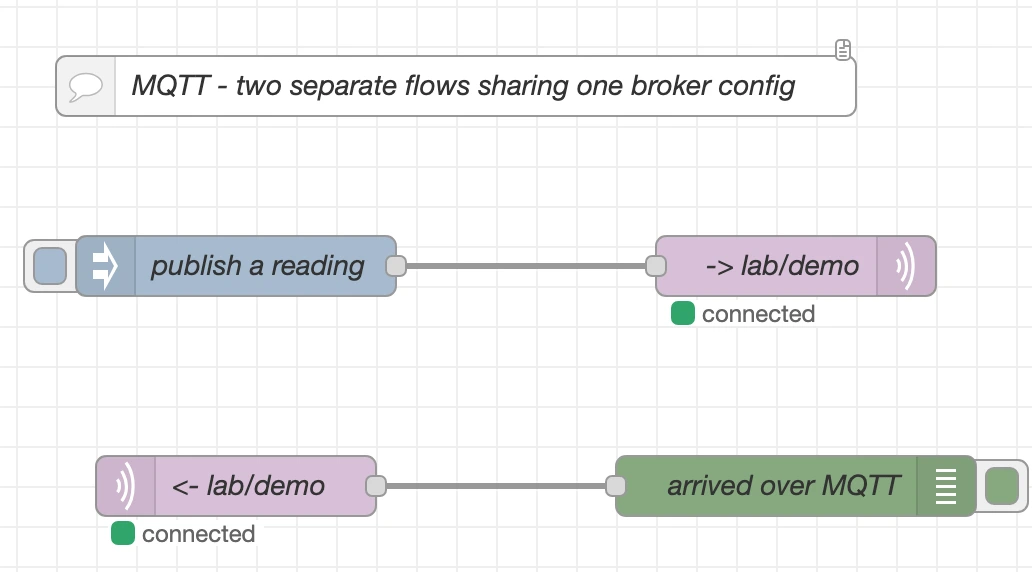
Two independent flows on that tab. The top one publishes to lab/demo. The bottom one is subscribed to lab/demo. So hitting the inject sends a message out to the broker, and it comes straight back in through the other flow.
The important bit is that both nodes point at the same broker configuration:
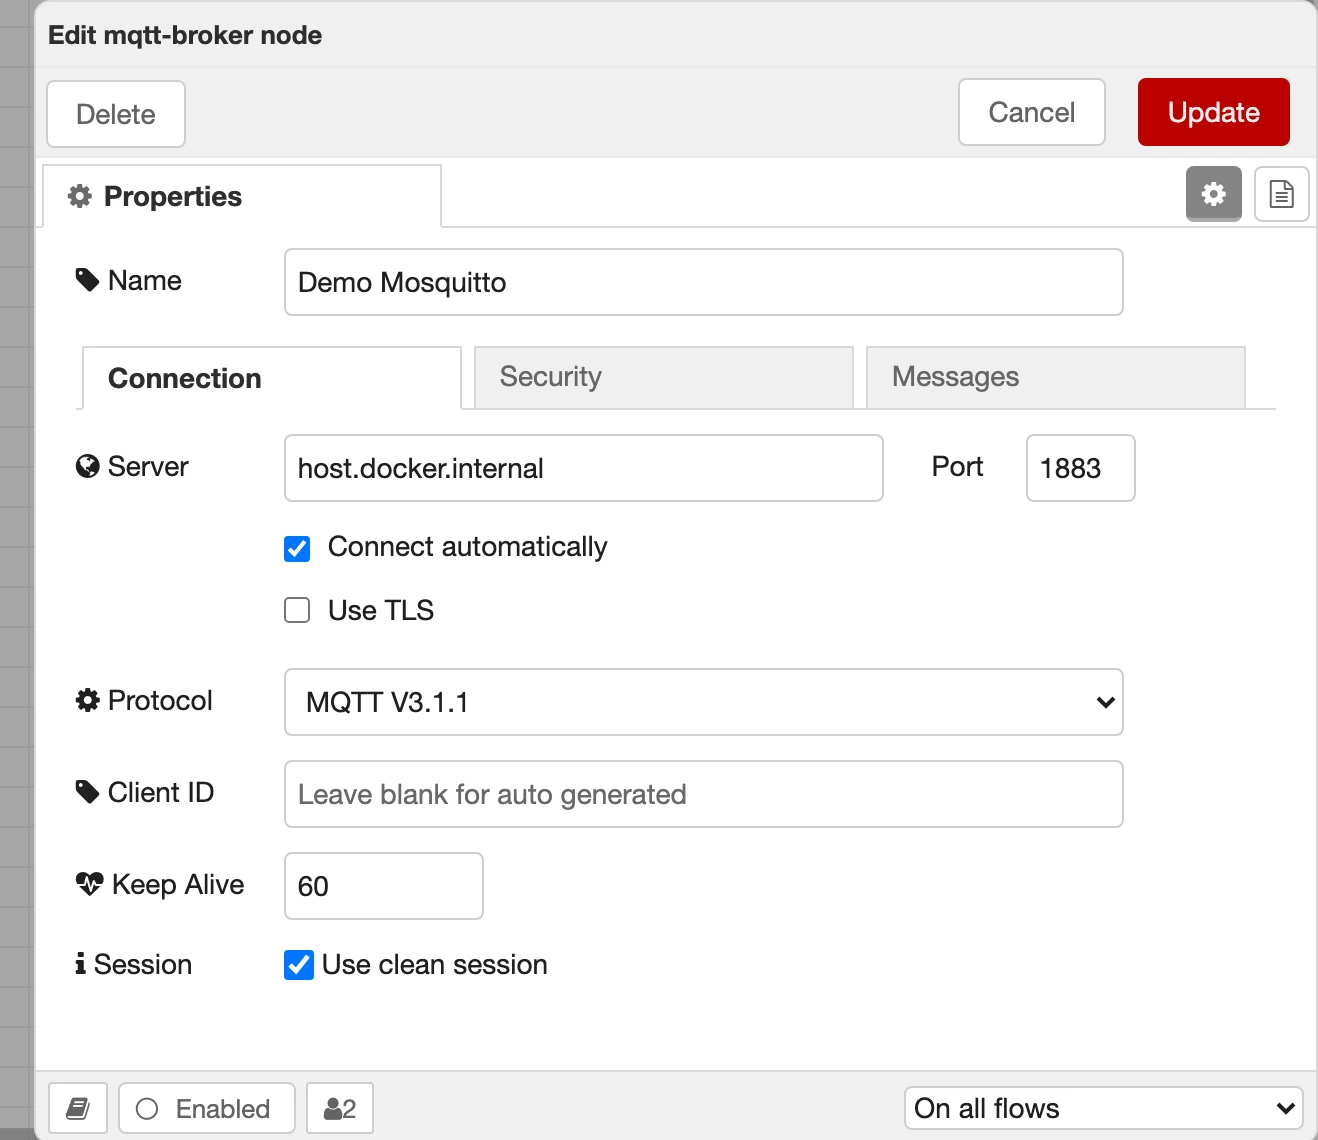
You set the connection up once and every MQTT node in your entire Node-RED reuses it. Note the Use TLS checkbox: that's where the TLS config from earlier gets attached.
Here's the round trip actually happening:
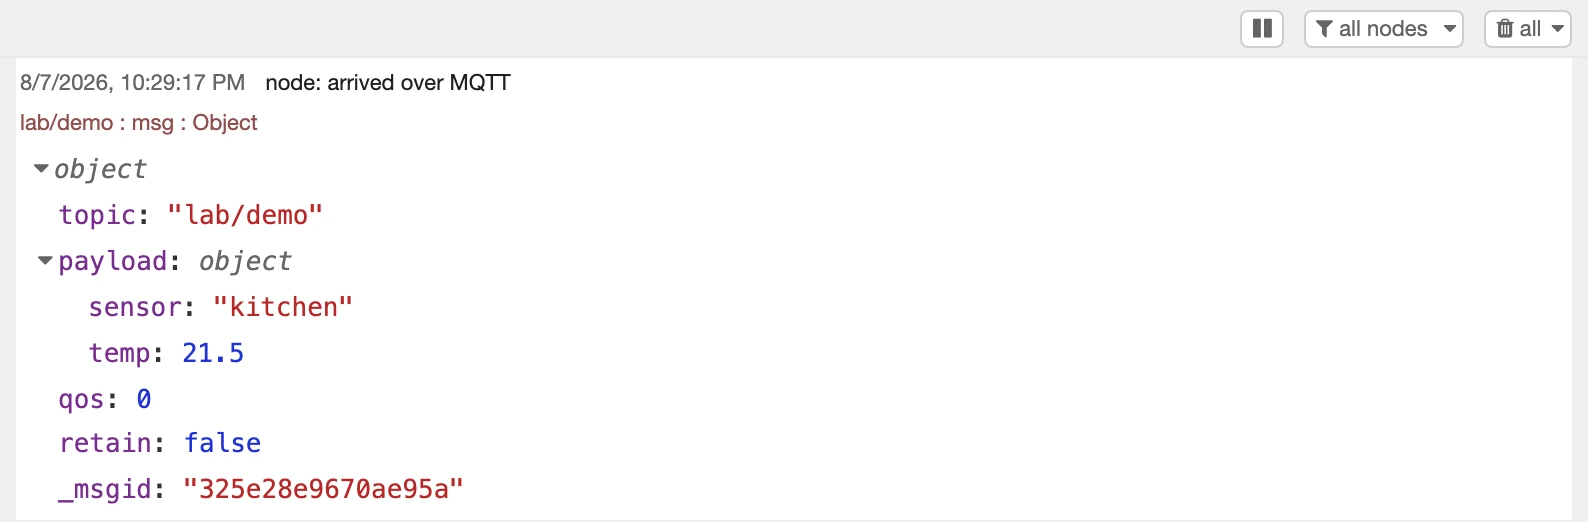
You get the topic, the payload parsed into an object, plus the QoS and retain flags.
The broker connection itself is a configuration node, the same species as the TLS and proxy configs above: it lives in the config sidebar, not on the canvas.
Import this flow to get the publisher and the subscriber sharing one broker config.
Needs an MQTT broker. The export points at
host.docker.internal:1883, because my Node-RED runs in Docker and my Mosquitto broker runs in a different container. That address won't resolve on your setup. Open the broker config and point it at your own broker before you deploy:localhostif it's on the same machine, otherwise its IP or hostname. Without a broker, both nodes will just sit there showing "connecting".
JSON (107 lines)
[
  {
    "id": "p2mqtt",
    "type": "tab",
    "label": "4 - MQTT",
    "disabled": false,
    "info": "Publish and subscribe against a real broker."
  },
  {
    "id": "cfg_broker",
    "type": "mqtt-broker",
    "name": "Demo Mosquitto",
    "broker": "host.docker.internal",
    "port": "1883",
    "clientid": "",
    "autoConnect": true,
    "usetls": false,
    "protocolVersion": "4",
    "keepalive": "60",
    "cleansession": true,
    "autoUnsubscribe": true,
    "birthQos": "0",
    "closeQos": "0",
    "willQos": "0"
  },
  {
    "id": "m_c",
    "type": "comment",
    "z": "p2mqtt",
    "name": "MQTT - two separate flows sharing one broker config",
    "info": "Top flow publishes to lab/demo. Bottom flow is subscribed to the same topic, so hitting the inject sends the message out to Mosquitto and it comes straight back in.\n\nBoth nodes point at the same broker config, which is the bit worth noticing - you set the connection up once and every MQTT node reuses it.",
    "x": 300,
    "y": 60,
    "wires": []
  },
  {
    "id": "m_pub",
    "type": "inject",
    "z": "p2mqtt",
    "name": "publish a reading",
    "props": [
      {
        "p": "payload"
      },
      {
        "p": "topic",
        "vt": "str"
      }
    ],
    "repeat": "",
    "crontab": "",
    "once": false,
    "onceDelay": 0.1,
    "topic": "",
    "payload": "{\"sensor\":\"kitchen\",\"temp\":21.5}",
    "payloadType": "json",
    "x": 190,
    "y": 150,
    "wires": [["m_out"]]
  },
  {
    "id": "m_out",
    "type": "mqtt out",
    "z": "p2mqtt",
    "name": "-> lab/demo",
    "topic": "lab/demo",
    "qos": "0",
    "retain": "",
    "broker": "cfg_broker",
    "x": 470,
    "y": 150,
    "wires": []
  },
  {
    "id": "m_in",
    "type": "mqtt in",
    "z": "p2mqtt",
    "name": "<- lab/demo",
    "topic": "lab/demo",
    "qos": "2",
    "datatype": "auto-detect",
    "broker": "cfg_broker",
    "nl": false,
    "rap": true,
    "rh": 0,
    "inputs": 0,
    "x": 190,
    "y": 260,
    "wires": [["m_dbg"]]
  },
  {
    "id": "m_dbg",
    "type": "debug",
    "z": "p2mqtt",
    "name": "arrived over MQTT",
    "active": true,
    "tosidebar": true,
    "console": false,
    "tostatus": false,
    "complete": "true",
    "targetType": "full",
    "statusType": "auto",
    "x": 470,
    "y": 260,
    "wires": []
  }
]
Common mistake: publishing and subscribing to the same topic in one flow and expecting to see the message twice. You'll see it once, because MQTT Out sends it to the broker and MQTT In receives it back — one round trip, not an echo.
HTTP In and HTTP Response
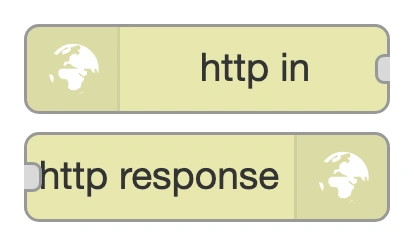
HTTP In creates a web endpoint on your Node-RED server. Configure a path and a method, and when someone hits that URL you get a message with the headers, query parameters, body, all of it.
HTTP Response sends the reply back. Whatever payload reaches it becomes the response body, and you can set status codes and headers via message properties.
These two go together. If you use HTTP In without an HTTP Response, the client just hangs there until it times out. That one catches absolutely everybody at least once.
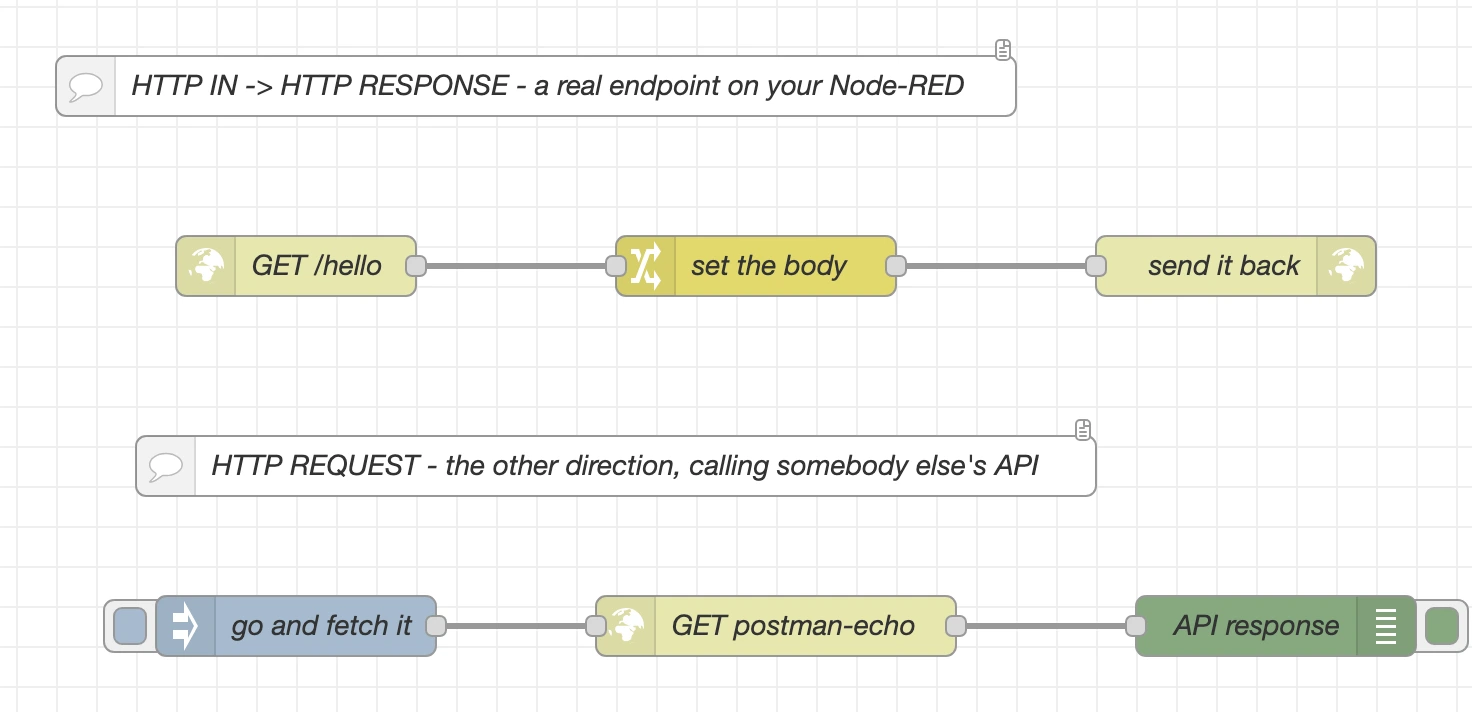
The top flow is a complete endpoint: HTTP In on GET /hello, a Change node that sets the body, and an HTTP Response to close it out.
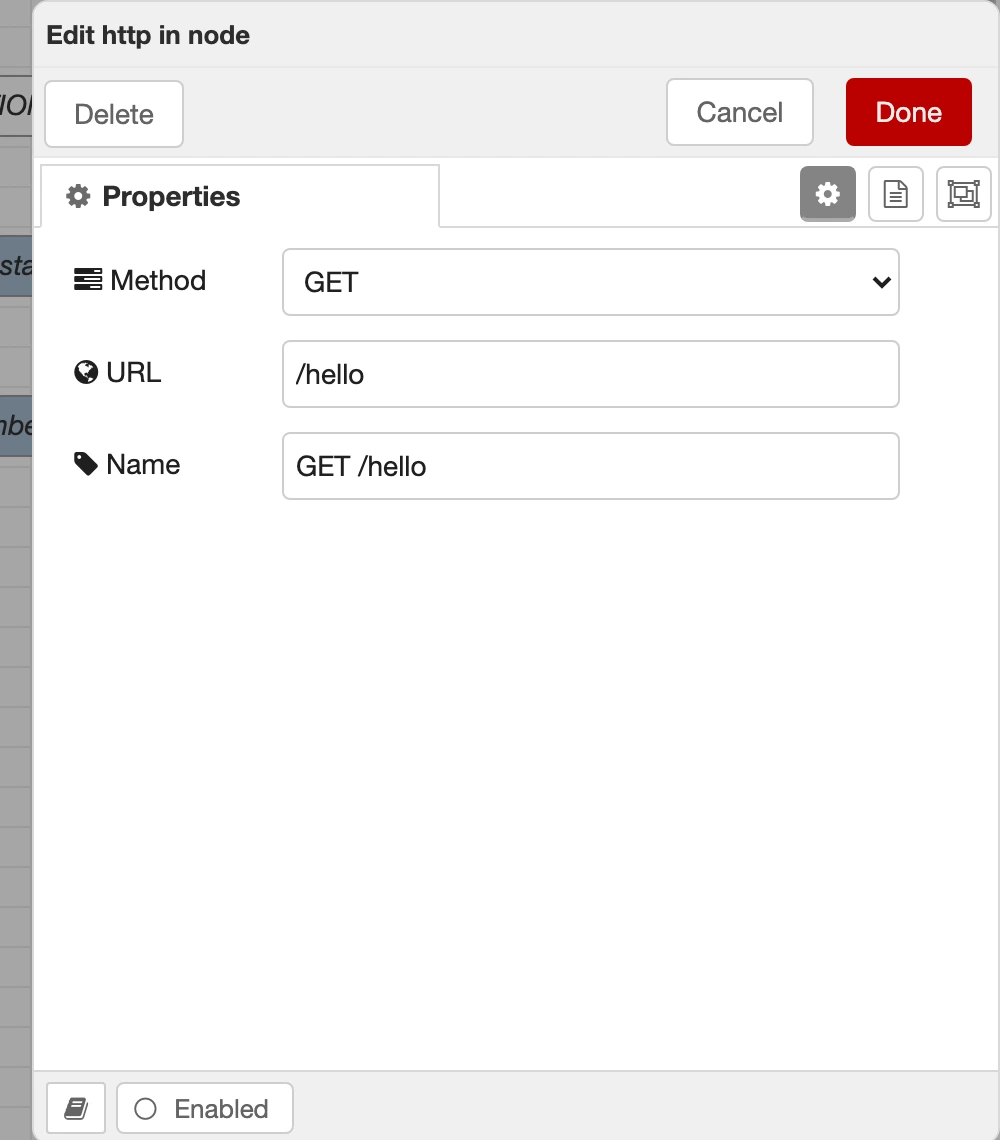
Deploy that and the URL is live:

That's a real request to http://localhost:1881/hello. Port 1881 because that's what I've mapped this container to — yours is almost certainly 1880, the Node-RED default, so the URL you want is http://localhost:1880/hello. Use whatever address you type to reach the editor, with /hello on the end.
Import this flow to get both directions on one tab: the GET /hello endpoint, and the outgoing call to a public test API.
Mostly self-contained. The
GET /helloendpoint works as soon as you deploy — you just need to know your own port to visit it. The second flow on the tab calls an external test service (postman-echo.com), so that half needs outbound internet access.
JSON (132 lines)
[
  {
    "id": "p2http",
    "type": "tab",
    "label": "5 - HTTP",
    "disabled": false,
    "info": "Node-RED as a web server and as a client."
  },
  {
    "id": "h_c",
    "type": "comment",
    "z": "p2http",
    "name": "HTTP IN -> HTTP RESPONSE - a real endpoint on your Node-RED",
    "info": "Deploy this and hit http://localhost:1881/hello in a browser.\n\nThe HTTP In node catches the request, the Change node sets the body, and the HTTP Response node closes the transaction.\n\nLeave the Response node off and the browser just hangs until it times out. That catches everyone once.",
    "x": 300,
    "y": 60,
    "wires": []
  },
  {
    "id": "h_in",
    "type": "http in",
    "z": "p2http",
    "name": "GET /hello",
    "url": "/hello",
    "method": "get",
    "upload": false,
    "x": 180,
    "y": 150,
    "wires": [["h_chg"]]
  },
  {
    "id": "h_chg",
    "type": "change",
    "z": "p2http",
    "name": "set the body",
    "rules": [
      {
        "t": "set",
        "p": "payload",
        "pt": "msg",
        "to": "Hello from Node-RED!",
        "tot": "str"
      }
    ],
    "action": "",
    "property": "",
    "from": "",
    "to": "",
    "reg": false,
    "x": 410,
    "y": 150,
    "wires": [["h_res"]]
  },
  {
    "id": "h_res",
    "type": "http response",
    "z": "p2http",
    "name": "send it back",
    "statusCode": "",
    "headers": {},
    "x": 650,
    "y": 150,
    "wires": []
  },
  {
    "id": "h_c2",
    "type": "comment",
    "z": "p2http",
    "name": "HTTP REQUEST - the other direction, calling somebody else's API",
    "info": "This one calls a public test API and parses the JSON that comes back.\n\nThe 'Use proxy' option on this node is where an HTTP Proxy config gets attached, if you are stuck behind a corporate one.",
    "x": 340,
    "y": 250,
    "wires": []
  },
  {
    "id": "h_in2",
    "type": "inject",
    "z": "p2http",
    "name": "go and fetch it",
    "props": [
      {
        "p": "payload"
      },
      {
        "p": "topic",
        "vt": "str"
      }
    ],
    "repeat": "",
    "crontab": "",
    "once": false,
    "onceDelay": 0.1,
    "topic": "",
    "payload": "",
    "payloadType": "date",
    "x": 180,
    "y": 330,
    "wires": [["h_req"]]
  },
  {
    "id": "h_req",
    "type": "http request",
    "z": "p2http",
    "name": "GET postman-echo",
    "method": "GET",
    "ret": "obj",
    "paytoqs": "ignore",
    "url": "https://postman-echo.com/get?node=red",
    "tls": "",
    "proxy": "",
    "headers": [],
    "x": 420,
    "y": 330,
    "wires": [["h_dbg2"]]
  },
  {
    "id": "h_dbg2",
    "type": "debug",
    "z": "p2http",
    "name": "API response",
    "active": true,
    "tosidebar": true,
    "console": false,
    "tostatus": false,
    "complete": "payload",
    "targetType": "msg",
    "statusType": "auto",
    "x": 670,
    "y": 330,
    "wires": []
  }
]
HTTP Request
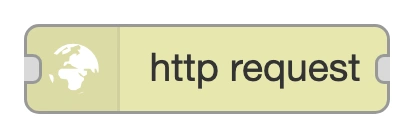
The other direction: Node-RED as a client, calling somebody else's API. Configure the URL, method, headers and authentication, and when a message hits it, off it goes.
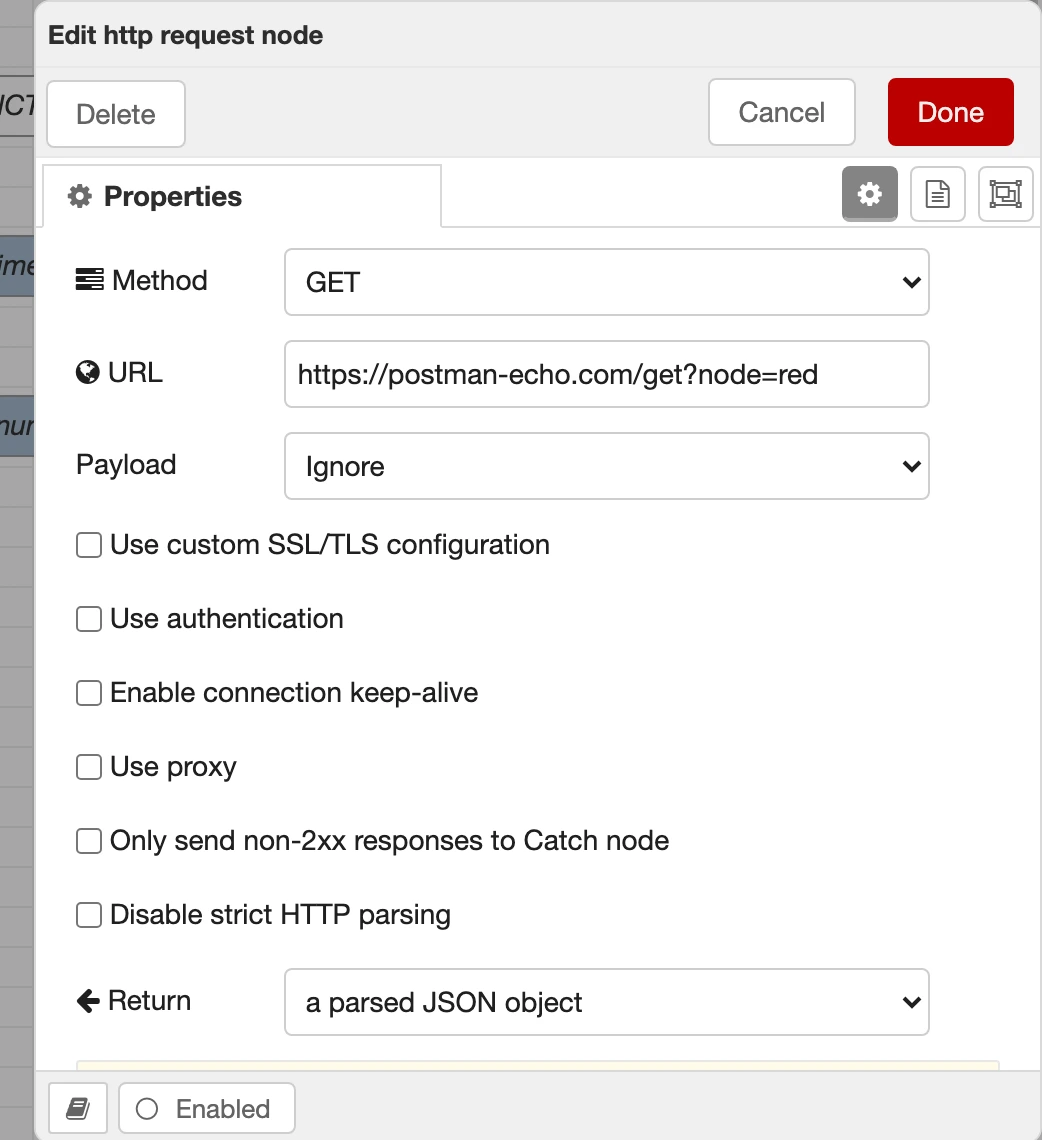
Notice the Use proxy checkbox: that's where the HTTP Proxy config gets attached. Also worth setting the return type to "a parsed JSON object" if you're calling a JSON API, which saves you piping it through a JSON node afterwards.
The bottom flow on that tab calls a public test API and dumps the response:
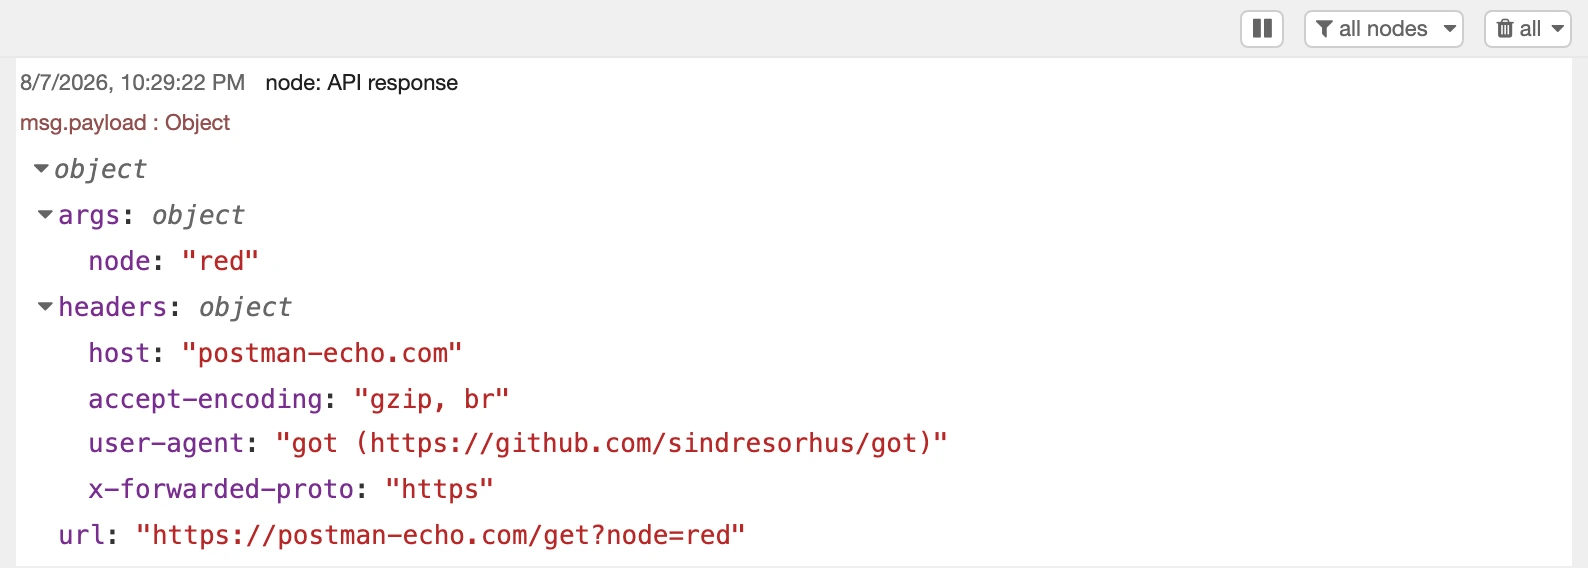
Common mistake: leaving the return type as a string and then wondering why msg.payload.someField is undefined. Either set it to "a parsed JSON object" here, or put a JSON node after it.
Import this flow to get an outgoing call to a public test API, with the response parsed straight into an object.
Calls an external test service (
postman-echo.com), so it needs outbound internet access. If you're behind a proxy, this is the node that needs the proxy config from earlier.
JSON (75 lines)
[
  {
    "id": "n_httpreq",
    "type": "tab",
    "label": "HTTP Request",
    "disabled": false,
    "info": "Calling somebody else's API."
  },
  {
    "id": "hr_c",
    "type": "comment",
    "z": "n_httpreq",
    "name": "HTTP REQUEST - Node-RED as the client",
    "x": 280,
    "y": 60,
    "wires": []
  },
  {
    "id": "hr_in",
    "type": "inject",
    "z": "n_httpreq",
    "name": "fetch it",
    "props": [
      {
        "p": "payload"
      },
      {
        "p": "topic",
        "vt": "str"
      }
    ],
    "repeat": "",
    "crontab": "",
    "once": false,
    "onceDelay": 0.1,
    "topic": "",
    "payload": "",
    "payloadType": "date",
    "x": 180,
    "y": 160,
    "wires": [["hr_req"]]
  },
  {
    "id": "hr_req",
    "type": "http request",
    "z": "n_httpreq",
    "name": "GET postman-echo",
    "method": "GET",
    "ret": "obj",
    "paytoqs": "ignore",
    "url": "https://postman-echo.com/get?node=red",
    "tls": "",
    "proxy": "",
    "headers": [],
    "x": 410,
    "y": 160,
    "wires": [["hr_dbg"]]
  },
  {
    "id": "hr_dbg",
    "type": "debug",
    "z": "n_httpreq",
    "name": "parsed JSON response",
    "active": true,
    "tosidebar": true,
    "console": false,
    "tostatus": false,
    "complete": "payload",
    "targetType": "msg",
    "statusType": "auto",
    "x": 680,
    "y": 160,
    "wires": []
  }
]
WebSocket In and Out
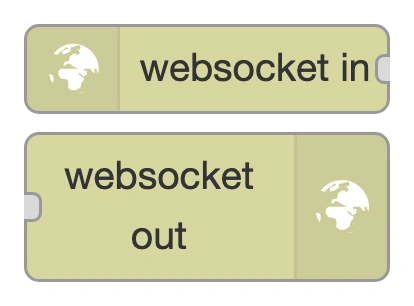
Real-time, bidirectional communication. WebSocket In either listens for incoming connections (server mode) or connects out to an external URL (client mode). WebSocket Out sends messages the other way: to the server you're connected to in client mode, and in server mode to either one client or all of them.
Think of it as MQTT without a broker: direct, persistent, two-way. Great for live dashboards where you want instant updates rather than polling.
The mode isn't set on the node itself, it's set by which configuration node you attach. There are two of them:
- WebSocket Listener — server mode. You give it a path like
/ws/demoand Node-RED serves a WebSocket endpoint there, on the same port as the editor. - WebSocket Client — client mode. You give it a full URL like
ws://localhost:1880/ws/demoand Node-RED connects out to it.
That listener path is relative and works anywhere. The client URL is the awkward one: Node-RED requires an absolute ws://host:port/path, with no way to say "wherever I'm running". Which matters for the demo below, because it's a flow that talks to itself.
One gotcha worth knowing in server mode: reply or broadcast is decided by msg._session. WebSocket In stamps that property onto every message it emits, identifying the client the message came from. If it's still there when the message reaches WebSocket Out, the reply goes back to that client alone. If it's missing — because you built the message yourself, or something in between dropped it — the payload goes to every connected client.
So: keep msg._session intact to reply, leave it off to broadcast. If a private reply is somehow reaching everybody, that property has gone missing somewhere in your flow.
Import this flow to get a full round trip: a listener on /ws/demo, and a client that connects straight back to it and sends a message.
Assumes Node-RED is on port 1880. The client config is set to
ws://localhost:1880/ws/demo, the default. If your editor is on a different port, edit it, or the client will never connect and the inject will do nothing. Open the config node namedEDIT ME - ws://localhost:1880/ws/demoand change the URL to match whatever address you use to reach the editor. My own Node-RED runs in Docker mapped to 1881, so on my machine this readsws://localhost:1881/ws/demo— which is exactly the sort of difference that catches people out.
JSON (99 lines)
[
  {
    "id": "n_ws",
    "type": "tab",
    "label": "WebSocket",
    "disabled": false,
    "info": "A server and a message pushed to it."
  },
  {
    "id": "cfg_ws",
    "type": "websocket-listener",
    "path": "/ws/demo",
    "wholemsg": "false"
  },
  {
    "id": "cfg_wsc",
    "type": "websocket-client",
    "name": "EDIT ME - ws://localhost:1880/ws/demo",
    "path": "ws://localhost:1880/ws/demo",
    "tls": "",
    "wholemsg": "false",
    "hb": "",
    "subprotocol": "",
    "headers": []
  },
  {
    "id": "ws_c",
    "type": "comment",
    "z": "n_ws",
    "name": "WEBSOCKET - listening on /ws/demo, and a client connecting back to it",
    "info": "CHECK THE PORT FIRST.\n\nThe client config node is set to ws://localhost:1880/ws/demo, which is the Node-RED default. If you reach the editor on a different port, open the config node named 'EDIT ME' and change the URL to match - otherwise the client never connects and the inject does nothing.\n\nThe listener half needs no editing: its path is relative to whatever port Node-RED is already on.",
    "x": 280,
    "y": 60,
    "wires": []
  },
  {
    "id": "ws_in",
    "type": "websocket in",
    "z": "n_ws",
    "name": "server: <- /ws/demo",
    "server": "cfg_ws",
    "client": "",
    "x": 230,
    "y": 150,
    "wires": [["ws_dbg"]]
  },
  {
    "id": "ws_dbg",
    "type": "debug",
    "z": "n_ws",
    "name": "server received it",
    "active": true,
    "tosidebar": true,
    "console": false,
    "tostatus": false,
    "complete": "payload",
    "targetType": "msg",
    "statusType": "auto",
    "x": 500,
    "y": 150,
    "wires": []
  },
  {
    "id": "ws_inj",
    "type": "inject",
    "z": "n_ws",
    "name": "send from the client",
    "props": [
      {
        "p": "payload"
      },
      {
        "p": "topic",
        "vt": "str"
      }
    ],
    "repeat": "",
    "crontab": "",
    "once": false,
    "onceDelay": 0.1,
    "topic": "",
    "payload": "hello over websockets",
    "payloadType": "str",
    "x": 230,
    "y": 240,
    "wires": [["ws_out"]]
  },
  {
    "id": "ws_out",
    "type": "websocket out",
    "z": "n_ws",
    "name": "client: -> /ws/demo",
    "server": "",
    "client": "cfg_wsc",
    "x": 500,
    "y": 240,
    "wires": []
  }
]
TCP In and Out
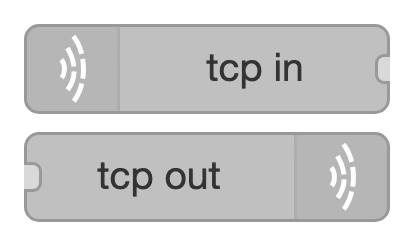
Raw TCP sockets, and there are three nodes here, not two. TCP In and TCP Out handle one-way traffic; TCP Request (next section) handles the send-then-wait-for-a-reply pattern.
TCP In is either a server listening on a port, or a client connecting out and receiving whatever the other end sends. TCP Out sends data: to a host and port as a client, to all connected clients as a server, or back down the socket a message arrived on ("reply" mode, which is how you build a server that answers).
These work at the byte-stream level, so you may need to handle your own message framing. TCP doesn't preserve message boundaries — two sends can arrive as one lump, or one send can arrive in pieces — which is why the nodes offer "split on a character" and "fixed number of bytes" options. Reach for them when you're talking to custom hardware, legacy systems, or anything with a bespoke protocol.
Import this flow to get a listener on port 5051 and a client that sends it some bytes.
Self-contained, assuming port 5051 is free. Everything runs inside your own Node-RED. If something else on your machine already has that port, the TCP In node will report an error on deploy — open both TCP nodes and change 5051 to another free port above 1024 (they have to match).
JSON (93 lines)
[
  {
    "id": "n_tcp",
    "type": "tab",
    "label": "TCP",
    "disabled": false,
    "info": "A socket server talking to itself."
  },
  {
    "id": "tc_c",
    "type": "comment",
    "z": "n_tcp",
    "name": "TCP - listener on 5051, and a client sending to it",
    "x": 280,
    "y": 60,
    "wires": []
  },
  {
    "id": "tc_in",
    "type": "tcp in",
    "z": "n_tcp",
    "name": "listen on 5051",
    "server": "server",
    "host": "",
    "port": "5051",
    "datamode": "stream",
    "datatype": "utf8",
    "newline": "",
    "topic": "",
    "base64": false,
    "tls": "",
    "trim": false,
    "x": 210,
    "y": 150,
    "wires": [["tc_dbg"]]
  },
  {
    "id": "tc_dbg",
    "type": "debug",
    "z": "n_tcp",
    "name": "bytes arrived",
    "active": true,
    "tosidebar": true,
    "console": false,
    "tostatus": false,
    "complete": "payload",
    "targetType": "msg",
    "statusType": "auto",
    "x": 480,
    "y": 150,
    "wires": []
  },
  {
    "id": "tc_inj",
    "type": "inject",
    "z": "n_tcp",
    "name": "send some bytes",
    "props": [
      {
        "p": "payload"
      },
      {
        "p": "topic",
        "vt": "str"
      }
    ],
    "repeat": "",
    "crontab": "",
    "once": false,
    "onceDelay": 0.1,
    "topic": "",
    "payload": "hello over tcp",
    "payloadType": "str",
    "x": 210,
    "y": 240,
    "wires": [["tc_out"]]
  },
  {
    "id": "tc_out",
    "type": "tcp out",
    "z": "n_tcp",
    "name": "-> localhost:5051",
    "host": "localhost",
    "port": "5051",
    "beserver": "client",
    "base64": false,
    "end": true,
    "tls": "",
    "x": 490,
    "y": 240,
    "wires": []
  }
]
TCP Request
The one people miss. TCP In and TCP Out are each one-way, so building "send this, wait for the answer" out of them means wiring two nodes together and somehow matching replies to requests. TCP Request does the whole exchange in a single node.
It opens (or reuses) a connection to the server you configure, writes msg.payload to it, waits for the response, and emits that response as msg.payload on its one output. Request in, reply out.
How it differs from the other two:
| Direction | Outputs | |
|---|---|---|
| TCP In | receives only | emits whatever arrives |
| TCP Out | sends only | none |
| TCP Request | sends and receives | emits the reply to your request |
The setting that actually matters is when to stop waiting, because TCP has no idea where a reply ends. You get five choices: after a fixed time, after a specific character arrives (a newline, usually), after a set number of bytes, never (keep the connection open and stream everything back), or don't wait at all. Pick the one that matches the protocol you're talking to. Getting this wrong is the single most common reason a TCP Request node appears to hang or returns half an answer.
You can also choose whether the reply comes back as a string or a raw Buffer. Buffer is the default, which surprises people who expected text — set it to string if you're talking a text protocol.
Typical uses: querying a device or service that speaks a simple request/response protocol over TCP, like older industrial hardware, a serial-to-network bridge, or a homebrew daemon.
Import this flow for a complete round trip that doesn't need anything outside Node-RED. It builds its own TCP server out of core nodes: a TCP In listening on 5053, a Function node that turns whatever arrives into a PONG: reply, and a TCP Out in "reply" mode sending it back down the same socket. Then an Inject fires PING through a TCP Request node, and the Debug node shows the answer coming back.
Self-contained, assuming port 5053 is free. No broker, no internet, no external server — the flow talks to itself. If port 5053 is taken on your machine, open the TCP In node and the TCP Request node and change both to another free port above 1024. They have to match.
Both halves live on one tab. The top row is the server, the bottom row is the client:
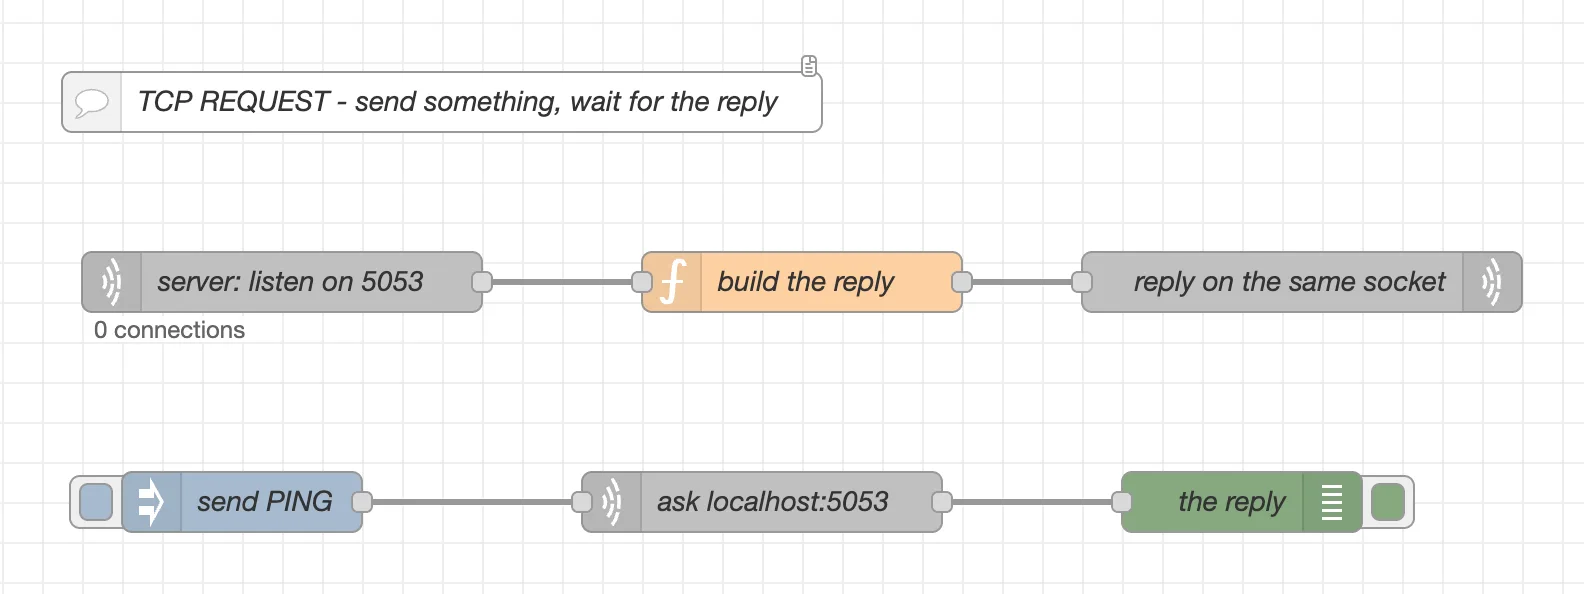
Send PING, and PONG: PING comes back:

JSON (127 lines)
[
  {
    "id": "n_tcpreq",
    "type": "tab",
    "label": "TCP Request",
    "disabled": false,
    "info": "A request/response round trip over raw TCP."
  },
  {
    "id": "tr_c",
    "type": "comment",
    "z": "n_tcpreq",
    "name": "TCP REQUEST - send something, wait for the reply",
    "info": "TOPOLOGY: this tab contains both halves, so it needs nothing outside Node-RED.\n\nTop row is a tiny TCP server built from core nodes:\n  tcp in (server, port 5053) -> function (build a reply) -> tcp out (reply mode)\n\nBottom row is the client:\n  inject 'PING' -> tcp request (localhost:5053) -> debug\n\nPORT: 5053 is used because it is above 1024 (no root needed) and unlikely to be busy. If it is taken on your machine, change it in BOTH the 'tcp in' node and the 'tcp request' node - they must match.\n\nThe tcp request node is set to stop waiting when it sees a newline, which is why the reply ends with one.",
    "x": 300,
    "y": 60,
    "wires": []
  },
  {
    "id": "tr_srv_in",
    "type": "tcp in",
    "z": "n_tcpreq",
    "name": "server: listen on 5053",
    "server": "server",
    "host": "",
    "port": "5053",
    "datamode": "stream",
    "datatype": "utf8",
    "newline": "\\n",
    "topic": "",
    "base64": false,
    "tls": "",
    "trim": false,
    "x": 220,
    "y": 150,
    "wires": [["tr_srv_fn"]]
  },
  {
    "id": "tr_srv_fn",
    "type": "function",
    "z": "n_tcpreq",
    "name": "build the reply",
    "func": "// Echo it back with a prefix. The trailing newline is what tells\n// the tcp request node that the reply is finished.\nmsg.payload = \"PONG: \" + String(msg.payload).trim() + \"\\n\";\nreturn msg;",
    "outputs": 1,
    "timeout": 0,
    "noerr": 0,
    "initialize": "",
    "finalize": "",
    "libs": [],
    "x": 480,
    "y": 150,
    "wires": [["tr_srv_out"]]
  },
  {
    "id": "tr_srv_out",
    "type": "tcp out",
    "z": "n_tcpreq",
    "name": "reply on the same socket",
    "host": "",
    "port": "",
    "beserver": "reply",
    "base64": false,
    "end": false,
    "tls": "",
    "x": 730,
    "y": 150,
    "wires": []
  },
  {
    "id": "tr_inj",
    "type": "inject",
    "z": "n_tcpreq",
    "name": "send PING",
    "props": [
      {
        "p": "payload"
      },
      {
        "p": "topic",
        "vt": "str"
      }
    ],
    "repeat": "",
    "crontab": "",
    "once": false,
    "onceDelay": 0.1,
    "topic": "",
    "payload": "PING\n",
    "payloadType": "str",
    "x": 200,
    "y": 260,
    "wires": [["tr_req"]]
  },
  {
    "id": "tr_req",
    "type": "tcp request",
    "z": "n_tcpreq",
    "name": "ask localhost:5053",
    "server": "localhost",
    "port": "5053",
    "out": "char",
    "ret": "string",
    "splitc": "\\n",
    "newline": "",
    "trim": false,
    "tls": "",
    "x": 460,
    "y": 260,
    "wires": [["tr_dbg"]]
  },
  {
    "id": "tr_dbg",
    "type": "debug",
    "z": "n_tcpreq",
    "name": "the reply",
    "active": true,
    "tosidebar": true,
    "console": false,
    "tostatus": false,
    "complete": "payload",
    "targetType": "msg",
    "statusType": "auto",
    "x": 700,
    "y": 260,
    "wires": []
  }
]
Common mistake: wiring a TCP Request node to a server that never sends a terminating character, with the node set to "wait for a character". It'll sit there until it times out. If you're not sure what the server sends, start with the fixed-time option, look at what actually comes back, then tighten it up.
UDP In and Out
Connectionless packets. UDP In listens on a port for datagrams, which is good for broadcasts and UDP-based sensors. UDP Out fires a single packet at a host and port.
No sustained connection, no delivery guarantee, just fire-and-forget. Wake-on-LAN is the classic use case, and it's dead simple for that.
Common mistake: expecting UDP to behave like TCP. There's no connection to fail, so a UDP Out node pointed at a host that isn't listening reports no error at all — the packet just disappears. If a UDP flow seems to do nothing, check the receiving end first.
Import this flow to get a listener on port 5052 and a datagram fired straight at it.
Self-contained, assuming port 5052 is free. If it's taken, change it in both the UDP In and UDP Out nodes.
JSON (90 lines)
[
  {
    "id": "n_udp",
    "type": "tab",
    "label": "UDP",
    "disabled": false,
    "info": "Fire-and-forget datagrams."
  },
  {
    "id": "ud_c",
    "type": "comment",
    "z": "n_udp",
    "name": "UDP - listener on 5052, and a packet sent to it",
    "x": 280,
    "y": 60,
    "wires": []
  },
  {
    "id": "ud_in",
    "type": "udp in",
    "z": "n_udp",
    "name": "listen on 5052",
    "iface": "",
    "port": "5052",
    "ipv": "udp4",
    "multicast": "false",
    "group": "",
    "datatype": "utf8",
    "x": 210,
    "y": 150,
    "wires": [["ud_dbg"]]
  },
  {
    "id": "ud_dbg",
    "type": "debug",
    "z": "n_udp",
    "name": "packet arrived",
    "active": true,
    "tosidebar": true,
    "console": false,
    "tostatus": false,
    "complete": "payload",
    "targetType": "msg",
    "statusType": "auto",
    "x": 480,
    "y": 150,
    "wires": []
  },
  {
    "id": "ud_inj",
    "type": "inject",
    "z": "n_udp",
    "name": "send a packet",
    "props": [
      {
        "p": "payload"
      },
      {
        "p": "topic",
        "vt": "str"
      }
    ],
    "repeat": "",
    "crontab": "",
    "once": false,
    "onceDelay": 0.1,
    "topic": "",
    "payload": "hello over udp",
    "payloadType": "str",
    "x": 210,
    "y": 240,
    "wires": [["ud_out"]]
  },
  {
    "id": "ud_out",
    "type": "udp out",
    "z": "n_udp",
    "name": "-> 127.0.0.1:5052",
    "addr": "127.0.0.1",
    "iface": "",
    "port": "5052",
    "ipv": "udp4",
    "outport": "",
    "base64": false,
    "multicast": "false",
    "x": 490,
    "y": 240,
    "wires": []
  }
]
Part 3: Parser, Sequence and Storage nodes
The final stretch. These are all about data: converting between formats, splitting and recombining message streams, and reading and writing files.
Parser nodes
Further reading: Working with messages in the Node-RED docs, on message structure and property types.
CSV
Converts between CSV text and JavaScript objects, in both directions. Feed it a CSV string and it gives you objects; feed it an array of objects and it gives you CSV text.
You configure the delimiter and either name your columns or tell it to use the first row as headers. Useful for reading data files, and for logging sensor readings out to something you can open in a spreadsheet.
Import this flow to get both directions: CSV text parsed into objects, and objects rendered back out as CSV.
JSON (138 lines)
[
  {
    "id": "n_csv",
    "type": "tab",
    "label": "CSV",
    "disabled": false,
    "info": "Text to objects, and back again."
  },
  {
    "id": "cs_c",
    "type": "comment",
    "z": "n_csv",
    "name": "CSV - parse in one direction, generate in the other",
    "x": 280,
    "y": 60,
    "wires": []
  },
  {
    "id": "cs_in1",
    "type": "inject",
    "z": "n_csv",
    "name": "some CSV text",
    "props": [
      {
        "p": "payload"
      },
      {
        "p": "topic",
        "vt": "str"
      }
    ],
    "repeat": "",
    "crontab": "",
    "once": false,
    "onceDelay": 0.1,
    "topic": "",
    "payload": "room,temp\nkitchen,21.5\nhall,19",
    "payloadType": "str",
    "x": 200,
    "y": 140,
    "wires": [["cs_parse"]]
  },
  {
    "id": "cs_parse",
    "type": "csv",
    "z": "n_csv",
    "name": "CSV -> objects",
    "sep": ",",
    "hdrin": true,
    "hdrout": "none",
    "multi": "mult",
    "ret": "\\n",
    "temp": "",
    "skip": "0",
    "strings": true,
    "include_empty_strings": false,
    "include_null_values": false,
    "x": 460,
    "y": 140,
    "wires": [["cs_dbg1"]]
  },
  {
    "id": "cs_dbg1",
    "type": "debug",
    "z": "n_csv",
    "name": "array of objects",
    "active": true,
    "tosidebar": true,
    "console": false,
    "tostatus": false,
    "complete": "payload",
    "targetType": "msg",
    "statusType": "auto",
    "x": 710,
    "y": 140,
    "wires": []
  },
  {
    "id": "cs_in2",
    "type": "inject",
    "z": "n_csv",
    "name": "an array of objects",
    "props": [
      {
        "p": "payload"
      },
      {
        "p": "topic",
        "vt": "str"
      }
    ],
    "repeat": "",
    "crontab": "",
    "once": false,
    "onceDelay": 0.1,
    "topic": "",
    "payload": "[{\"room\":\"kitchen\",\"temp\":21.5},{\"room\":\"hall\",\"temp\":19}]",
    "payloadType": "json",
    "x": 200,
    "y": 230,
    "wires": [["cs_build"]]
  },
  {
    "id": "cs_build",
    "type": "csv",
    "z": "n_csv",
    "name": "objects -> CSV",
    "sep": ",",
    "hdrin": false,
    "hdrout": "all",
    "multi": "one",
    "ret": "\\n",
    "temp": "room,temp",
    "skip": "0",
    "strings": true,
    "include_empty_strings": false,
    "include_null_values": false,
    "x": 460,
    "y": 230,
    "wires": [["cs_dbg2"]]
  },
  {
    "id": "cs_dbg2",
    "type": "debug",
    "z": "n_csv",
    "name": "CSV text",
    "active": true,
    "tosidebar": true,
    "console": false,
    "tostatus": false,
    "complete": "payload",
    "targetType": "msg",
    "statusType": "auto",
    "x": 710,
    "y": 230,
    "wires": []
  }
]
HTML
Extracts parts of an HTML document using CSS selectors. Web scraping in a node.
Give it an HTML string (usually one you've just fetched with HTTP Request) plus a selector, and it pulls out the matching elements. You can get an array of all matches, or emit one message per match. Same selectors you'd use in CSS or jQuery.
Import this flow to get a scrap of HTML and a selector pulling both prices out of it.
JSON (73 lines)
[
  {
    "id": "n_html",
    "type": "tab",
    "label": "HTML",
    "disabled": false,
    "info": "Pull values out of a page."
  },
  {
    "id": "ht_c",
    "type": "comment",
    "z": "n_html",
    "name": "HTML - CSS selectors, like jQuery",
    "x": 280,
    "y": 60,
    "wires": []
  },
  {
    "id": "ht_in",
    "type": "inject",
    "z": "n_html",
    "name": "a scrap of HTML",
    "props": [
      {
        "p": "payload"
      },
      {
        "p": "topic",
        "vt": "str"
      }
    ],
    "repeat": "",
    "crontab": "",
    "once": false,
    "onceDelay": 0.1,
    "topic": "",
    "payload": "<div><h1>Foxy's Lab</h1><p class='price'>19.99</p><p class='price'>4.50</p></div>",
    "payloadType": "str",
    "x": 200,
    "y": 160,
    "wires": [["ht_html"]]
  },
  {
    "id": "ht_html",
    "type": "html",
    "z": "n_html",
    "name": "select .price",
    "property": "payload",
    "outproperty": "payload",
    "tag": ".price",
    "ret": "text",
    "as": "single",
    "x": 450,
    "y": 160,
    "wires": [["ht_dbg"]]
  },
  {
    "id": "ht_dbg",
    "type": "debug",
    "z": "n_html",
    "name": "matches",
    "active": true,
    "tosidebar": true,
    "console": false,
    "tostatus": false,
    "complete": "payload",
    "targetType": "msg",
    "statusType": "auto",
    "x": 690,
    "y": 160,
    "wires": []
  }
]
JSON
Converts between JSON strings and JavaScript objects. Give it a string, it parses; give it an object, it stringifies.
The main use is right after an HTTP Request that returns JSON as text. Pipe it through a JSON node and you've got something you can actually work with. It's a safe parser, which beats hand-rolling JSON.parse in a Function node and hoping the input is well-formed.
Import this flow to get a JSON string parsed into a real object you can reach into.
JSON (71 lines)
[
  {
    "id": "n_json",
    "type": "tab",
    "label": "JSON",
    "disabled": false,
    "info": "String to object, and back."
  },
  {
    "id": "js_c",
    "type": "comment",
    "z": "n_json",
    "name": "JSON - safe parsing without a Function node",
    "x": 280,
    "y": 60,
    "wires": []
  },
  {
    "id": "js_in",
    "type": "inject",
    "z": "n_json",
    "name": "a JSON string",
    "props": [
      {
        "p": "payload"
      },
      {
        "p": "topic",
        "vt": "str"
      }
    ],
    "repeat": "",
    "crontab": "",
    "once": false,
    "onceDelay": 0.1,
    "topic": "",
    "payload": "{\"room\":\"kitchen\",\"temp\":21.5}",
    "payloadType": "str",
    "x": 200,
    "y": 160,
    "wires": [["js_json"]]
  },
  {
    "id": "js_json",
    "type": "json",
    "z": "n_json",
    "name": "parse it",
    "property": "payload",
    "action": "",
    "pretty": false,
    "x": 440,
    "y": 160,
    "wires": [["js_dbg"]]
  },
  {
    "id": "js_dbg",
    "type": "debug",
    "z": "n_json",
    "name": "now an object",
    "active": true,
    "tosidebar": true,
    "console": false,
    "tostatus": false,
    "complete": "true",
    "targetType": "full",
    "statusType": "auto",
    "x": 660,
    "y": 160,
    "wires": []
  }
]
XML
Same idea for XML, with one wrinkle that trips up absolutely everybody.
It uses the xml2js library underneath, and xml2js assumes any element could appear more than once. XML gives it no way to know whether <name> is a one-off or the first of fifty. So by default it wraps every element in an array, just in case.
Which means this:
<person><name>Alice</name><age>30</age></person>...does not become {person: {name: "Alice"}}. It actually becomes this:
{ "person": { "name": ["Alice"], "age": ["30"] } }Here's the debug panel proving it, with the object expanded:
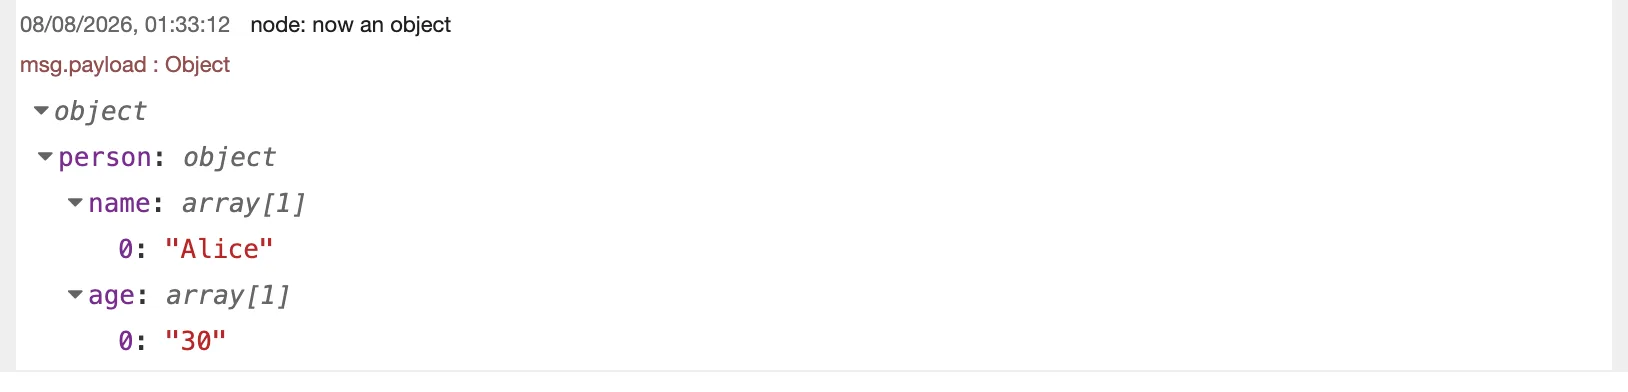
Note the arrays, and note that 30 came back as the string "30" — XML has no number type, so everything arrives as text. The value you're after is msg.payload.person.name[0], not msg.payload.person.name. Forgetting the [0] is the single most common XML node bug.
If you'd rather not deal with the arrays, you can pass xml2js options through on msg.options. Set that before the XML node and the shape changes:
msg.options = { explicitArray: false };
return msg;
With that in place, the same XML gives you {"person":{"name":"Alice","age":"30"}} instead. It's tidier to read, but be careful: an element that genuinely does repeat will now sometimes be a single value and sometimes an array, depending on the document. The default is noisier precisely because it's consistent. For anything where the input might vary, keep the arrays and use [0].
Genuinely useful for SOAP APIs and RSS feeds. Works in reverse too: hand it an object and it generates XML text.
Import this flow to get a scrap of XML turned into nested objects, so you can see the array shape in the debug panel for yourself.
JSON (72 lines)
[
  {
    "id": "n_xml",
    "type": "tab",
    "label": "XML",
    "disabled": false,
    "info": "Angle brackets to objects."
  },
  {
    "id": "xm_c",
    "type": "comment",
    "z": "n_xml",
    "name": "XML - parsed into nested objects, with arrays",
    "info": "Watch the debug output carefully. The result is:\n\n  { person: { name: [\"Alice\"], age: [\"30\"] } }\n\nEvery element is wrapped in an ARRAY, because the xml2js library underneath cannot tell from the XML whether an element repeats. So the value you want is msg.payload.person.name[0], not msg.payload.person.name.\n\nNote also that age is the STRING \"30\" - XML has no number type.\n\nTo get the simpler shape instead, set msg.options = { explicitArray: false } in a Function node before the XML node.",
    "x": 280,
    "y": 60,
    "wires": []
  },
  {
    "id": "xm_in",
    "type": "inject",
    "z": "n_xml",
    "name": "some XML",
    "props": [
      {
        "p": "payload"
      },
      {
        "p": "topic",
        "vt": "str"
      }
    ],
    "repeat": "",
    "crontab": "",
    "once": false,
    "onceDelay": 0.1,
    "topic": "",
    "payload": "<person><name>Alice</name><age>30</age></person>",
    "payloadType": "str",
    "x": 200,
    "y": 160,
    "wires": [["xm_xml"]]
  },
  {
    "id": "xm_xml",
    "type": "xml",
    "z": "n_xml",
    "name": "parse it",
    "property": "payload",
    "attr": "",
    "chr": "",
    "x": 440,
    "y": 160,
    "wires": [["xm_dbg"]]
  },
  {
    "id": "xm_dbg",
    "type": "debug",
    "z": "n_xml",
    "name": "now an object",
    "active": true,
    "tosidebar": true,
    "console": false,
    "tostatus": false,
    "complete": "payload",
    "targetType": "msg",
    "statusType": "auto",
    "x": 670,
    "y": 160,
    "wires": []
  }
]
YAML
The JSON node's cousin, for YAML. Parses YAML strings into objects and stringifies objects into YAML. Handy for reading config files.
Import this flow to get a YAML snippet, list and all, parsed into an object.
JSON (69 lines)
[
  {
    "id": "n_yaml",
    "type": "tab",
    "label": "YAML",
    "disabled": false,
    "info": "Config files to objects."
  },
  {
    "id": "ym_c",
    "type": "comment",
    "z": "n_yaml",
    "name": "YAML - same idea as the JSON node",
    "x": 280,
    "y": 60,
    "wires": []
  },
  {
    "id": "ym_in",
    "type": "inject",
    "z": "n_yaml",
    "name": "some YAML",
    "props": [
      {
        "p": "payload"
      },
      {
        "p": "topic",
        "vt": "str"
      }
    ],
    "repeat": "",
    "crontab": "",
    "once": false,
    "onceDelay": 0.1,
    "topic": "",
    "payload": "room: kitchen\ntemp: 21.5\ntags:\n  - warm\n  - occupied",
    "payloadType": "str",
    "x": 200,
    "y": 160,
    "wires": [["ym_yaml"]]
  },
  {
    "id": "ym_yaml",
    "type": "yaml",
    "z": "n_yaml",
    "name": "parse it",
    "property": "payload",
    "x": 440,
    "y": 160,
    "wires": [["ym_dbg"]]
  },
  {
    "id": "ym_dbg",
    "type": "debug",
    "z": "n_yaml",
    "name": "now an object",
    "active": true,
    "tosidebar": true,
    "console": false,
    "tostatus": false,
    "complete": "payload",
    "targetType": "msg",
    "statusType": "auto",
    "x": 670,
    "y": 160,
    "wires": []
  }
]
Sequence nodes
Further reading: Message sequences in the Node-RED docs, which is the reference for msg.parts.
Split
Takes one message and breaks it into many.
If the payload is an array, you get one message per element. If it's a string, you can split on a character, newlines being the obvious one. If it's an object, you can split it into key/value messages. You can also chunk arrays into fixed-size batches.
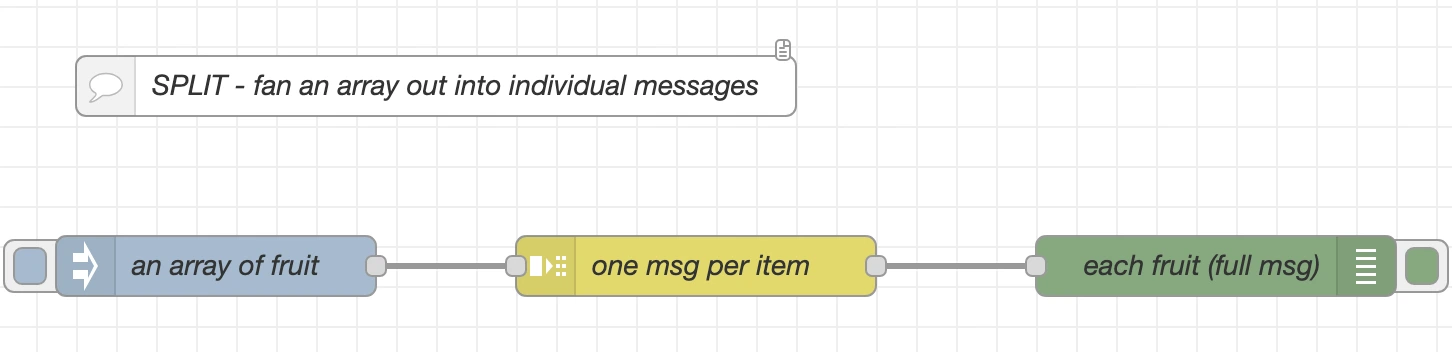
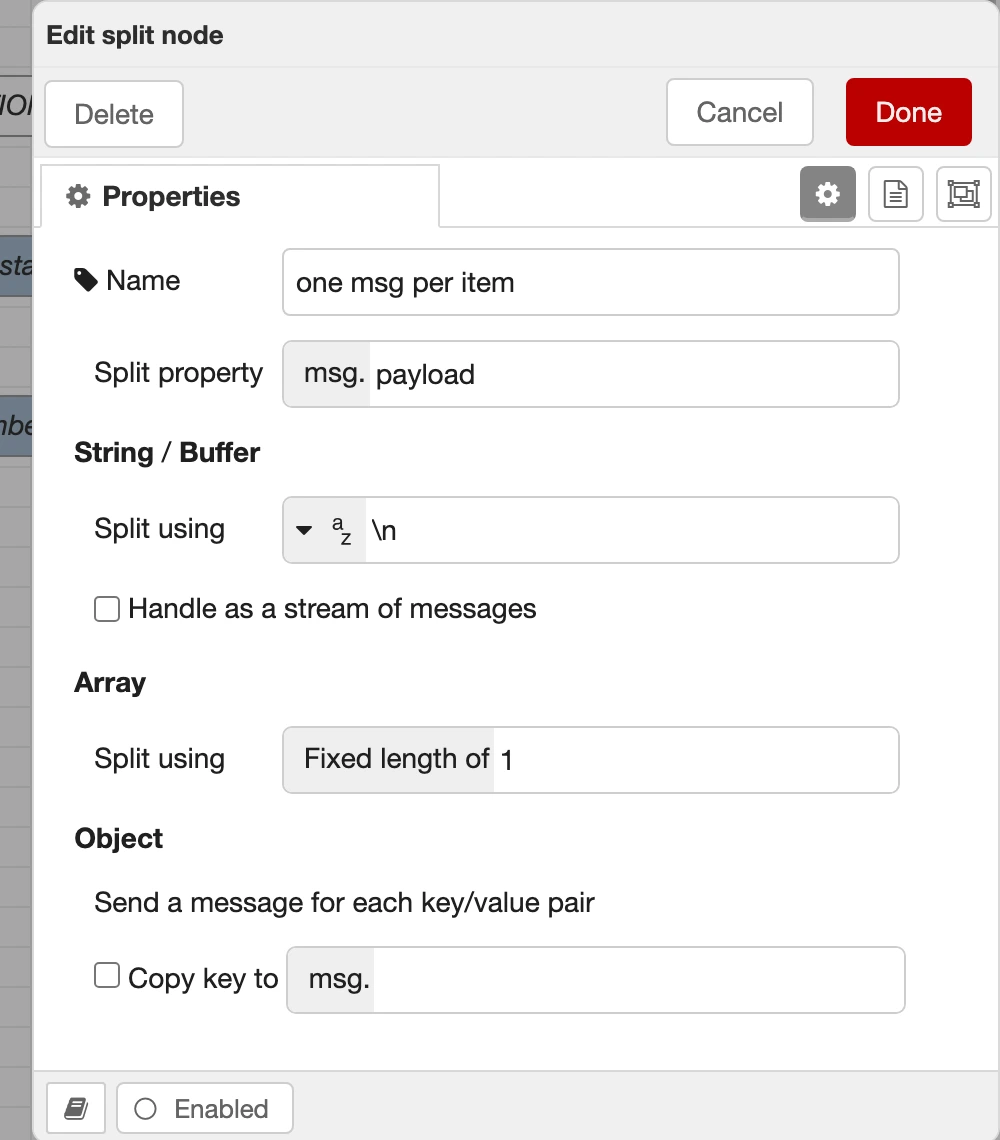
One message goes in with the payload ["apple", "banana", "cherry"], and three messages come out:
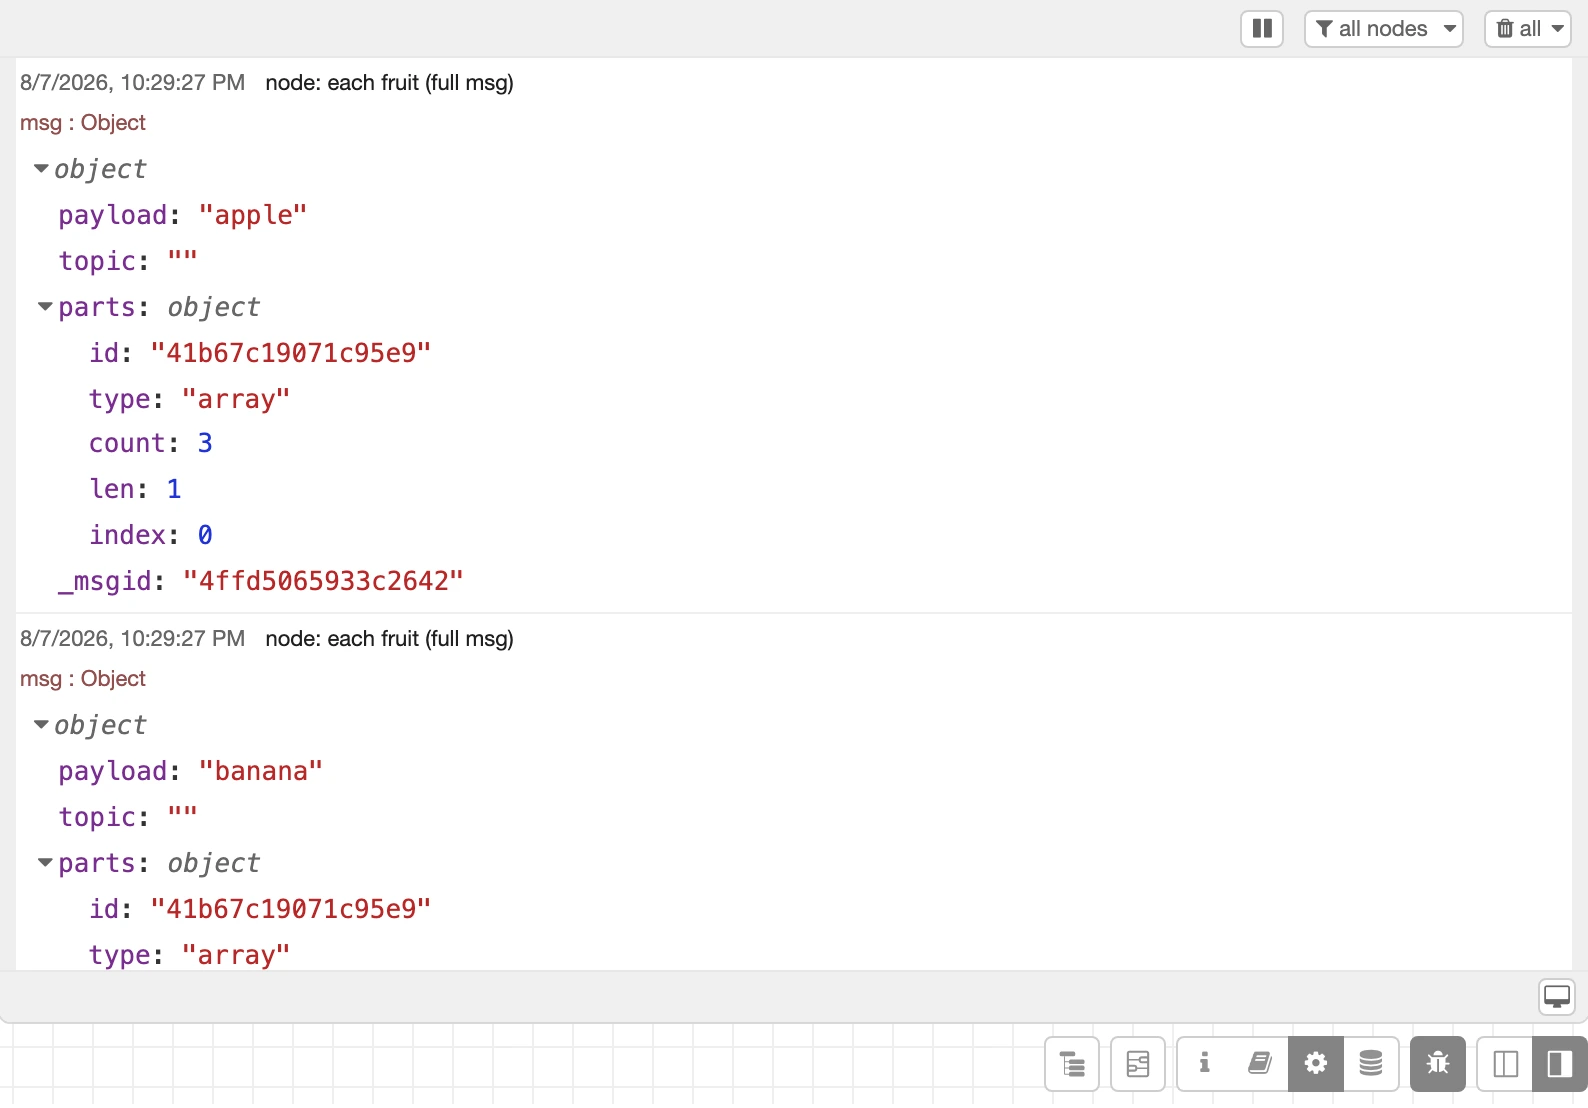
The bit to actually pay attention to is msg.parts. Split adds it to every message it emits, and it's the bookkeeping that makes the whole thing work:
id: a shared identifier tying this group of messages togethertype: what got split (arrayhere)count: how many messages are in the group (3)index: where this particular message sits in the sequencelen: how many items of the original this message accounts for (1, since we're going one at a time)
That's what lets a Join node further down the line put everything back together without you having to explain anything to it.
Import this flow to get the three-item array, the Split node, and a debug node set to show the full message so msg.parts is visible.
JSON (76 lines)
[
  {
    "id": "p3split",
    "type": "tab",
    "label": "6 - Split",
    "disabled": false,
    "info": "One message in, many messages out."
  },
  {
    "id": "sp_c",
    "type": "comment",
    "z": "p3split",
    "name": "SPLIT - fan an array out into individual messages",
    "info": "The inject sends one message whose payload is [\"apple\",\"banana\",\"cherry\"].\n\nSplit turns that into three separate messages. Look at msg.parts in the debug output - that is the bookkeeping that lets a Join node put it all back together later.",
    "x": 300,
    "y": 60,
    "wires": []
  },
  {
    "id": "sp_in",
    "type": "inject",
    "z": "p3split",
    "name": "an array of fruit",
    "props": [
      {
        "p": "payload"
      },
      {
        "p": "topic",
        "vt": "str"
      }
    ],
    "repeat": "",
    "crontab": "",
    "once": false,
    "onceDelay": 0.1,
    "topic": "",
    "payload": "[\"apple\",\"banana\",\"cherry\"]",
    "payloadType": "json",
    "x": 190,
    "y": 150,
    "wires": [["sp_split"]]
  },
  {
    "id": "sp_split",
    "type": "split",
    "z": "p3split",
    "name": "one msg per item",
    "splt": "\\n",
    "spltType": "str",
    "arraySplt": 1,
    "arraySpltType": "len",
    "stream": false,
    "addname": "",
    "property": "payload",
    "x": 430,
    "y": 150,
    "wires": [["sp_dbg"]]
  },
  {
    "id": "sp_dbg",
    "type": "debug",
    "z": "p3split",
    "name": "each fruit (full msg)",
    "active": true,
    "tosidebar": true,
    "console": false,
    "tostatus": false,
    "complete": "true",
    "targetType": "full",
    "statusType": "auto",
    "x": 690,
    "y": 150,
    "wires": []
  }
]
Sort
Sorts arrays or message sequences. Give it an array in the payload and it sorts it: numerically, alphabetically, or by a property you nominate, ascending or descending.
It also understands msg.parts. Feed it a sequence coming out of a Split node and it'll collect the whole lot, sort them, and emit them in the new order.
Import this flow to get an unsorted array of numbers put into ascending order.
JSON (76 lines)
[
  {
    "id": "n_sort",
    "type": "tab",
    "label": "Sort",
    "disabled": false,
    "info": "Put an array in order."
  },
  {
    "id": "so_c",
    "type": "comment",
    "z": "n_sort",
    "name": "SORT - numerically, ascending",
    "x": 280,
    "y": 60,
    "wires": []
  },
  {
    "id": "so_in",
    "type": "inject",
    "z": "n_sort",
    "name": "[5,3,9,1,7]",
    "props": [
      {
        "p": "payload"
      },
      {
        "p": "topic",
        "vt": "str"
      }
    ],
    "repeat": "",
    "crontab": "",
    "once": false,
    "onceDelay": 0.1,
    "topic": "",
    "payload": "[5,3,9,1,7]",
    "payloadType": "json",
    "x": 190,
    "y": 160,
    "wires": [["so_sort"]]
  },
  {
    "id": "so_sort",
    "type": "sort",
    "z": "n_sort",
    "name": "ascending",
    "order": "ascending",
    "as_num": true,
    "target": "payload",
    "targetType": "msg",
    "msgKey": "",
    "msgKeyType": "elem",
    "seqKey": "payload",
    "seqKeyType": "msg",
    "x": 420,
    "y": 160,
    "wires": [["so_dbg"]]
  },
  {
    "id": "so_dbg",
    "type": "debug",
    "z": "n_sort",
    "name": "sorted",
    "active": true,
    "tosidebar": true,
    "console": false,
    "tostatus": false,
    "complete": "payload",
    "targetType": "msg",
    "statusType": "auto",
    "x": 640,
    "y": 160,
    "wires": []
  }
]
Batch
Groups incoming messages into message sequences. Batch by count ("every 10 messages"), by time interval ("whatever turned up in the last 5 seconds"), or by a combination.
Here's the bit that catches people out, and it's worth being precise about: Batch does not give you an array. Feed six messages into a Batch node set to groups of three and six messages come out the other side, one at a time, exactly as they went in. What changes is that each one now carries msg.parts marking it as part of a group — the first group gets index: 0, 1, 2 with count: 3, then the second group starts again at index: 0.
Batch draws the boundaries. It doesn't do the collecting.
To turn each group into a single array, you follow it with a Join node in automatic mode, which reads that msg.parts bookkeeping and assembles each sequence into one message. That's why the demo flow below has both nodes in it, and why the Join is labelled "make each group an array" — it's the one doing that part of the job.
inject [1..6] → split → batch (draws the group boundaries) → join (builds the array) → debug
                        6 msgs in, 6 msgs out,               2 msgs out,
                        now tagged with msg.parts            [1,2,3] and [4,5,6]
It's a funnel with a marker pen, then. Good for bulk operations where sending one request with 100 readings beats sending 100 requests — but remember the Join is what actually hands you the 100 readings in one lump.

Two arrays come out, which is the Join node's doing:
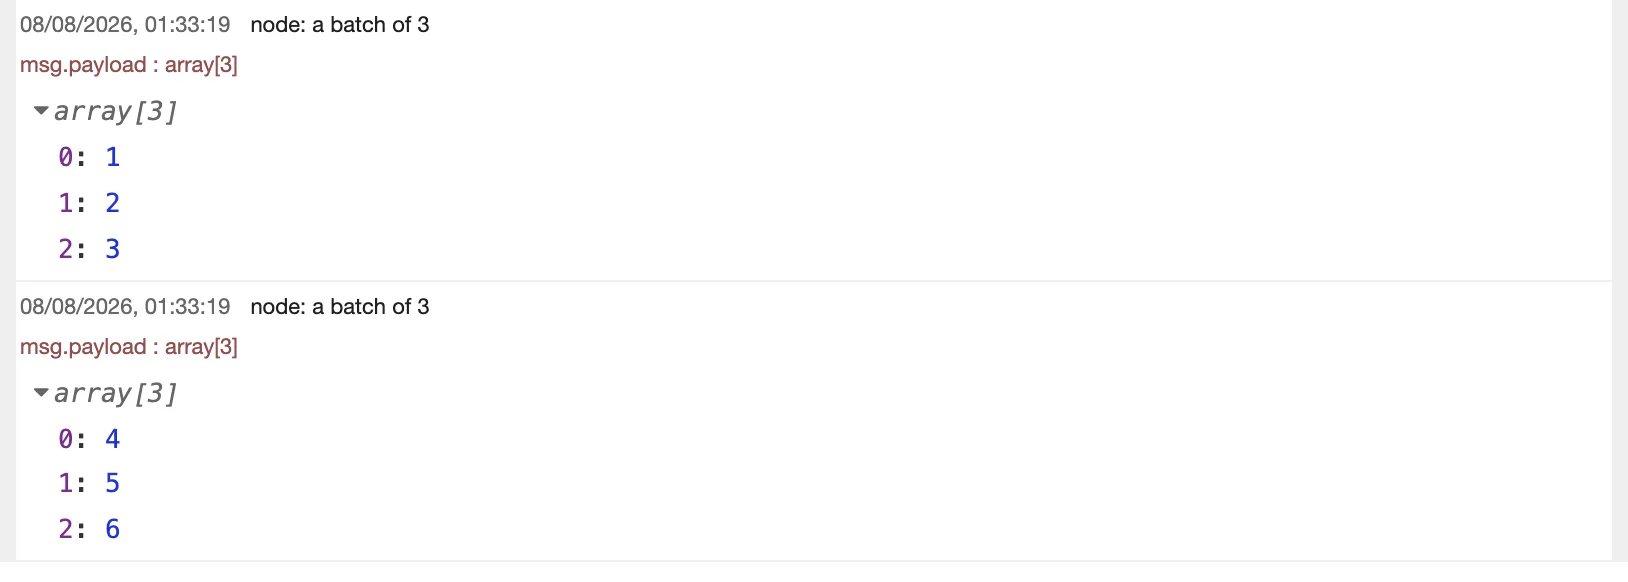
Import this flow to get six messages grouped into two batches of three, so you can see both halves working.
JSON (111 lines)
[
  {
    "id": "n_batch",
    "type": "tab",
    "label": "Batch",
    "disabled": false,
    "info": "Group messages up before processing."
  },
  {
    "id": "ba_c",
    "type": "comment",
    "z": "n_batch",
    "name": "BATCH + JOIN - who does what",
    "info": "Two nodes, two different jobs. Do not credit the array to the Batch node.\n\nSPLIT turns the array [1,2,3,4,5,6] into six separate messages.\n\nBATCH ('groups of 3') draws the boundaries. Six messages go in and six come out, still one at a time - but each now carries msg.parts marking which group it belongs to (index 0,1,2 / count 3, then the next group starts again at 0).\n\nJOIN ('make each group an array') is what actually collects them. In automatic mode it reads msg.parts and emits one message per group, so you get [1,2,3] then [4,5,6].\n\nRemove the Join and you will see six individual numbers in the debug panel, not two arrays. That is the quickest way to prove which node does which.",
    "x": 280,
    "y": 60,
    "wires": []
  },
  {
    "id": "ba_in",
    "type": "inject",
    "z": "n_batch",
    "name": "[1,2,3,4,5,6]",
    "props": [
      {
        "p": "payload"
      },
      {
        "p": "topic",
        "vt": "str"
      }
    ],
    "repeat": "",
    "crontab": "",
    "once": false,
    "onceDelay": 0.1,
    "topic": "",
    "payload": "[1,2,3,4,5,6]",
    "payloadType": "json",
    "x": 180,
    "y": 160,
    "wires": [["ba_split"]]
  },
  {
    "id": "ba_split",
    "type": "split",
    "z": "n_batch",
    "name": "one at a time",
    "splt": "\\n",
    "spltType": "str",
    "arraySplt": 1,
    "arraySpltType": "len",
    "stream": false,
    "addname": "",
    "property": "payload",
    "x": 370,
    "y": 160,
    "wires": [["ba_batch"]]
  },
  {
    "id": "ba_batch",
    "type": "batch",
    "z": "n_batch",
    "name": "groups of 3",
    "mode": "count",
    "count": "3",
    "overlap": "0",
    "interval": "10",
    "allowEmptySequence": false,
    "topics": [],
    "x": 570,
    "y": 160,
    "wires": [["ba_join"]]
  },
  {
    "id": "ba_join",
    "type": "join",
    "z": "n_batch",
    "name": "make each group an array",
    "mode": "auto",
    "build": "object",
    "property": "payload",
    "propertyType": "msg",
    "key": "topic",
    "joiner": "\\n",
    "joinerType": "str",
    "accumulate": false,
    "timeout": "",
    "count": "",
    "reduceRight": false,
    "x": 790,
    "y": 160,
    "wires": [["ba_dbg"]]
  },
  {
    "id": "ba_dbg",
    "type": "debug",
    "z": "n_batch",
    "name": "a batch of 3",
    "active": true,
    "tosidebar": true,
    "console": false,
    "tostatus": false,
    "complete": "payload",
    "targetType": "msg",
    "statusType": "auto",
    "x": 1030,
    "y": 160,
    "wires": []
  }
]
Join
The other half of Split. It recombines multiple messages into one, and it has a few modes:
- Automatic: reads
msg.partsand reassembles the sequence on its own. Waits for all parts, then emits one message. - Manual by count: collect N messages, output an array of their payloads.
- Manual by time: collect for X seconds, output whatever arrived.
- Key/value object: combine messages with different topics into one object, so separate
tempandhumiditymessages become{temp: 22, humidity: 60}.
Here's Split and Join working together, which is where they really earn their keep:

An array of [1,2,3,4,5] gets split into five messages, each one goes through a Function node that doubles it:
msg.payload = msg.payload * 2;
return msg;
...and then Join puts them back into a single array. The mode dropdown is the only setting that matters here:
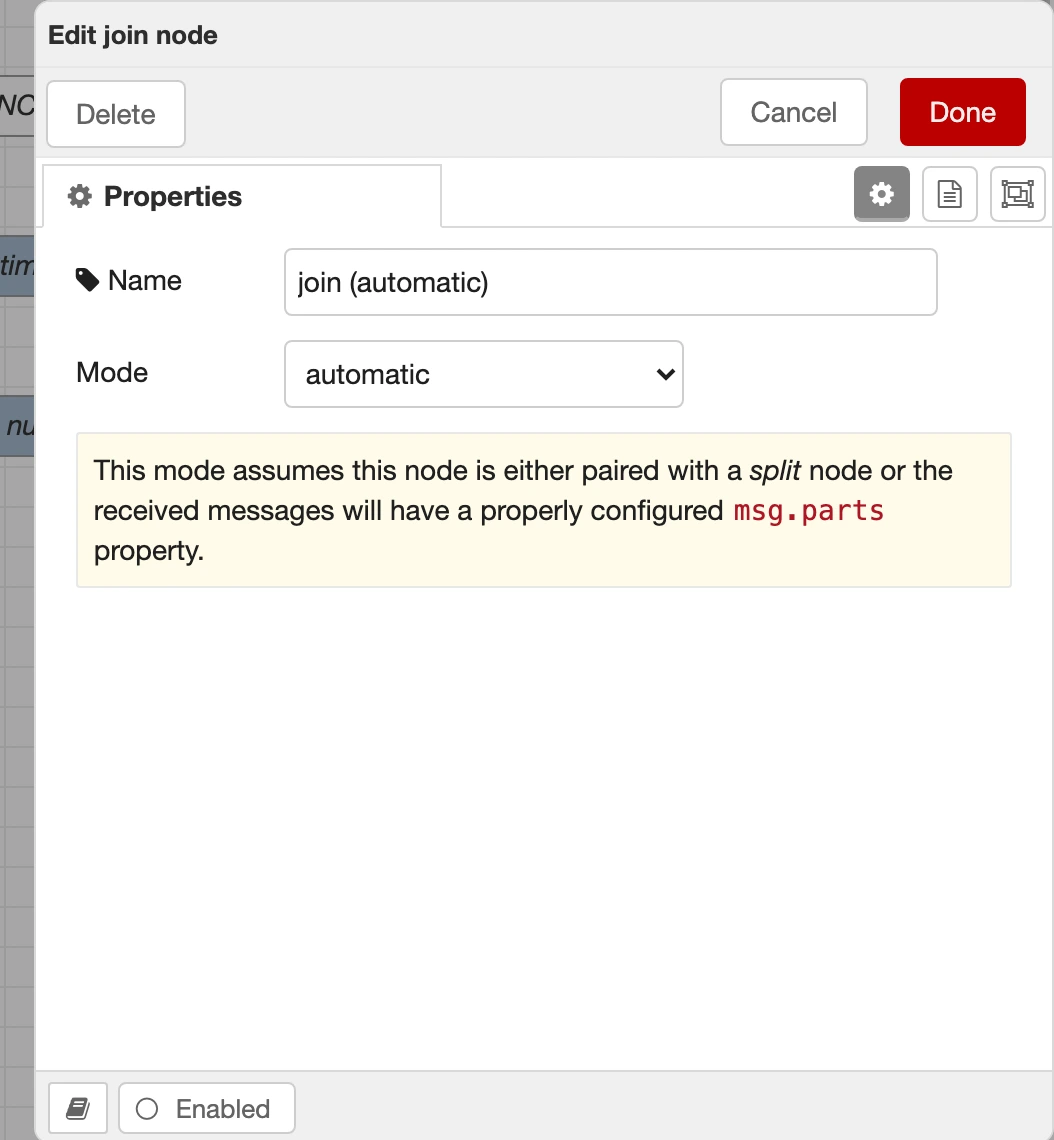
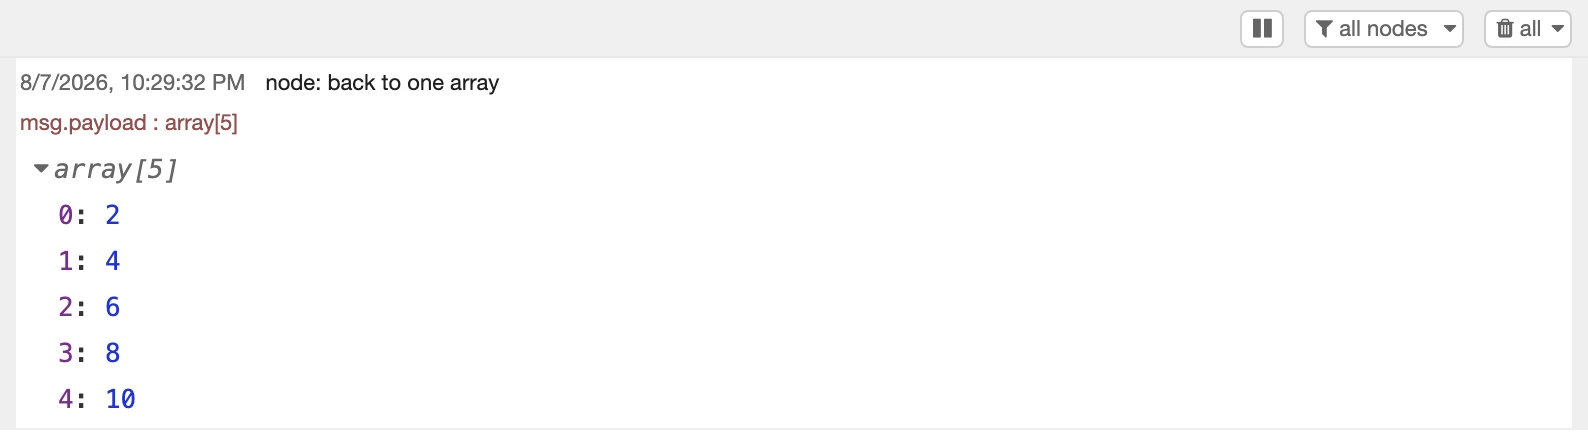
[2,4,6,8,10]. And I never told the Join node how many messages to expect or what order to put them in. It worked all of that out from msg.parts. That's the pattern: fan out, process each item on its own, fan back in.
Import this flow to get the whole fan-out and fan-in: Split, a Function node doubling each item, then Join putting the array back together.
JSON (112 lines)
[
  {
    "id": "p3join",
    "type": "tab",
    "label": "7 - Split + Join",
    "disabled": false,
    "info": "Break it up, work on the pieces, put it back."
  },
  {
    "id": "j_c",
    "type": "comment",
    "z": "p3join",
    "name": "SPLIT -> FUNCTION -> JOIN - process individually, keep the group",
    "info": "Numbers go in as one array, Split makes them individual messages, the Function doubles each one, and Join reassembles them into a single array again.\n\nJoin is set to automatic mode, which means it reads msg.parts and works out on its own how many messages to wait for and what order they go in. You do not have to tell it anything.",
    "x": 300,
    "y": 60,
    "wires": []
  },
  {
    "id": "j_in",
    "type": "inject",
    "z": "p3join",
    "name": "[1,2,3,4,5]",
    "props": [
      {
        "p": "payload"
      },
      {
        "p": "topic",
        "vt": "str"
      }
    ],
    "repeat": "",
    "crontab": "",
    "once": false,
    "onceDelay": 0.1,
    "topic": "",
    "payload": "[1,2,3,4,5]",
    "payloadType": "json",
    "x": 170,
    "y": 160,
    "wires": [["j_split"]]
  },
  {
    "id": "j_split",
    "type": "split",
    "z": "p3join",
    "name": "split",
    "splt": "\\n",
    "spltType": "str",
    "arraySplt": 1,
    "arraySpltType": "len",
    "stream": false,
    "addname": "",
    "property": "payload",
    "x": 360,
    "y": 160,
    "wires": [["j_fn"]]
  },
  {
    "id": "j_fn",
    "type": "function",
    "z": "p3join",
    "name": "double each one",
    "func": "msg.payload = msg.payload * 2;\nreturn msg;",
    "outputs": 1,
    "timeout": 0,
    "noerr": 0,
    "initialize": "",
    "finalize": "",
    "libs": [],
    "x": 540,
    "y": 160,
    "wires": [["j_join"]]
  },
  {
    "id": "j_join",
    "type": "join",
    "z": "p3join",
    "name": "join (automatic)",
    "mode": "auto",
    "build": "object",
    "property": "payload",
    "propertyType": "msg",
    "key": "topic",
    "joiner": "\\n",
    "joinerType": "str",
    "accumulate": false,
    "timeout": "",
    "count": "",
    "reduceRight": false,
    "x": 750,
    "y": 160,
    "wires": [["j_dbg"]]
  },
  {
    "id": "j_dbg",
    "type": "debug",
    "z": "p3join",
    "name": "back to one array",
    "active": true,
    "tosidebar": true,
    "console": false,
    "tostatus": false,
    "complete": "payload",
    "targetType": "msg",
    "statusType": "auto",
    "x": 960,
    "y": 160,
    "wires": []
  }
]
Storage nodes
Further reading: Working with context in the Node-RED docs, for when you want to persist data without going near a file.
Write File
Saves data to a file. Give it a filename and it writes msg.payload to disk. You can overwrite, append, or delete the file, choose the encoding, and decide how newlines are handled when appending.
There's also a "Create directory if it doesn't exist" checkbox, which is switched on in the demos below. Without it, writing to a folder that isn't there yet fails on the first message.
Where files actually land. This is the bit worth understanding before you write anything anywhere:
- A relative path like
demo-data/write-demo.logis resolved against the working directory of the Node-RED process, not against your home folder and not against the flow file. Where that is depends entirely on how Node-RED was started: for a typical systemd service install it's the user directory (~/.node-red), and in the official Docker image it's the app directory inside the container. Both work fine — the point is that "relative" doesn't mean one fixed place, so check rather than assume. - An absolute path like
/var/log/mine.loggoes exactly where it says, if the Node-RED user has permission to write there. In a container, it goes to that path inside the container, which vanishes when the container is rebuilt unless you've mapped a volume. - Permissions vary. Node-RED runs as a specific user, and that user often can't write to system directories. Under Docker it's usually the
node-reduser, not root.
The demos below use a relative demo-data/ folder with directory creation switched on, so they're self-contained wherever you're running: the folder is created next to wherever Node-RED lives, the writer and the reader use the same path so the round trip works regardless, and nothing outside that one folder is touched. When you're done experimenting, delete demo-data and you've cleaned up completely.
Import this flow to get a timestamped line appended to a file every time you hit the inject.
Self-contained, and it writes to disk. It creates a
demo-datafolder relative to the Node-RED working directory and appends todemo-data/write-demo.log. Nothing else is touched. Delete that folder afterwards to tidy up.
JSON (90 lines)
[
  {
    "id": "n_filewrite",
    "type": "tab",
    "label": "Write File",
    "disabled": false,
    "info": "Append a line to a file."
  },
  {
    "id": "fw_c",
    "type": "comment",
    "z": "n_filewrite",
    "name": "WRITE FILE - append mode, one line per trigger",
    "x": 280,
    "y": 60,
    "wires": []
  },
  {
    "id": "fw_in",
    "type": "inject",
    "z": "n_filewrite",
    "name": "log something",
    "props": [
      {
        "p": "payload"
      },
      {
        "p": "topic",
        "vt": "str"
      }
    ],
    "repeat": "",
    "crontab": "",
    "once": false,
    "onceDelay": 0.1,
    "topic": "",
    "payload": "",
    "payloadType": "date",
    "x": 190,
    "y": 160,
    "wires": [["fw_fn"]]
  },
  {
    "id": "fw_fn",
    "type": "function",
    "z": "n_filewrite",
    "name": "build the line",
    "func": "msg.payload = `Reading at ${new Date().toISOString()}`;\nreturn msg;",
    "outputs": 1,
    "timeout": 0,
    "noerr": 0,
    "initialize": "",
    "finalize": "",
    "libs": [],
    "x": 400,
    "y": 160,
    "wires": [["fw_write"]]
  },
  {
    "id": "fw_write",
    "type": "file",
    "z": "n_filewrite",
    "name": "append to demo-data/write-demo.log",
    "filename": "demo-data/write-demo.log",
    "filenameType": "str",
    "appendNewline": true,
    "createDir": true,
    "overwriteFile": "false",
    "encoding": "none",
    "x": 680,
    "y": 160,
    "wires": [["fw_dbg"]]
  },
  {
    "id": "fw_dbg",
    "type": "debug",
    "z": "n_filewrite",
    "name": "what got written",
    "active": true,
    "tosidebar": true,
    "console": false,
    "tostatus": false,
    "complete": "payload",
    "targetType": "msg",
    "statusType": "auto",
    "x": 950,
    "y": 160,
    "wires": []
  }
]
Read File
The opposite. Give it a filename and, when triggered, it reads the contents into msg.payload. You can get a text string, a binary buffer, or stream it line by line.
Here's both together:
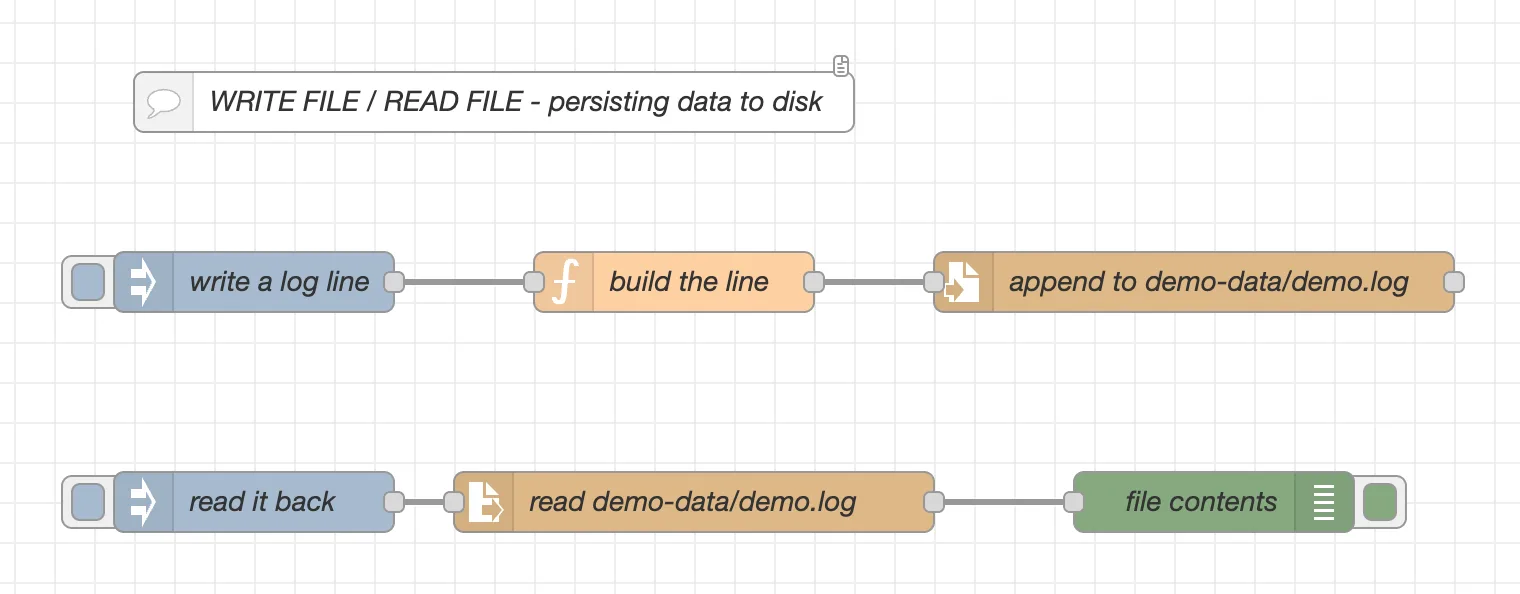
The top flow builds a timestamped line and appends it to demo-data/demo.log:
const when = new Date().toISOString();
msg.payload = `Log entry: ${when}`;
return msg;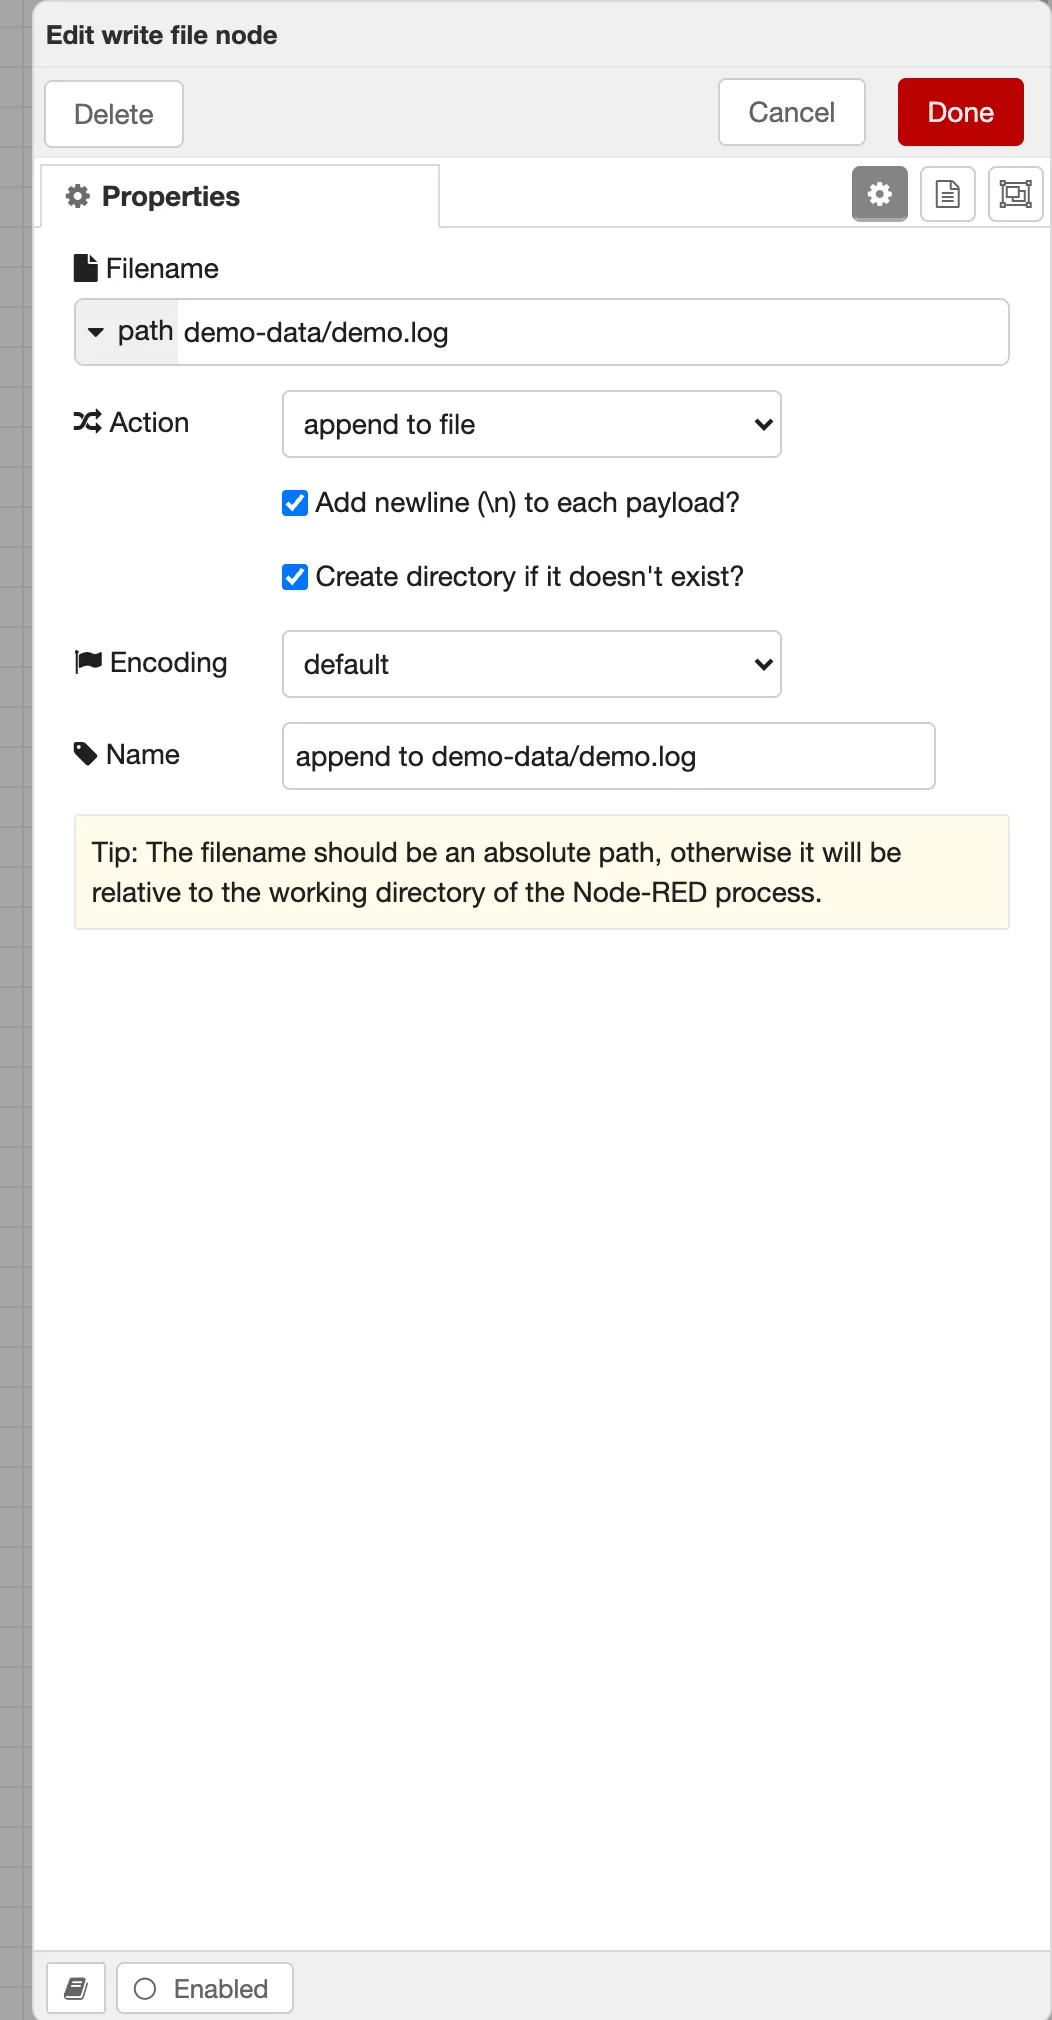
The bottom flow reads the whole file back. Hit the write inject a few times, then hit the read one:
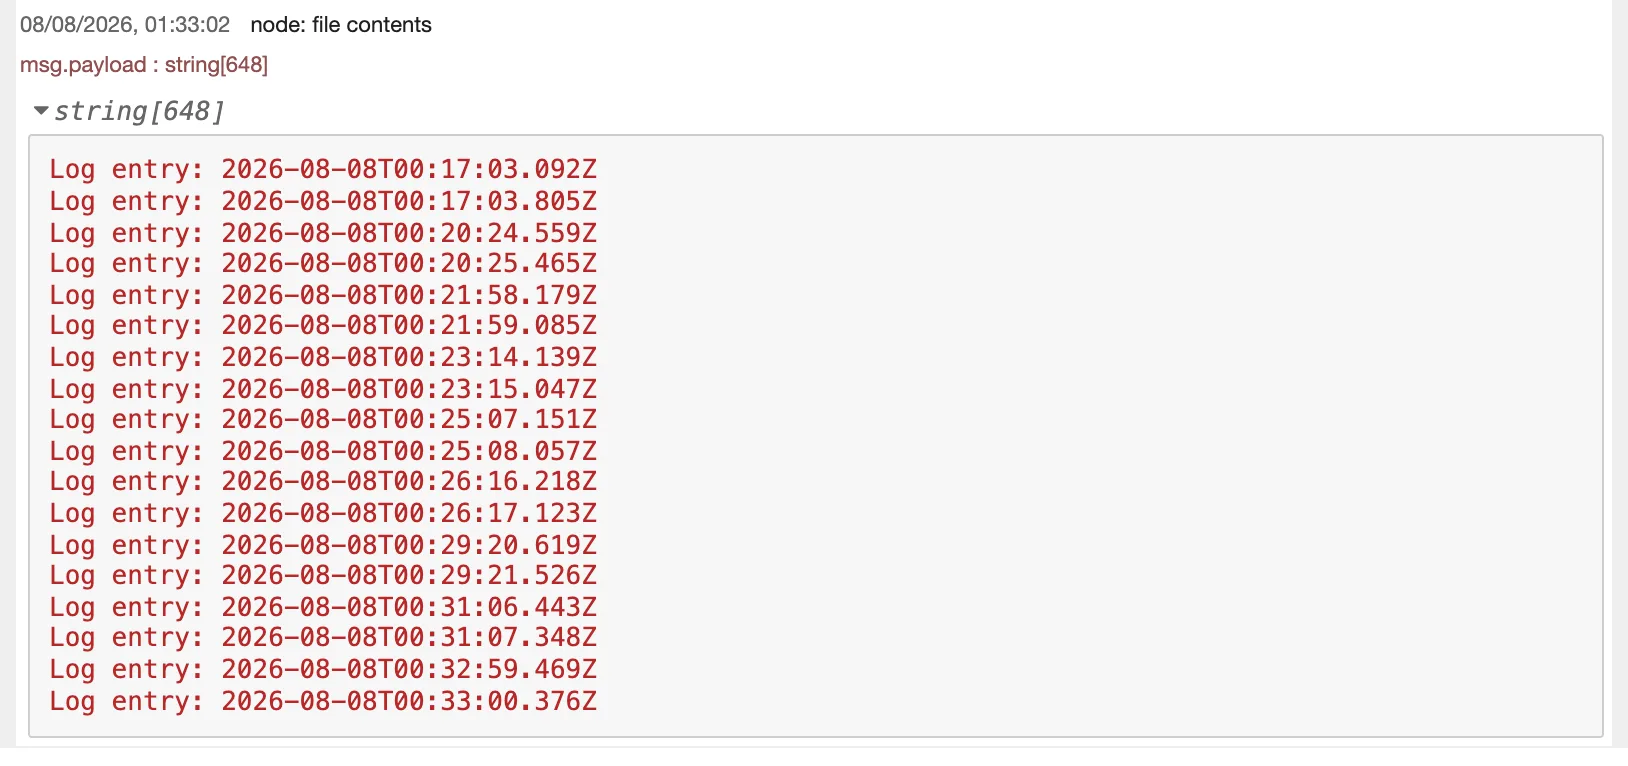
Append mode adds a line each time; Read File pulls back everything that's accumulated.
Import this flow to get the writer and the reader, both pointed at the same file.
Self-contained, and it writes to disk. Creates
demo-data/demo.logrelative to the Node-RED working directory. Hit the write inject a few times before you hit the read one — read it first and the node reports that the file doesn't exist.
JSON (132 lines)
[
  {
    "id": "p3file",
    "type": "tab",
    "label": "8 - File",
    "disabled": false,
    "info": "Write it out, read it back."
  },
  {
    "id": "fi_c",
    "type": "comment",
    "z": "p3file",
    "name": "WRITE FILE / READ FILE - persisting data to disk",
    "info": "Top flow appends a timestamped line to demo-data/demo.log every time you hit inject. Press it a few times.\n\nBottom flow reads the whole file back in one go.\n\nThe path is RELATIVE, so it resolves against the working directory of the Node-RED process - roughly ~/.node-red for a typical service install, or the app directory inside the container under Docker. 'Create directory' is switched on, so the demo-data folder is made for you on the first write.\n\nBoth nodes use the same path, so the round trip works wherever that turns out to be. Delete the demo-data folder when you are done.",
    "x": 300,
    "y": 60,
    "wires": []
  },
  {
    "id": "fi_in",
    "type": "inject",
    "z": "p3file",
    "name": "write a log line",
    "props": [
      {
        "p": "payload"
      },
      {
        "p": "topic",
        "vt": "str"
      }
    ],
    "repeat": "",
    "crontab": "",
    "once": false,
    "onceDelay": 0.1,
    "topic": "",
    "payload": "",
    "payloadType": "date",
    "x": 180,
    "y": 150,
    "wires": [["fi_fn"]]
  },
  {
    "id": "fi_fn",
    "type": "function",
    "z": "p3file",
    "name": "build the line",
    "func": "const when = new Date().toISOString();\nmsg.payload = `Log entry: ${when}`;\nreturn msg;",
    "outputs": 1,
    "timeout": 0,
    "noerr": 0,
    "initialize": "",
    "finalize": "",
    "libs": [],
    "x": 390,
    "y": 150,
    "wires": [["fi_write"]]
  },
  {
    "id": "fi_write",
    "type": "file",
    "z": "p3file",
    "name": "append to demo-data/demo.log",
    "filename": "demo-data/demo.log",
    "filenameType": "str",
    "appendNewline": true,
    "createDir": true,
    "overwriteFile": "false",
    "encoding": "none",
    "x": 650,
    "y": 150,
    "wires": [[]]
  },
  {
    "id": "fi_in2",
    "type": "inject",
    "z": "p3file",
    "name": "read it back",
    "props": [
      {
        "p": "payload"
      },
      {
        "p": "topic",
        "vt": "str"
      }
    ],
    "repeat": "",
    "crontab": "",
    "once": false,
    "onceDelay": 0.1,
    "topic": "",
    "payload": "",
    "payloadType": "date",
    "x": 180,
    "y": 260,
    "wires": [["fi_read"]]
  },
  {
    "id": "fi_read",
    "type": "file in",
    "z": "p3file",
    "name": "read demo-data/demo.log",
    "filename": "demo-data/demo.log",
    "filenameType": "str",
    "format": "utf8",
    "chunk": false,
    "sendError": false,
    "encoding": "none",
    "allProps": false,
    "x": 400,
    "y": 260,
    "wires": [["fi_dbg"]]
  },
  {
    "id": "fi_dbg",
    "type": "debug",
    "z": "p3file",
    "name": "file contents",
    "active": true,
    "tosidebar": true,
    "console": false,
    "tostatus": false,
    "complete": "payload",
    "targetType": "msg",
    "statusType": "auto",
    "x": 660,
    "y": 260,
    "wires": []
  }
]
Common mistake: hitting the read inject before the write one. Read File won't create anything, so you get an error rather than an empty result:
ENOENT: no such file or directory, open 'demo-data/demo.log'Worth knowing what the node's error option actually does, because the name suggests otherwise: it doesn't swap the error for a quiet empty message. The error is still raised either way — a Catch node will see it, and it'll appear in the debug sidebar. What the option adds is an extra message on the output with no payload and the details on msg.error, so your flow can carry on and handle the failure itself instead of just stopping dead.
Watch
Monitors a file or directory and emits a message whenever something changes.
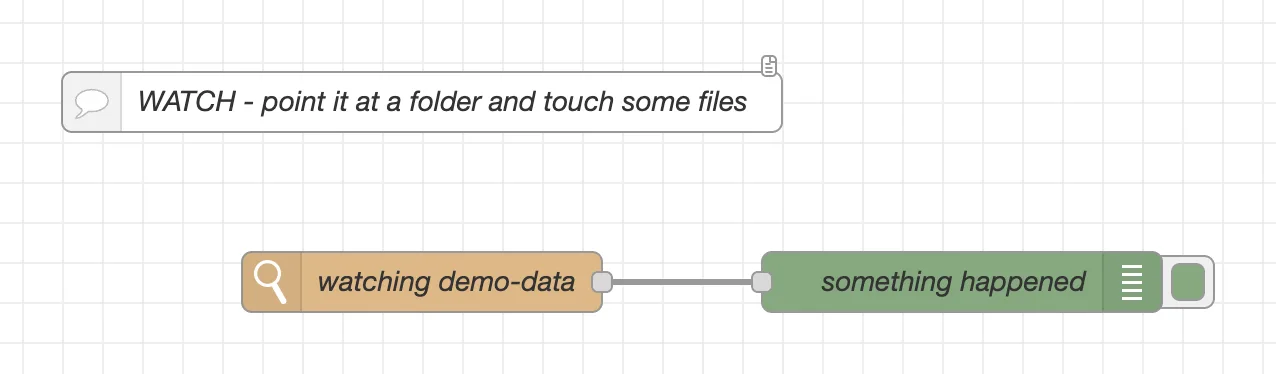
No inject node on this one; it fires on its own. Point it at a folder, then create, modify and delete a file in there:
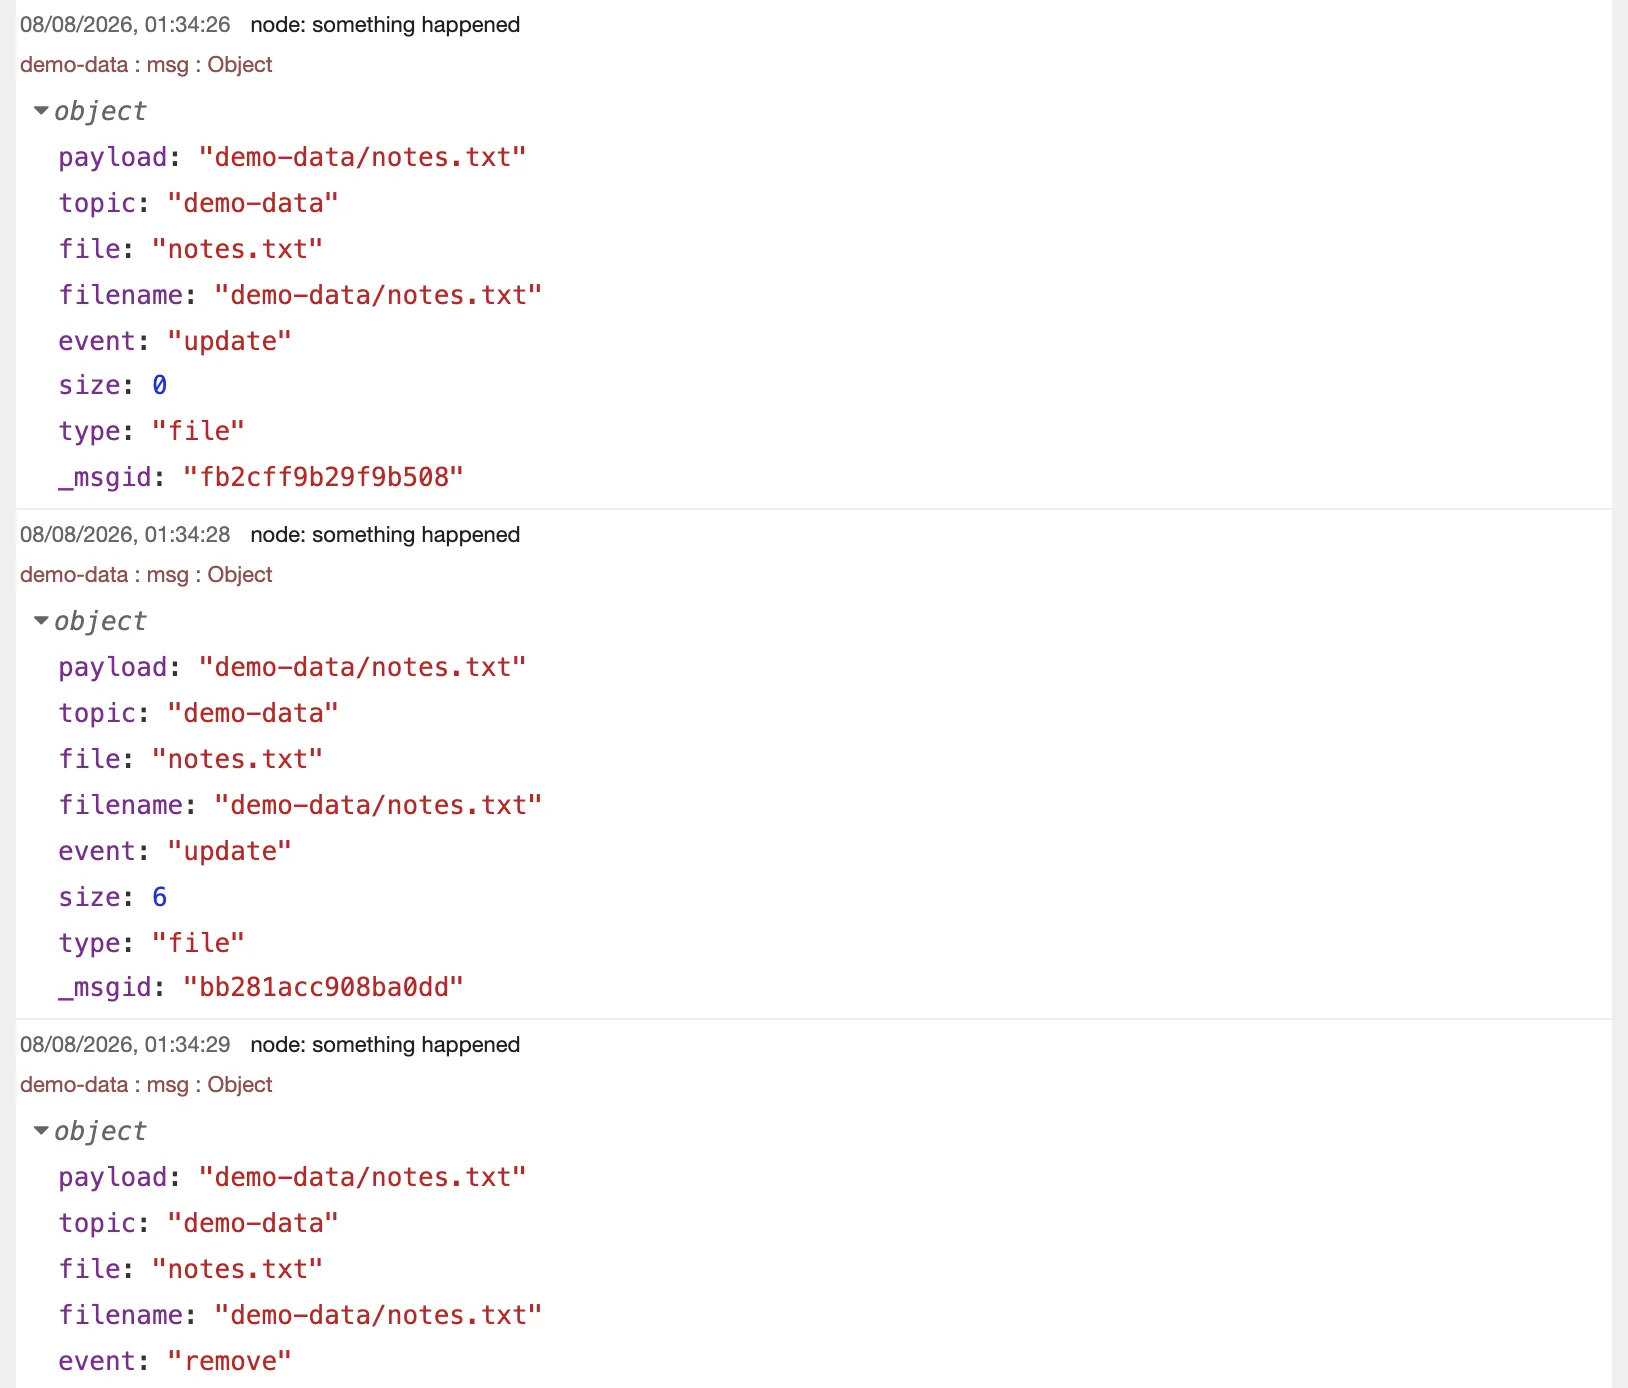
There's more in the message than just the payload, which is why that debug node is set to show the full message:
payload: path of whatever changedfilename: the same path againfile: just the filename on its owntopic: the path you asked it to watchevent:updatewhen a file is created or modified,removewhen it's deletedtype:fileordirectory— andnoneon a delete, since there's nothing left to inspectsize: bytes, present only while the file still exists
That event field is worth a second look, because creating a file and editing a file both report update. If you need to tell "this is new" from "this changed", compare against something you've stored yourself rather than expecting the node to tell you.
Watch a folder for incoming CSVs and process them automatically as they land. Watch a log file and react to new entries. It turns filesystem events into flow triggers, which opens up a lot.
The directory has to exist before the Watch node starts. This is the thing that catches everyone. Unlike the File node, Watch won't create anything — if the path isn't there when the flow deploys, the node fails immediately with ... does not exist in the runtime log and then sits there doing nothing. It won't notice the folder appearing later either, because it gave up at startup.
So the order matters:
- Run the Write File demo above first. That creates the
demo-datafolder for you. - Then import and deploy this flow.
If you've already deployed it against a missing folder, create the folder and hit Deploy again — the node only tries to attach when the flow starts.
Import this flow to get the Watch node and a full-message debug node.
Requires an existing local path. Watches
demo-data, relative to the Node-RED working directory. Create that folder first (the Write File demo does it), or deploy this and you'll get an error in the log instead of events. Once it's running, create, edit and delete a file in that folder to see the events arrive.
JSON (47 lines)
[
  {
    "id": "watchdemo0001",
    "type": "tab",
    "label": "9 - Watch",
    "disabled": false,
    "info": "Filesystem events into Node-RED messages."
  },
  {
    "id": "wa_c1",
    "type": "comment",
    "z": "watchdemo0001",
    "name": "WATCH - point it at a folder and touch some files",
    "info": "THE FOLDER MUST EXIST BEFORE YOU DEPLOY.\n\nThis watches demo-data, relative to the Node-RED working directory - the same folder the Write File demo creates. Run that one first, or make the folder yourself.\n\nIf the folder is missing when the flow starts, this node errors with 'does not exist' in the runtime log and then does nothing. It will NOT pick the folder up later. Create it, then hit Deploy again.\n\nNo inject needed - this one fires on its own. Create a file in that folder, edit it, delete it, and each action turns up in the debug panel.\n\nThe debug is set to the FULL message because there is more than just the payload worth seeing:\n\n  payload  - full path of the file that changed\n  file     - just the filename\n  event    - what happened\n  topic    - the path being watched\n  type     - file or directory\n  size     - bytes, when it still exists",
    "x": 300,
    "y": 60,
    "wires": []
  },
  {
    "id": "wa_watch",
    "type": "watch",
    "z": "watchdemo0001",
    "name": "watching demo-data",
    "files": "demo-data",
    "recursive": "",
    "allProps": false,
    "x": 300,
    "y": 150,
    "wires": [["wa_dbg"]]
  },
  {
    "id": "wa_dbg",
    "type": "debug",
    "z": "watchdemo0001",
    "name": "something happened",
    "active": true,
    "tosidebar": true,
    "console": false,
    "tostatus": false,
    "complete": "true",
    "targetType": "full",
    "statusType": "auto",
    "x": 570,
    "y": 150,
    "wires": []
  }
]
That's the lot
That's the core palette covered, across three videos and one very long article: Common, Function, Network, Parser, Sequence and Storage.
The real magic isn't in any individual node though. It's in what happens when you start chaining them. An MQTT In feeding a Switch feeding a Function feeding an HTTP Request. A Watch node catching a new file, a CSV node parsing it, a Split node fanning it out and a Join node bringing it home. That's when Node-RED stops being a toy and starts being the thing quietly running your house.
If this was useful, the videos are up on the channel and there's plenty more Node-RED, smart home and home lab stuff where that came from.
Now go build something.
Ta'ra!